I won’t show the details of how I create every individual asset in the scene, as this would be rehashing things I have demonstrated in other modules. My aim for this project is to prepare me for employment at a game studio, so instead I will show what I did with considerations to future employment. Both in terms of how to design a good environment and the technical processes I found needed changing to create professional standard assets.
:: Designing an Environment ::
I will need to be able to show I understand the methods designers use to create compelling environments for players once I leave university. What makes something appear visually noisy as opposed to realistically cluttered? And how do you create an environment that shows to profession environment artists you know how to direct the viewers gaze around an environment to tell whatever visual story you are aiming for. I found a very useful article, ‘How To Direct A Viewer’s Eye Through Your Design’ (Bradley,S 2014). Which talks about the various tricks used by designers to direct the viewer gaze around an environment. All of which I will need to show in my own scene.
‘We begin by creating a hierarchy of relative importance through visual weight’
(Bradley,S 2014).
By keeping the blockout shots as the final frames I am able to decide which assets require more time than others. With the frames in mind I can identify which props are hero assets and which are less visible in the final frames, adjusting the time each asset requires accordingly.
‘We can use position, emphasis, movement, eye gaze, and other visual cues to help the eye find its way through a composition’
(Bradley,S 2014).
Props such as the line from the wall will naturally draw the viewers gaze in a certain direction when looking at the environment, I can then place the various aspects of the scene accordingly, so the viewers gaze fall naturally to the assets I wish to showcase most prominently.
‘A varying degree of emphasis works best. The eye instinctively moves from most to least prominent’
(Bradley,S 2014).
By mixing up the emphasis the frames give to various props I create a visually appealing scene, there needs to be some assets such as the wall which serves as a link between the different frames. The viewer can use the wall as a means to orientate themselves around the scene, removing any chance of the scene becoming visually cluttered or confusing.
:: Prop Islands ::
Another aspect of environment design I had not considered before this project is thinking about prop islands. This is something that helps quantify the progress you are making on an environment by identifying the various areas of interest and grouping the different assets that are needed for those sections. I want my scene to show this clearly in my final renders and it would be best if I discover now what the prop islands I have are and what each island needs regarding prop demands.
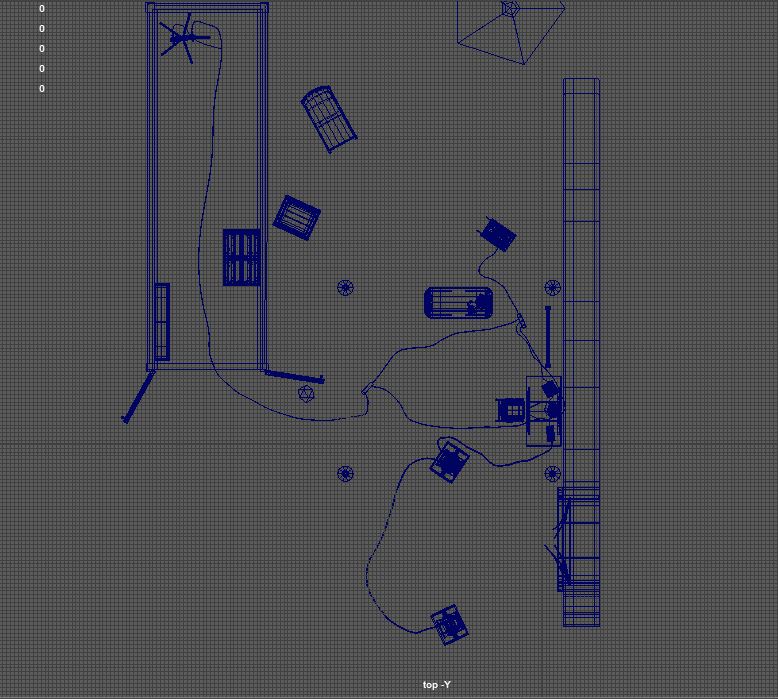
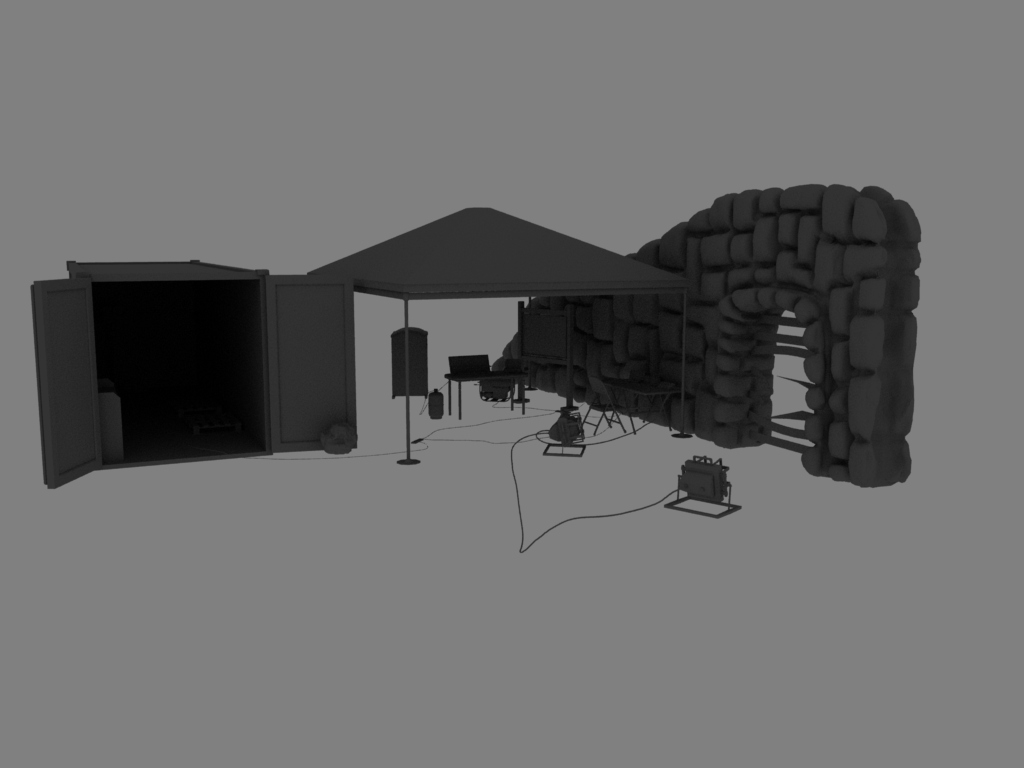
To help me identify these islands I looked to the blockout I have of the scene in maya (fig.1) by using the top down view I can easily identify the different areas of interest I have (Fig.2). I boiled the scene down to three different prop clusters/islands, the container, and its furnishing; the work area which includes the cooking supplies (or the camp area) and the lights shining on the broken sewer gate.
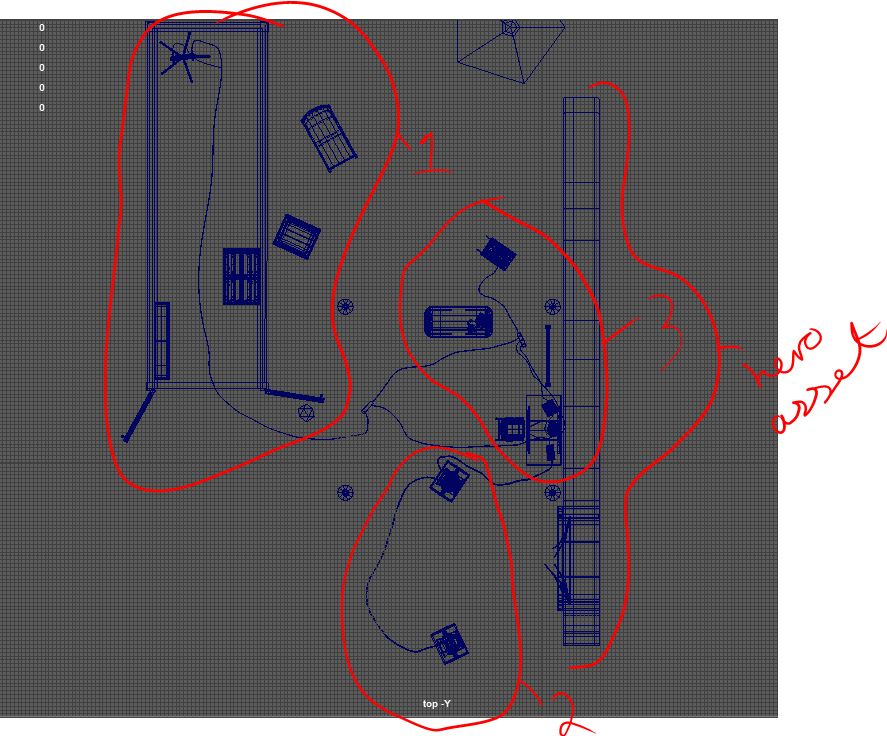
These are the three main areas of interest within the scene, and using the wide frame shot I can position them so that one island leads onto the next. For example if I position the container so that It drags the viewers eye toward the camp cluster I help make the container seem like it belongs as a part of the environment.
I then have the wall which ties together the second and third prop island, with the broken light feature I am adding to the third prop island to direct the viewers gaze to the grate I help create a visual loop between the different prop islands of my scene.
:: My common mistakes ::
When modelling the generator I found myself modelling in every vent of the grill, which in tern results in a high complexity model (Fig.3) This drives the engine demands of the scene upward and would be poor practise in a studio environment. I had to consider where the generator is placed in the scene and how visible the asset is in my final frames. When considering these frames and reminding myself that the asset is not a hero prop I decided that rather than modelling in each vent gap manually I will instead keep this space as a flat solid plane (Fig.4) Later adding in the vent gaps through the texture.


This naturally does not create as nice a visual when regarding this prop alone, but one of the considerations you need to have in mind when developing an entire environment is the importance of each asset and act accordingly. This is a departure from how I create the asset pack during my first year ‘3D asset Design’ module for instance, where each asset was as important as the other and separates an environment artist role from a prop artist role.
:: Exploring Low Poly ::
As apart of being able to create convincing looking assets you need to be able to understand what is meant by low poly assets. Even going back to my first experience creating 3D models some of the feedback I received talked about my low poly meshes being a little too high poly for what is expected in a professional studio. Digging into what is expected from low poly meshes led me to an interesting discussion on professional practises regarding triangulating your meshes.
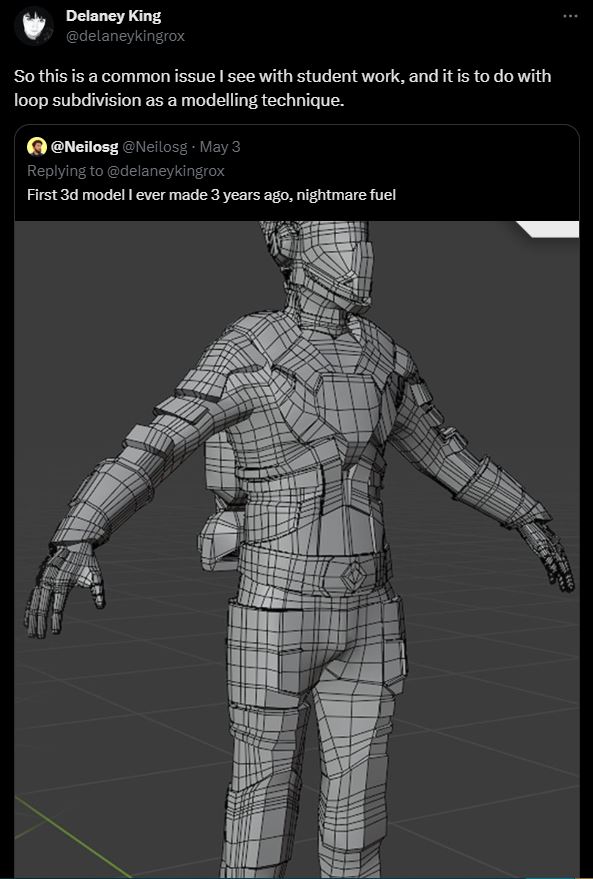
I had believed that a high poly mesh is simply a low poly mesh without the supporting edge loops around the edges of the model. However through browsing the game dev community on sites such as twitter it seems the professional practise is to further manipulate your low poly mesh by triangulating as many vertexes as possible without damaging the silhouette of the shape.
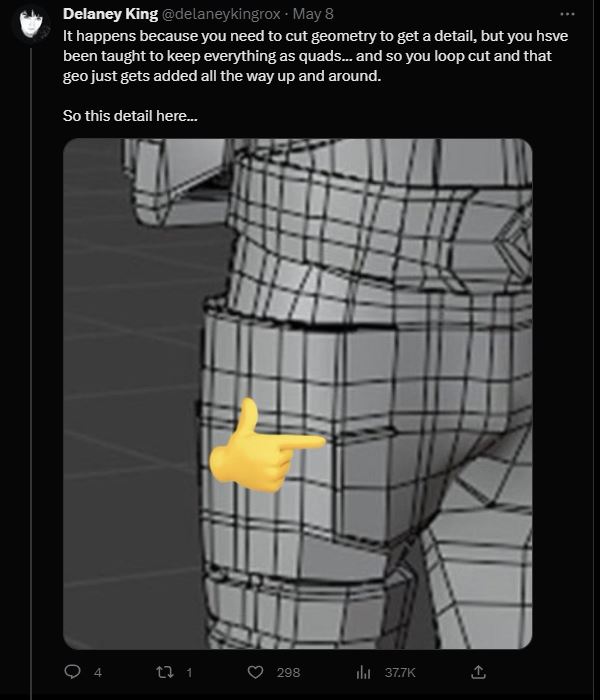
For example, the above tweet by Delaney King, one of many such tweets by professional game devs discusses how by leaving the low poly mesh quadrated and ready to receive the supporting edge loops from the high poly mesh you are operating with a mesh that hold much more geometry than the model actually requires.
This is especially the case for environment art as the models you create are static by nature. You cant triangulate a character mesh for example and expect to have a good time when animating that model, but as an environment artist the assets we create will never be animated so this is not a concern for us.

By triangulating It is important to not I do not mean telling maya to generate a triangulated mesh as this can effect the silhouette rather this means a change in my approach to asset modelling. I had previously thought my process of modelling an asset to be create the low poly mesh, duplicate and add the supporting edge loops to the high poly mesh then UV and move to texturing. I now find that this is really only half the modelling process.
What I need to do is create the low poly mesh, duplicate and add the high poly edge loops. Then I need to go back to the low poly mesh and merge as many vertex as possible to create a model with as little geometry as possible while not effecting the silhouette of the model. This means merging vertexes into triangles until you have as simple a mesh as possible.
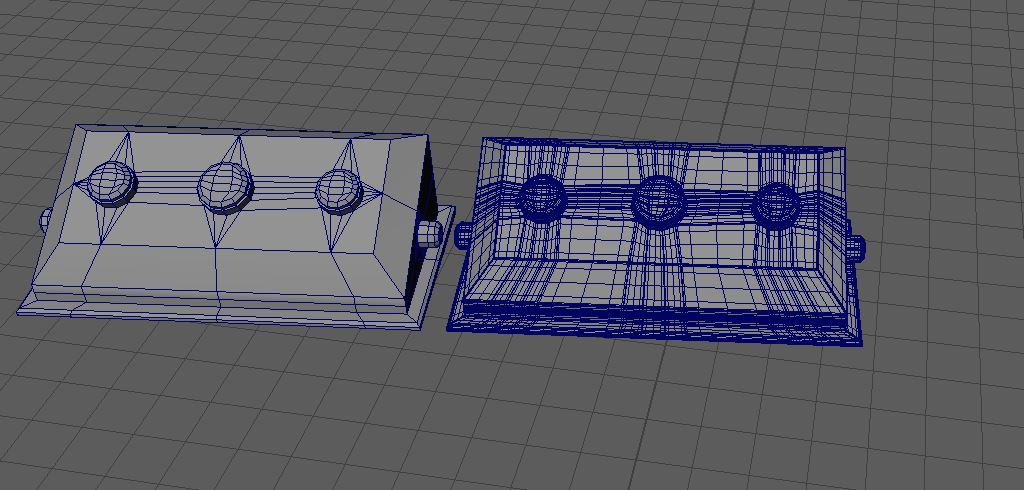
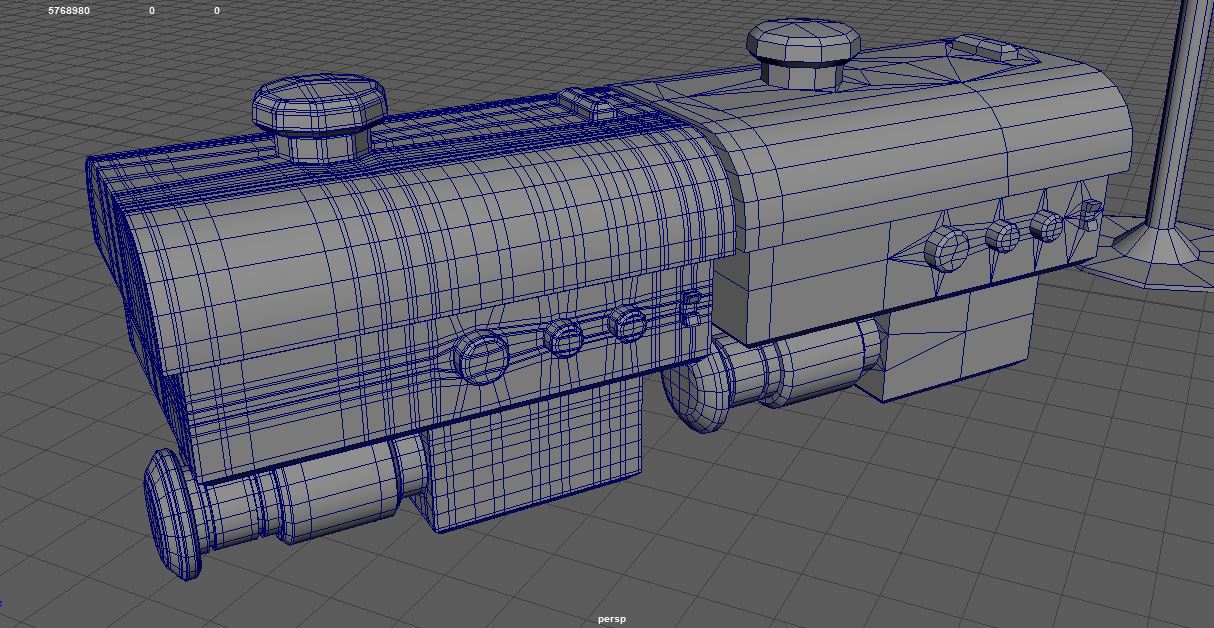
I have selected a couple of the models in my scene that highlight the difference between the high and low poly especially well (Fig.5, Fig.6). This gives me a much better optimised asset to place into the game engine and by demonstrating this I am showing game studios that I understand how as an environment artist I will optimise my work as much as possible for the constraints of the game engine used.
:: Summary ::
In this post I have discussed the new aspects of 3D modelling I have explored in my environment. By doing this I am demonstrating an understanding of professional practises expected of an environment artist regarding modelling.
Something that will be expected of my by any studio indie or triple A. At this point in the development of my environment I have a fully modelled environment, with just a couple of exceptions which will need to be done in ZBrush before I can move all the various assets into Substance Painter for texturing.
:: References ::
Bradley,S 2014. ‘How To Direct A Viewer’s Eye Through Your Design’ [Online Article] Available online: https://vanseodesign.com/web-design/direct-the-eye/ [Accessed 18/07/2023]
King, D (2023). ‘So this is a common issue I see with student work, and it is to do with loop subdivision as a modelling technique.’ [Twitter] Available online: https://twitter.com/delaneykingrox/status/1655505647407095809 [Accessed 17/07/2023]