Now I have explored lighting, camera work and effects creation within Unreal Engine I can finally move onto actually creating the piece I storyboarded previously. The actual production piece is mostly just a vehicle for the effects to take the centre stage, so I will be using as many found assets and materials as I can find to populate my scene.
:: Assets Needed ::
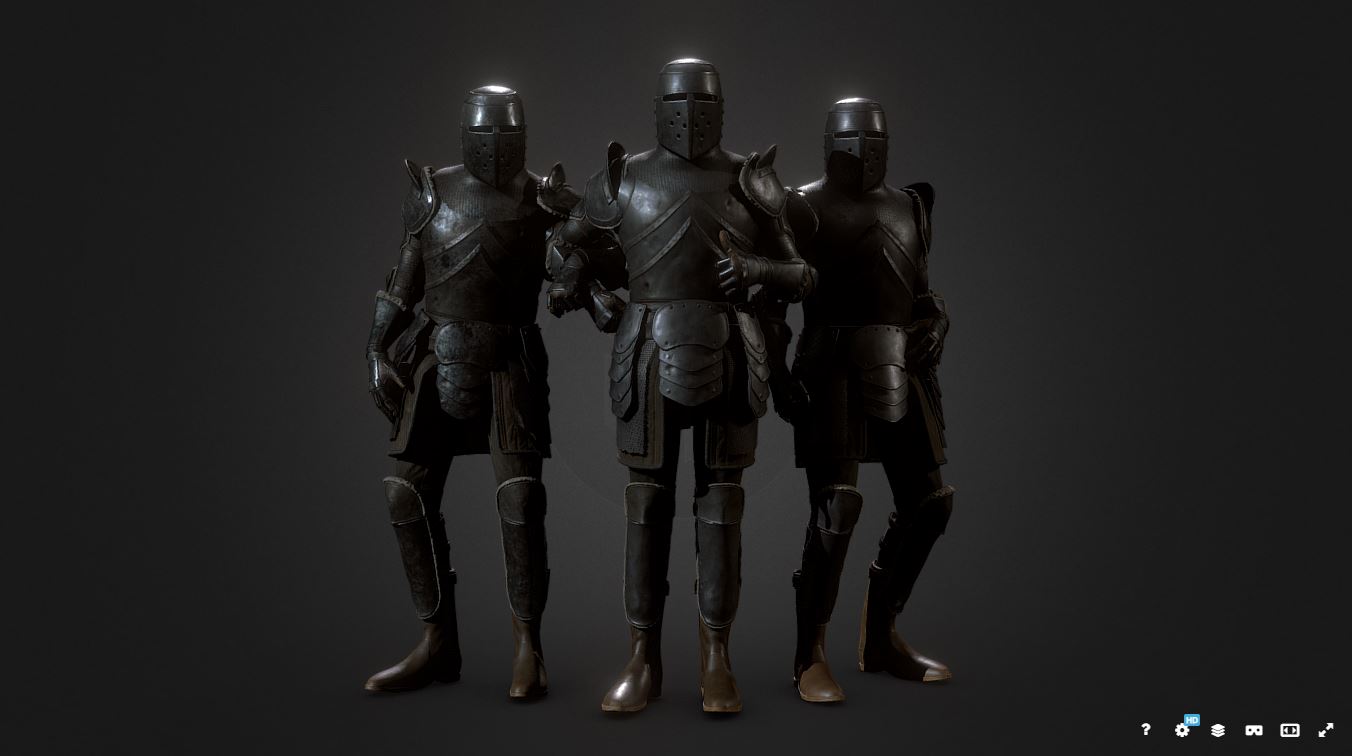
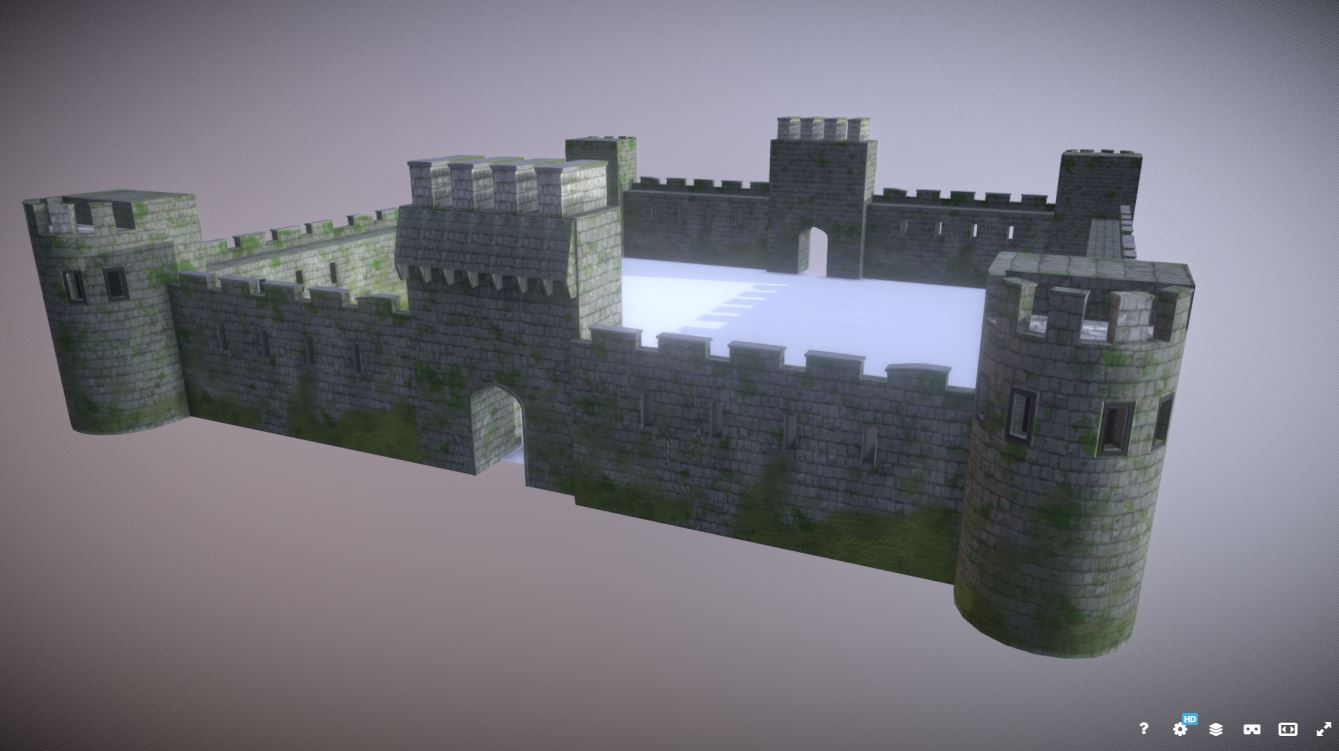
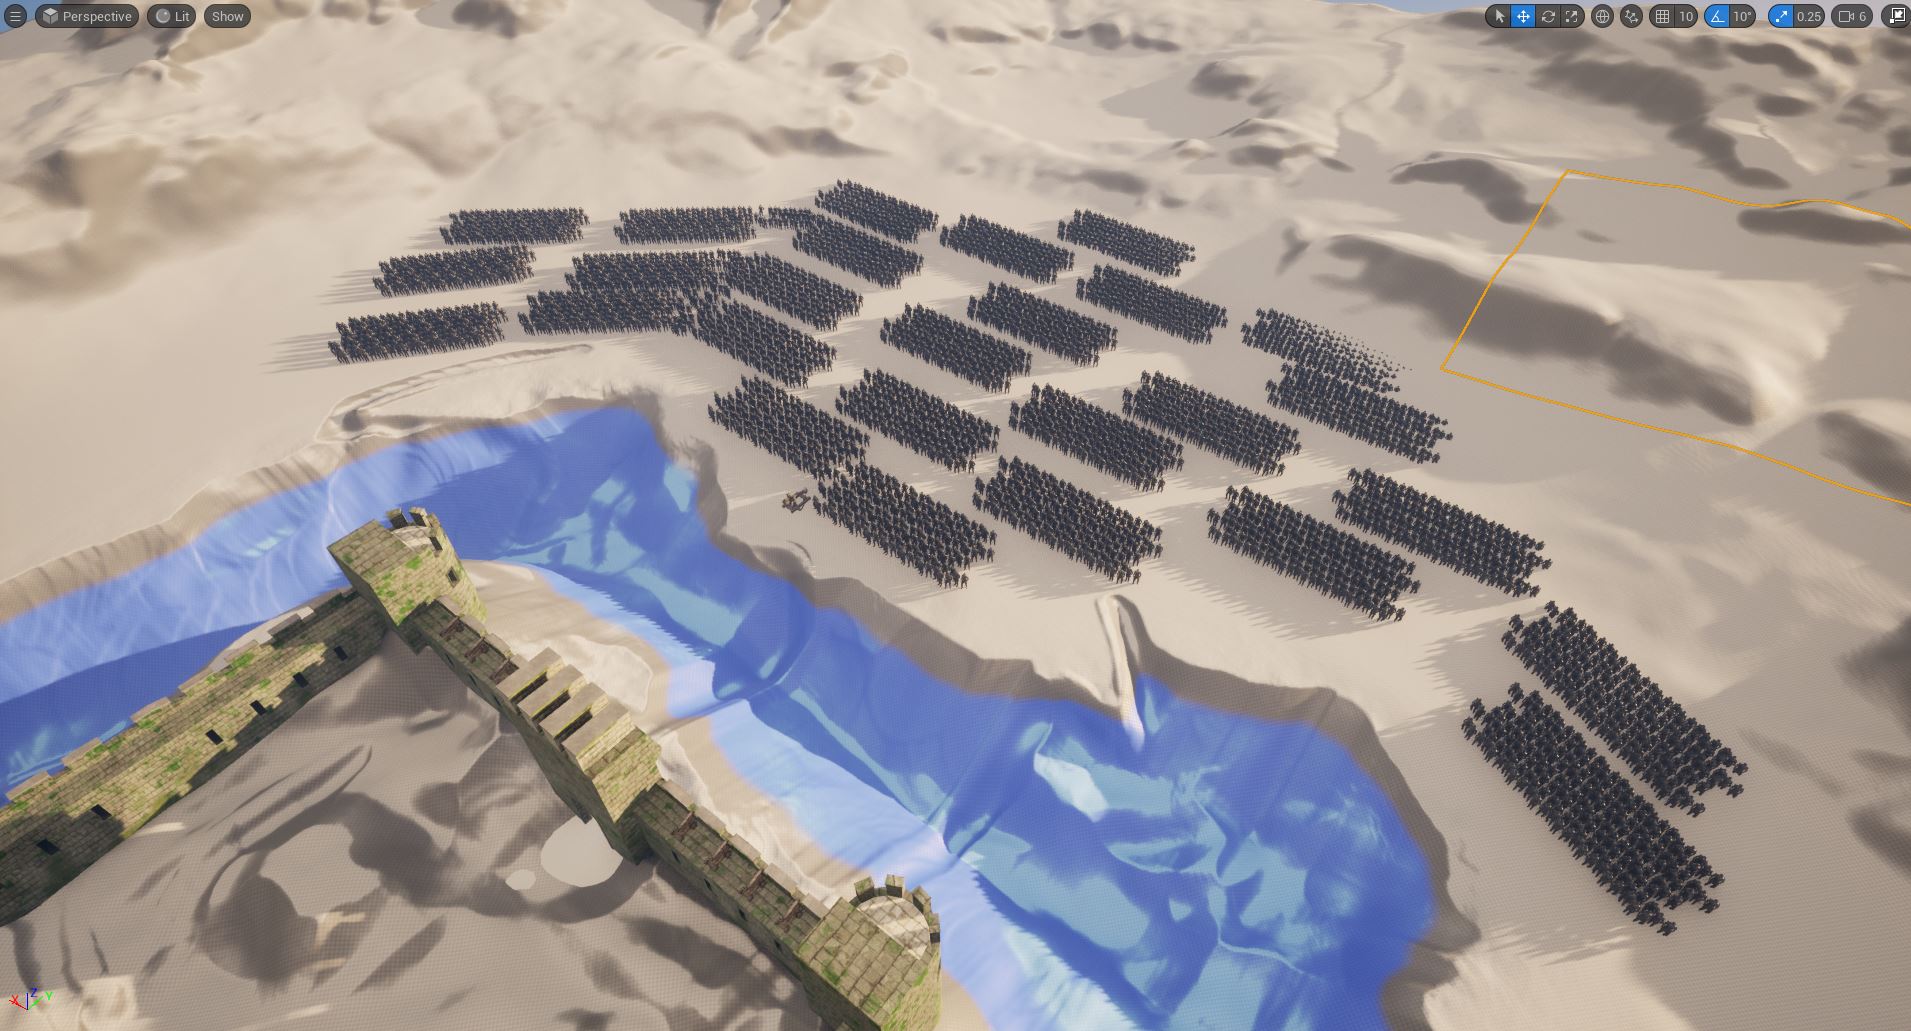
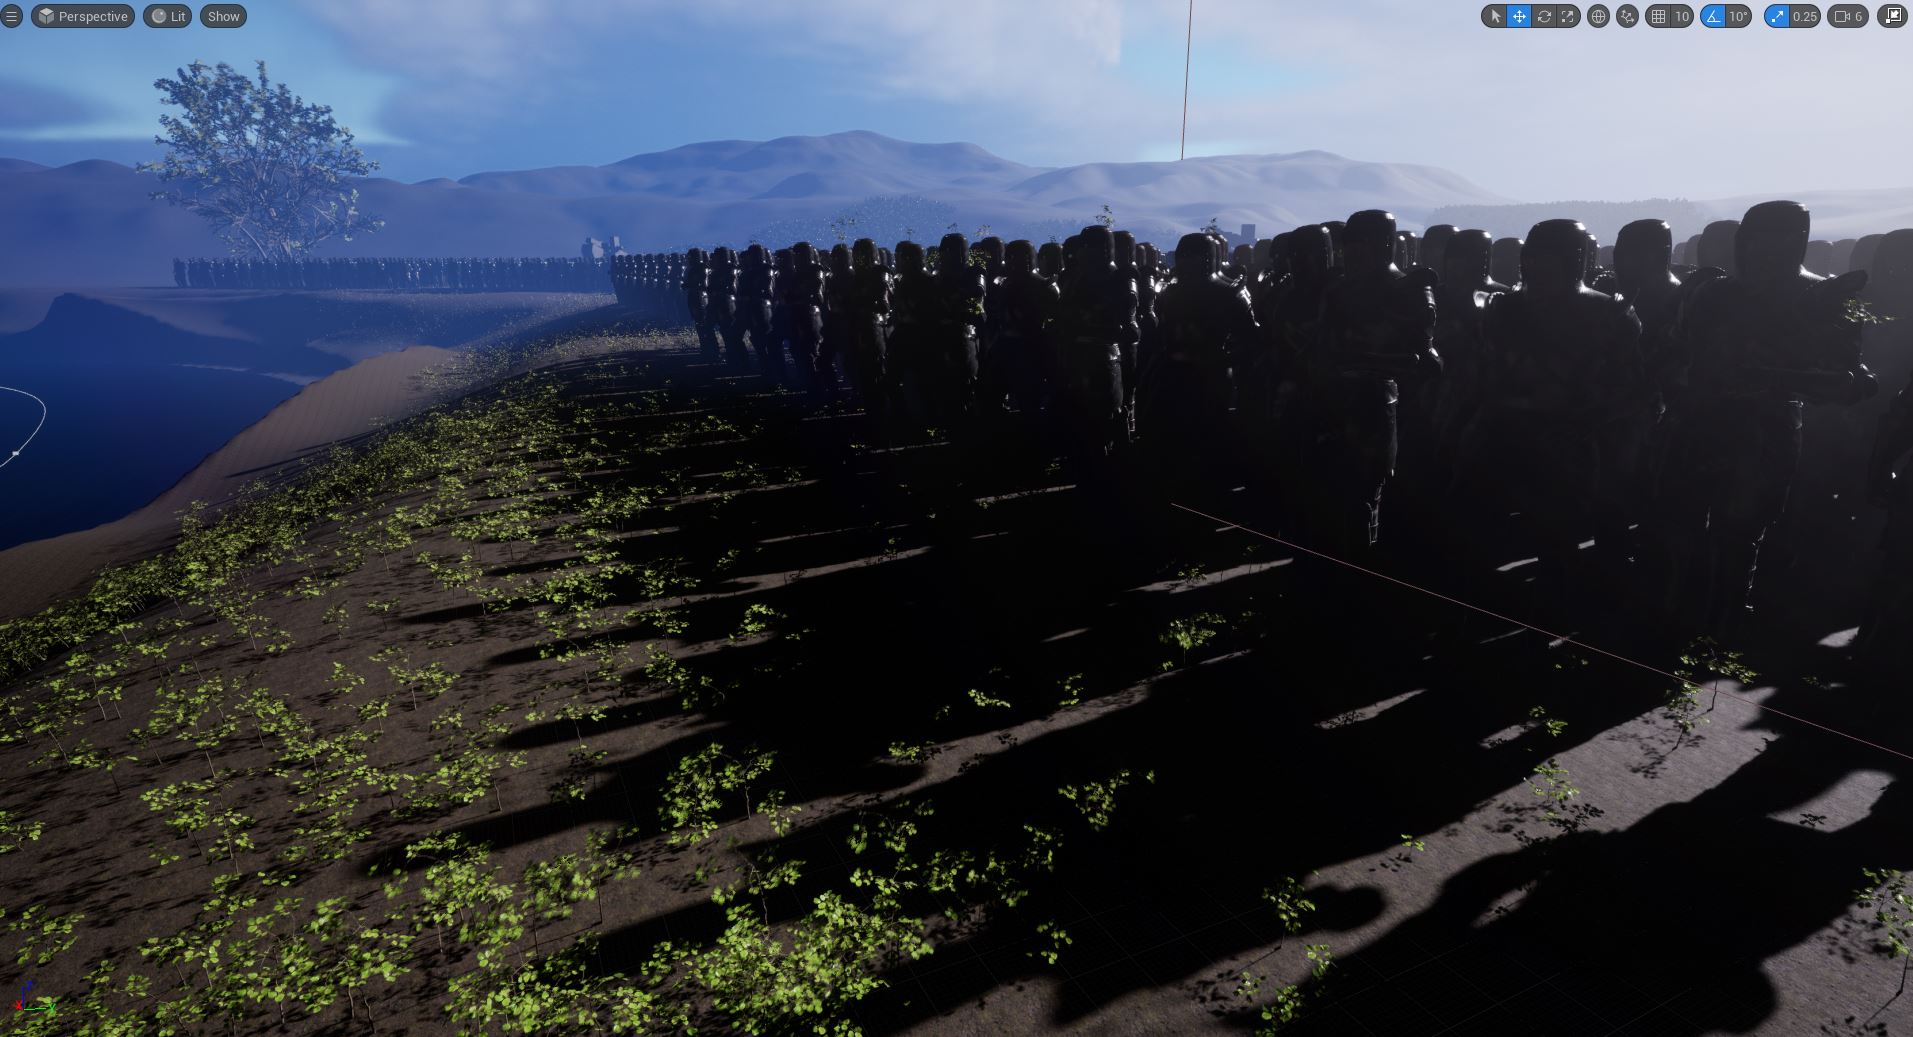
Below you can see the various assets I found for the use in my piece. While some of these assets will be used basically in there original stage (Ref.2, Ref.5, Ref.6) some of them will pose questions as to how they can be used. For example with the knights (Ref.1) I will need to duplicate the three figures many times to create what looks like an army, which could pose taxing on the game engine. So this is something I will need to explore.

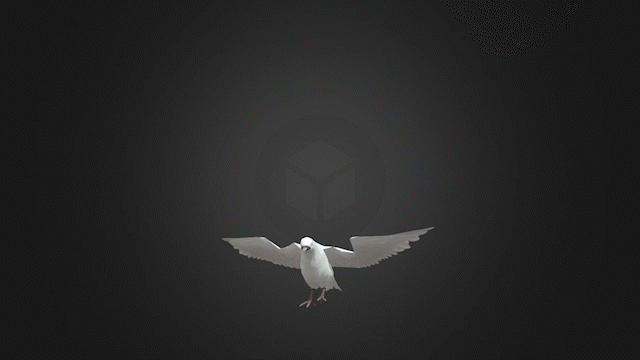
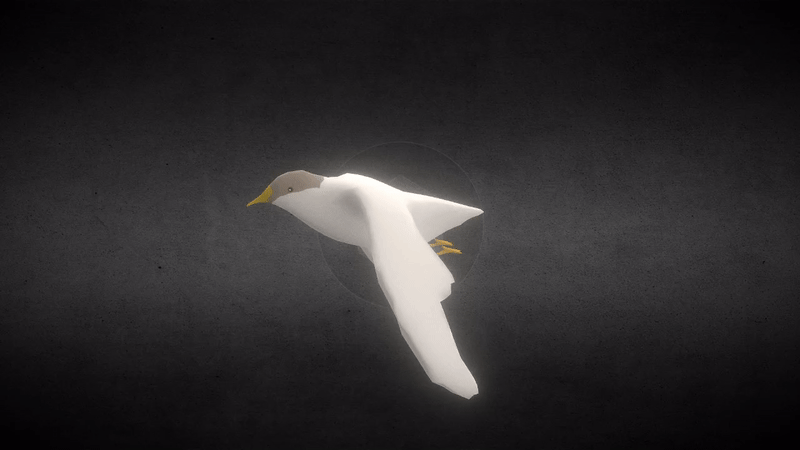
I also have an issue with the bird character, as I cannot find an animated bird that can take off, fly horizontally and land. The best free models I have found either land and take off (Ref.7) or just fly horizontally (Ref.8). This means I am going to have to switch between the two models which could be jarring to the viewer. Hopefully this can be somewhat masked using effects around the character and some creative camera cuts. But this does mean altering some of the shots outlined in my storyboards previously.
:: Setting the Stage ::
When creating the scene the first issue I ran into was the polycount of the knights asset when duplicated enough to create an army (Fig.1). The amount of assets demanded immediately made the game engine stutter on my computer which would only be worsened by adding effects. Fortunately with Unreal Engine 5 a new tool called ‘Nanite’ has been introduced which basically dynamically created a low poly version of a model within the game engine (Fig.2).
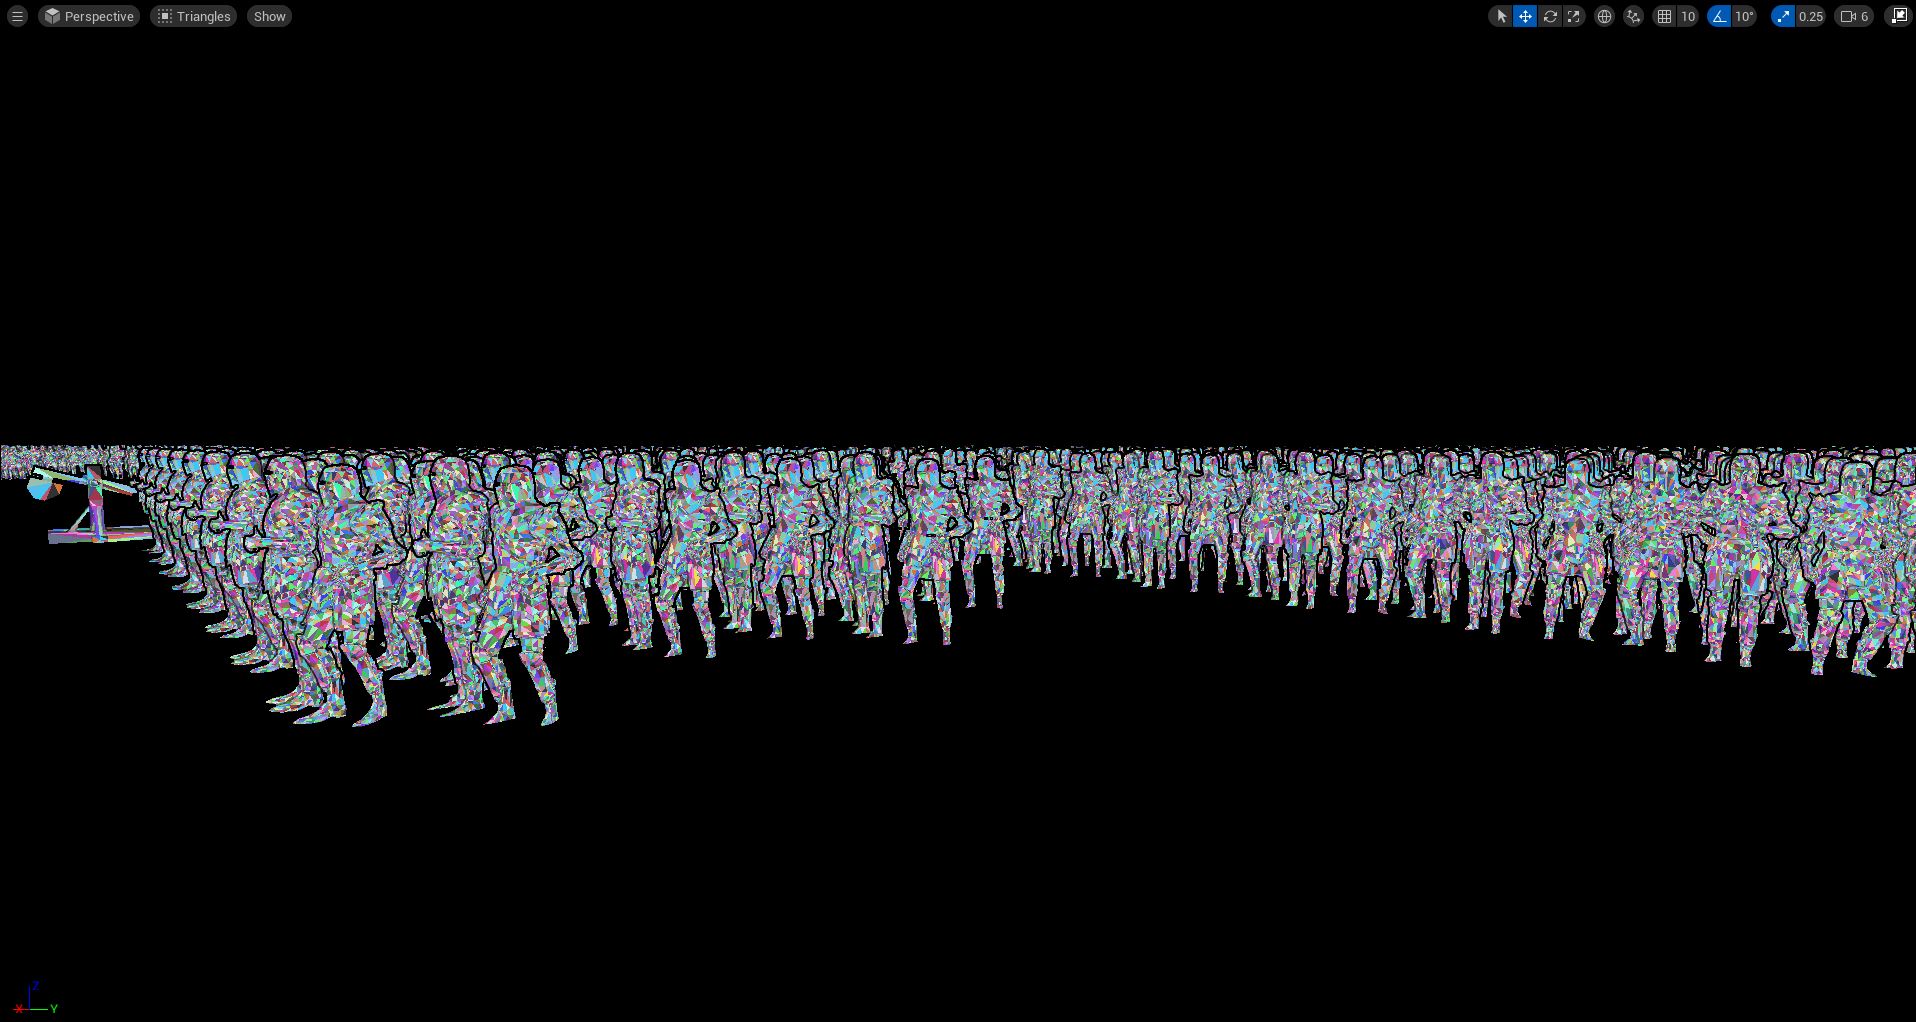
If I were to create my own assets the complexity of the models would be less of an issue but fortunately be using nanite I was able to call a very large number of individual soldiers without issue. Saving me time from either making my own low poly models or trying to find a model of army head and shoulders to create the shadows I required.
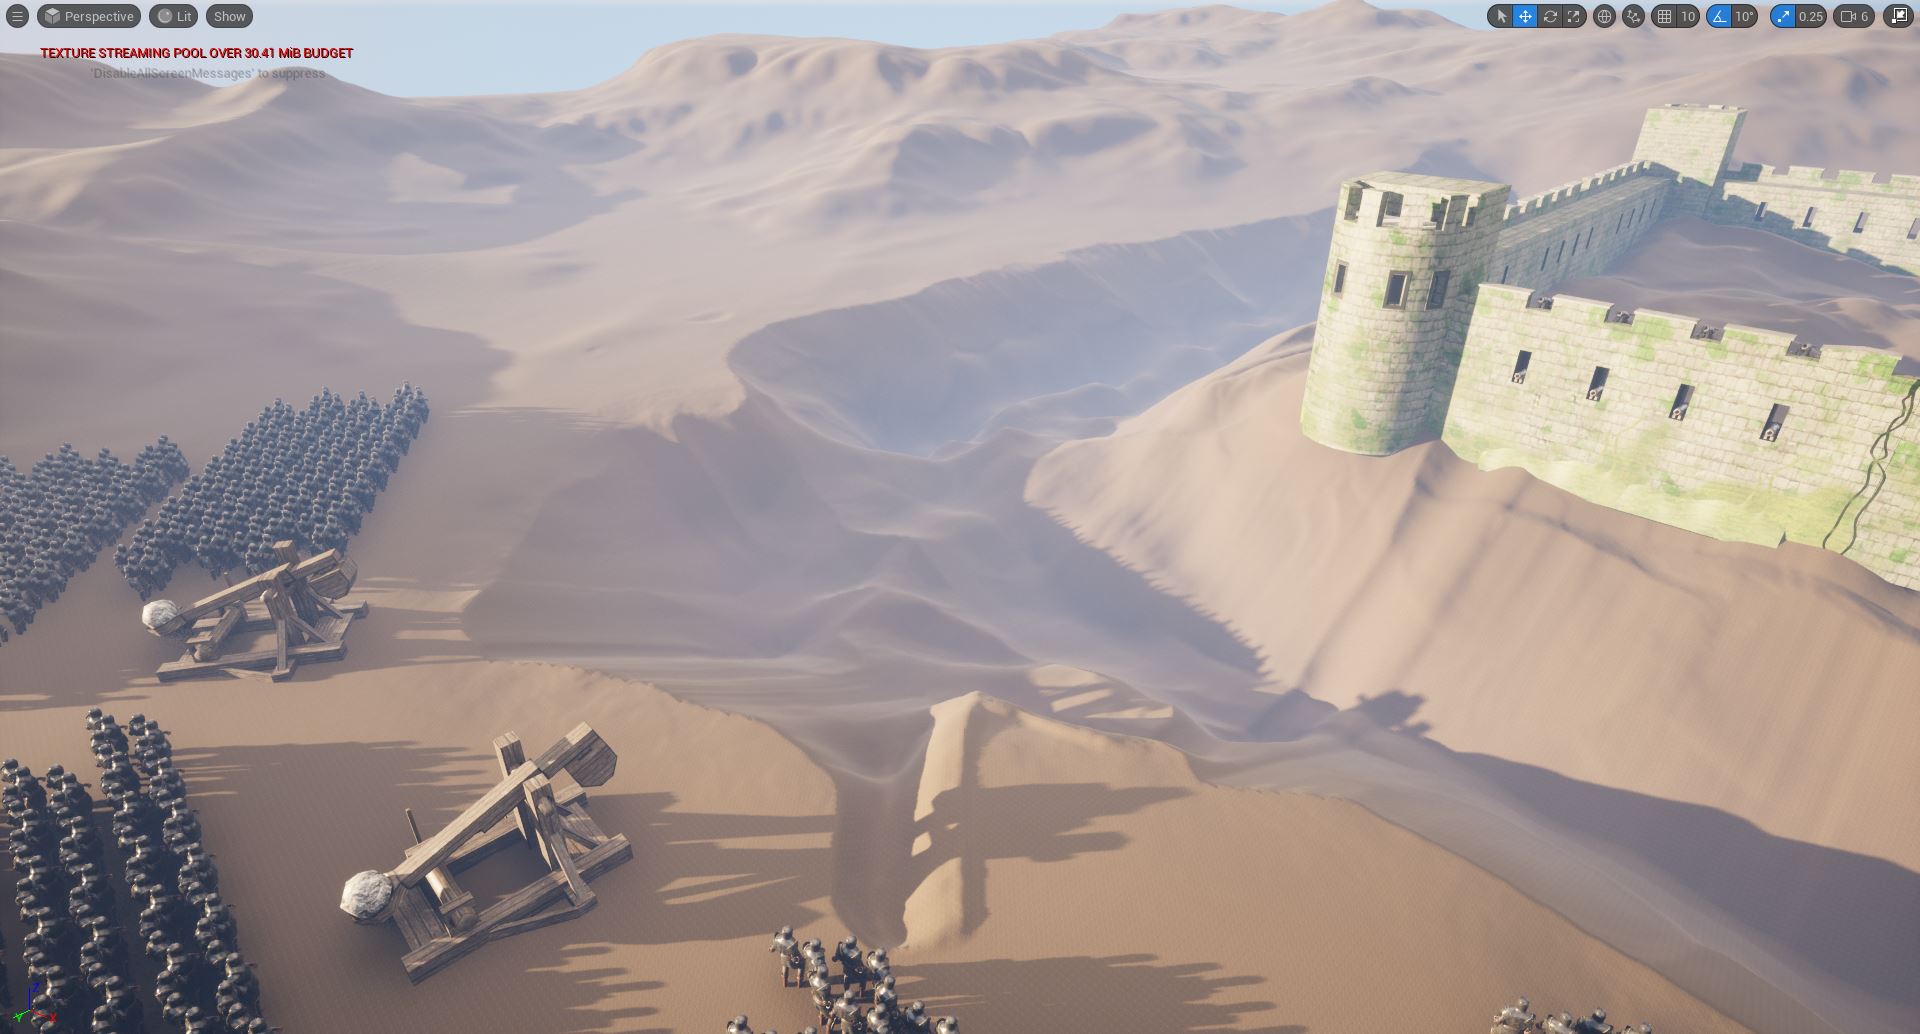
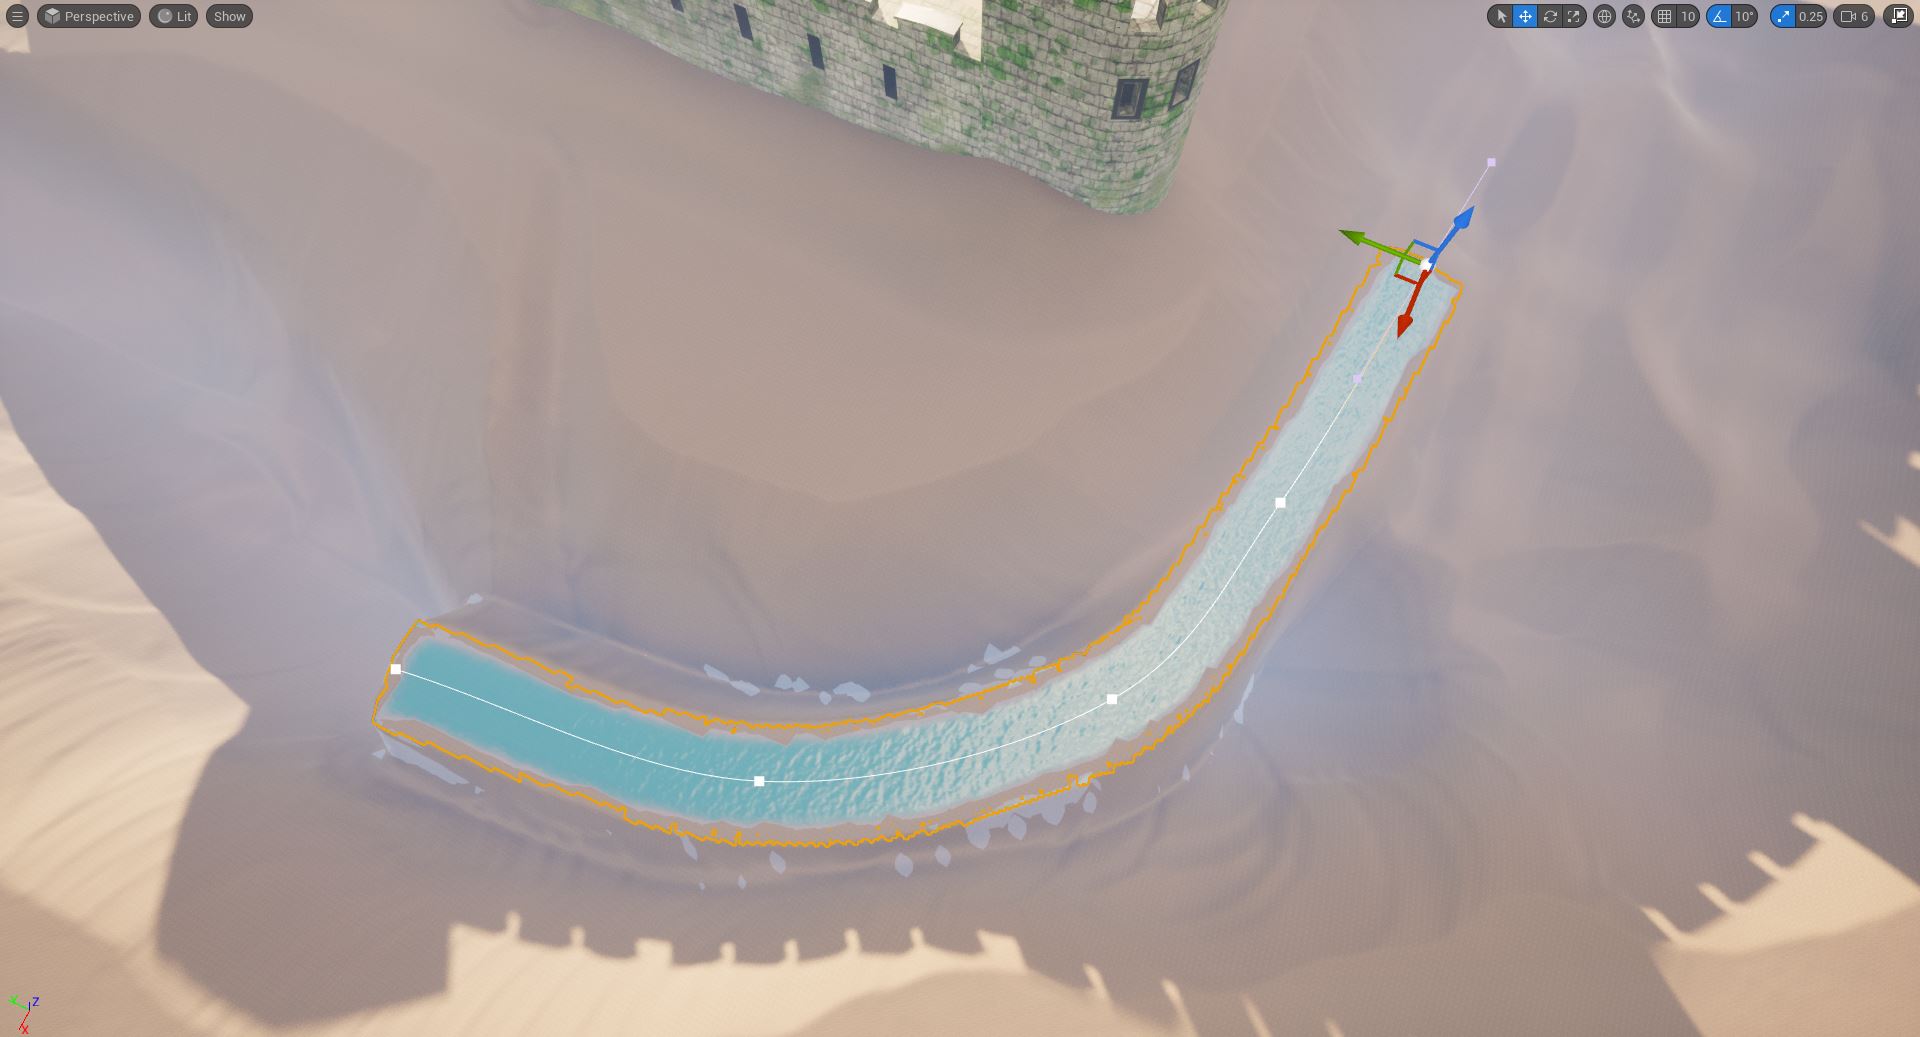
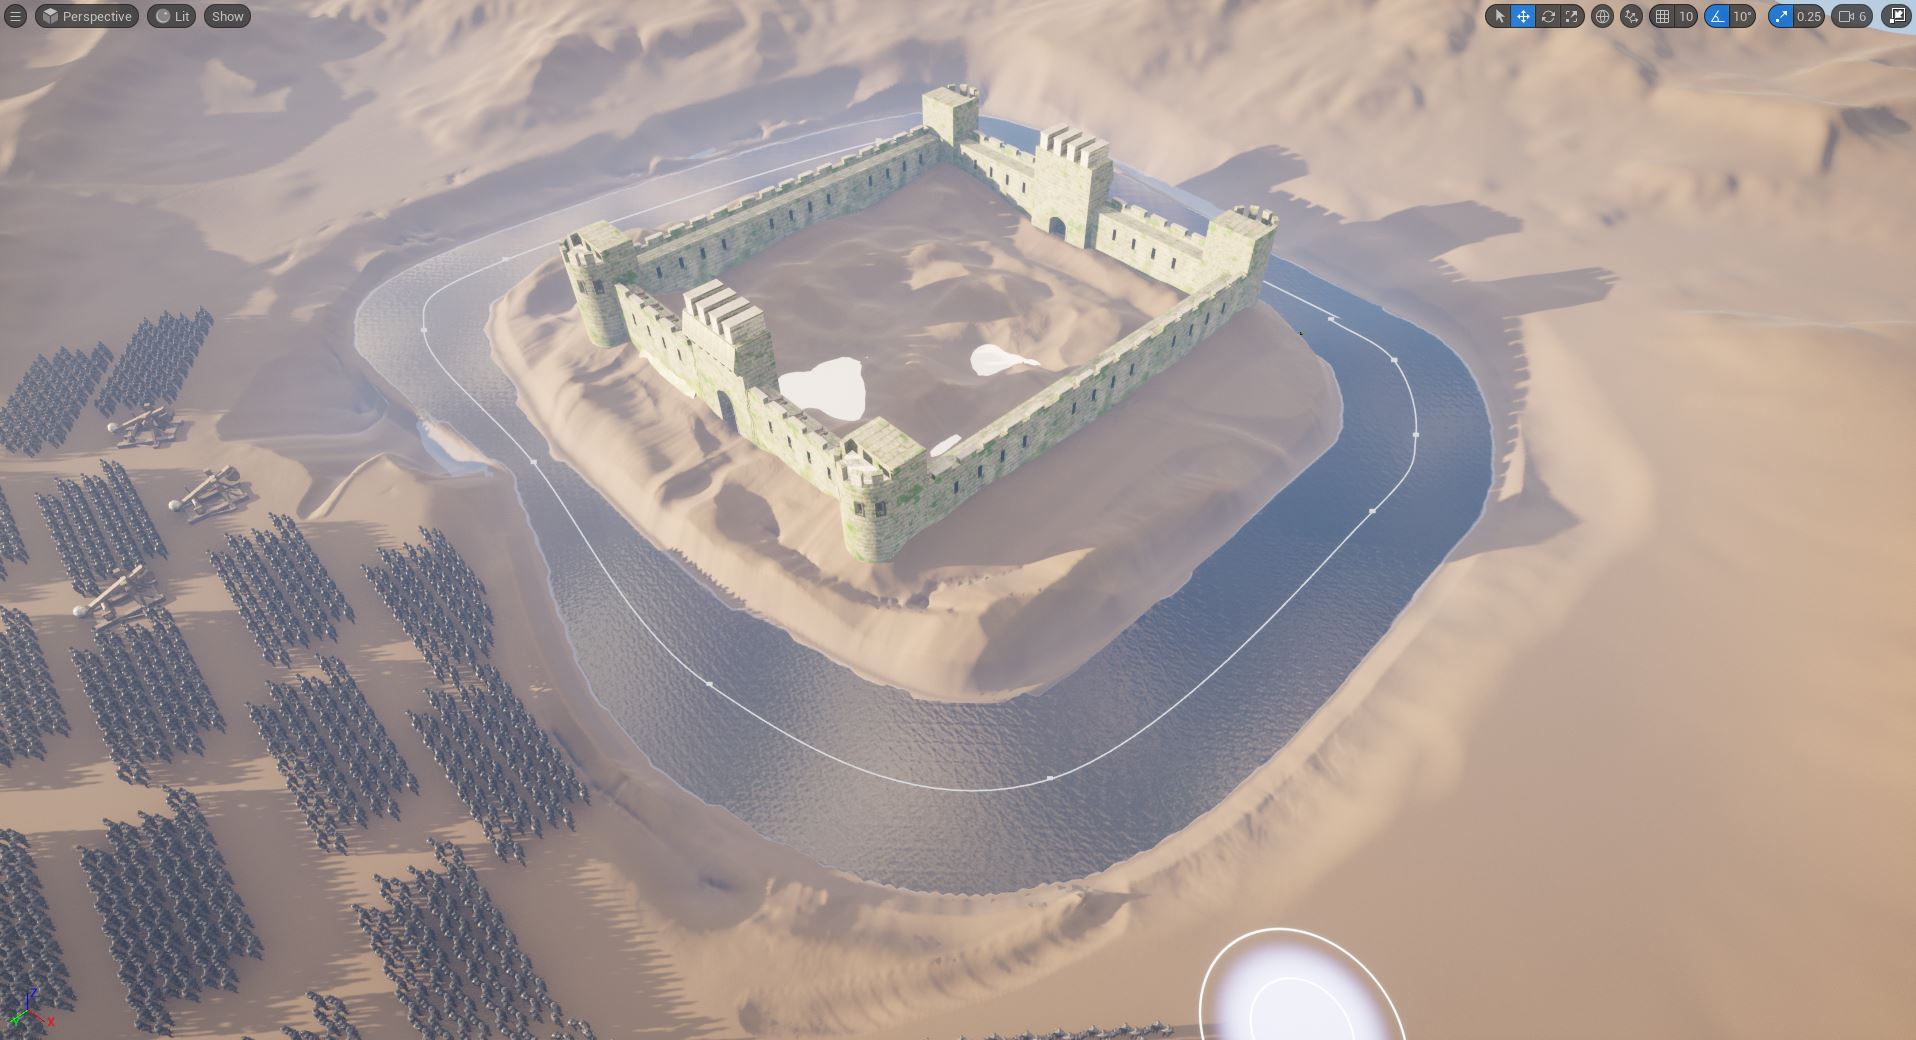
I also wanted to create a divide between the army and the castle (Fig.3). This was needed as the army is to remain still during my video, and this needs to make sense visually. If there were no barrier between the two opposing sides, it would be visually questionable why the army would simply stand still. Another new tool with Unreal Engine 5 is the water plugin system, which was something I thought I would experiment with given this opportunity (Fig.4).
I used the above video to guide me through the various parameters of this new tool (Virtus Learning Hub, 2022) and was able to create a moving lake around the castle which would provide a visual reason for the armies stillness (Fig.5). I would have liked to add more to this area, such as vegetation or a broken wooden bridge leading to the castle entrance, which could then perhaps have a flame effect placed on top. However due to time constraints and lighting issues I later faced this wasn’t possible.
The last step of asset placing came in the form of vegetation. I used a specific tree asset (Fig.6) for where the bird character will take off from, as this tree is going to be focused on heavily at the start of the piece. Before using the foliage brush to add in extra greenery to help breathe some life into the landscape (Fig.7)

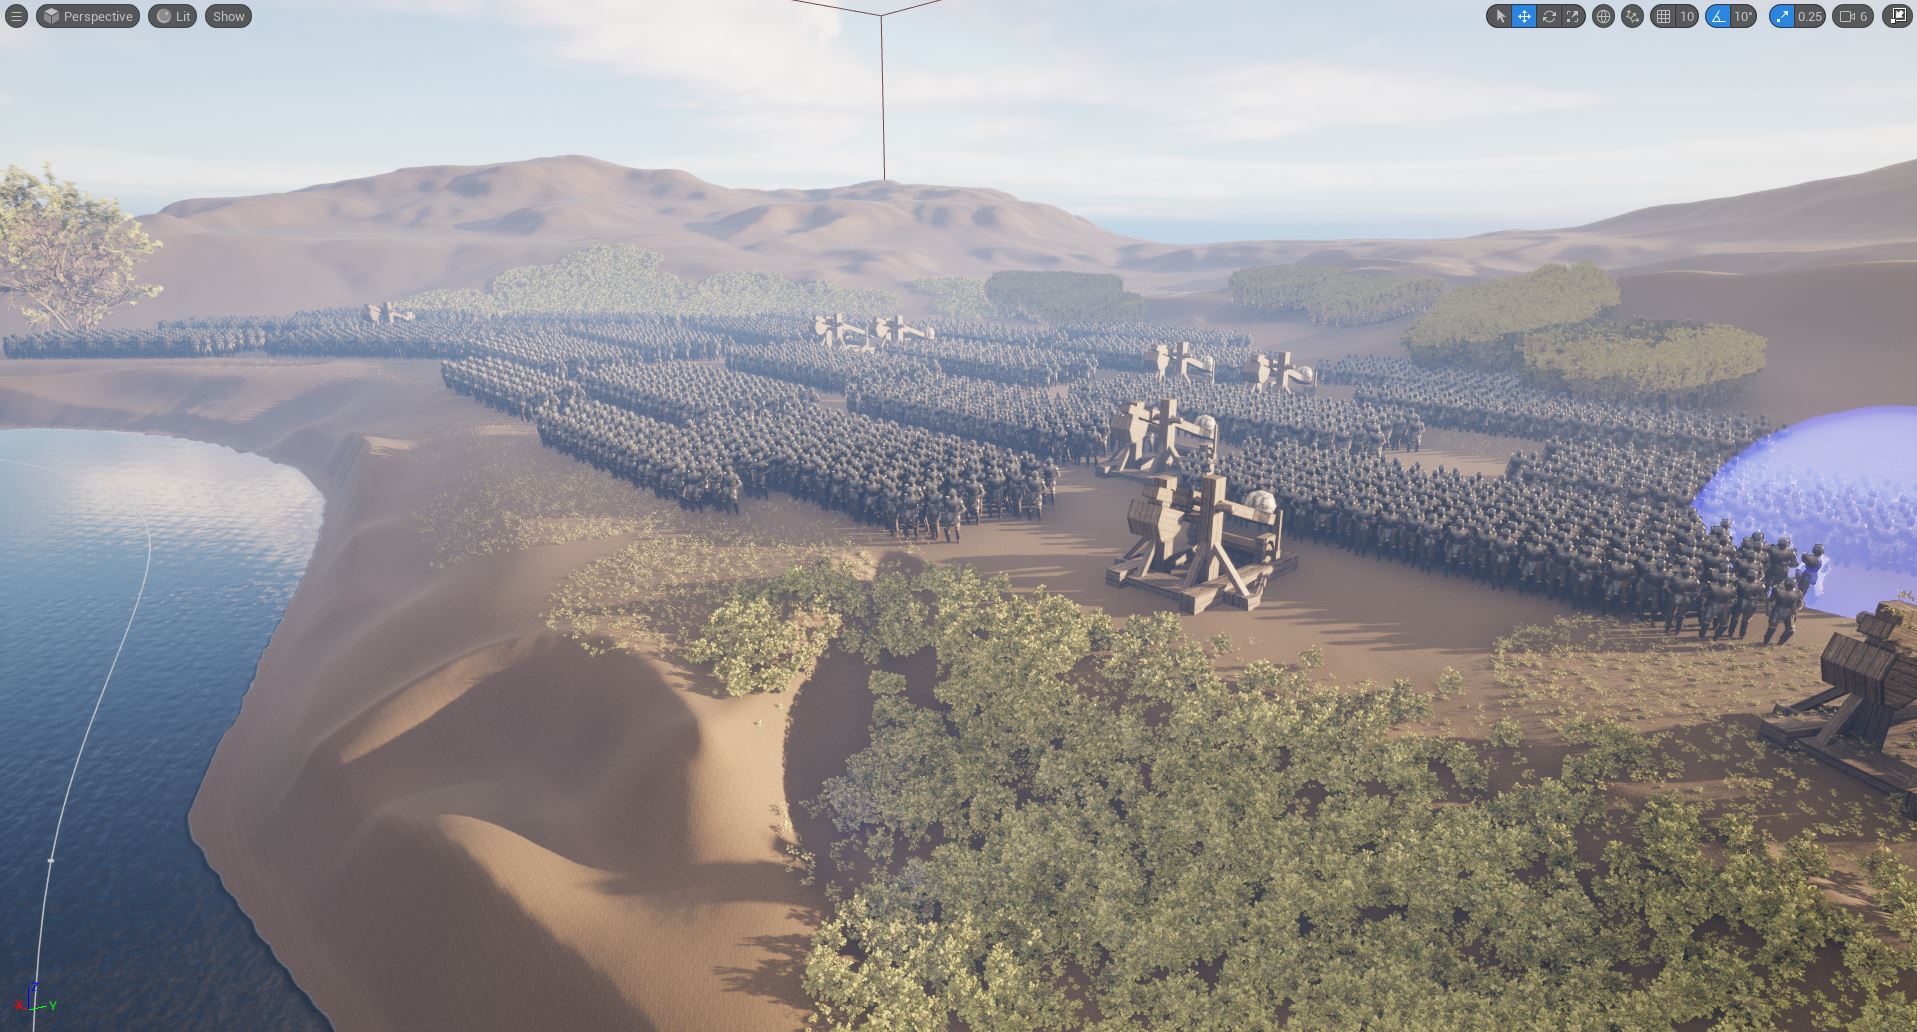
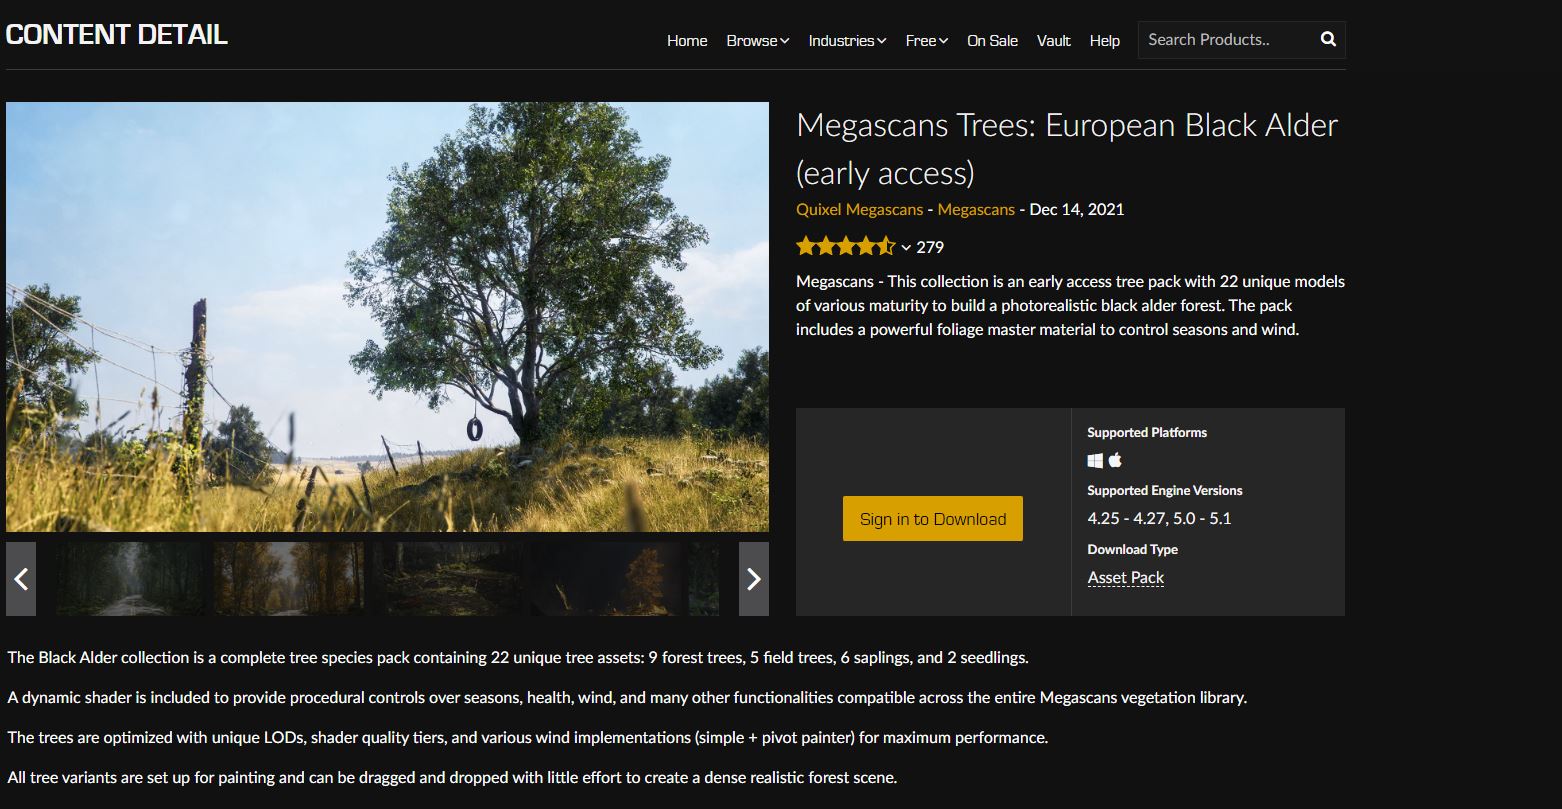
There was an issue with the foliage however, as adding it into quickly made the game engine slow drastically. Plus if I selected the models I used to create the foliage (Quixel Megascans, 2021) and changed them to nanite models as I did the knight assets they lost there material textures. I suspect the models are old enough to not be optimised for the nanite tool and so I had to settle for a scene sparsely populated with foliage. This was doubly disappointing as I had imagined the scene taking place in a European forest clearing, however this would clearly have to change.
:: Lighting the Scene ::
Next, I moved to lighting the scene. I wanted to do this after setting the stage so that I could place and manipulate the actors using the sun before switching to low key lighting. I used various tools such as atmospheric fog and the sky blueprint sphere, as demonstrated in the tutorial video below (Gorka Games, 2022). I also added a blue hue to the scene, which as I discovered in my exploring lighting post helps make the scnee appear cold.
While the video did help create a night scene it still wasn’t quite what I would class as low key, so I increased the harshness of the point light in order to cast stronger shadows on the actors in the scene (Fig.8) and then added touches such as atmospheric fog to help make the army spear more densely populated than it was (Fig.9).
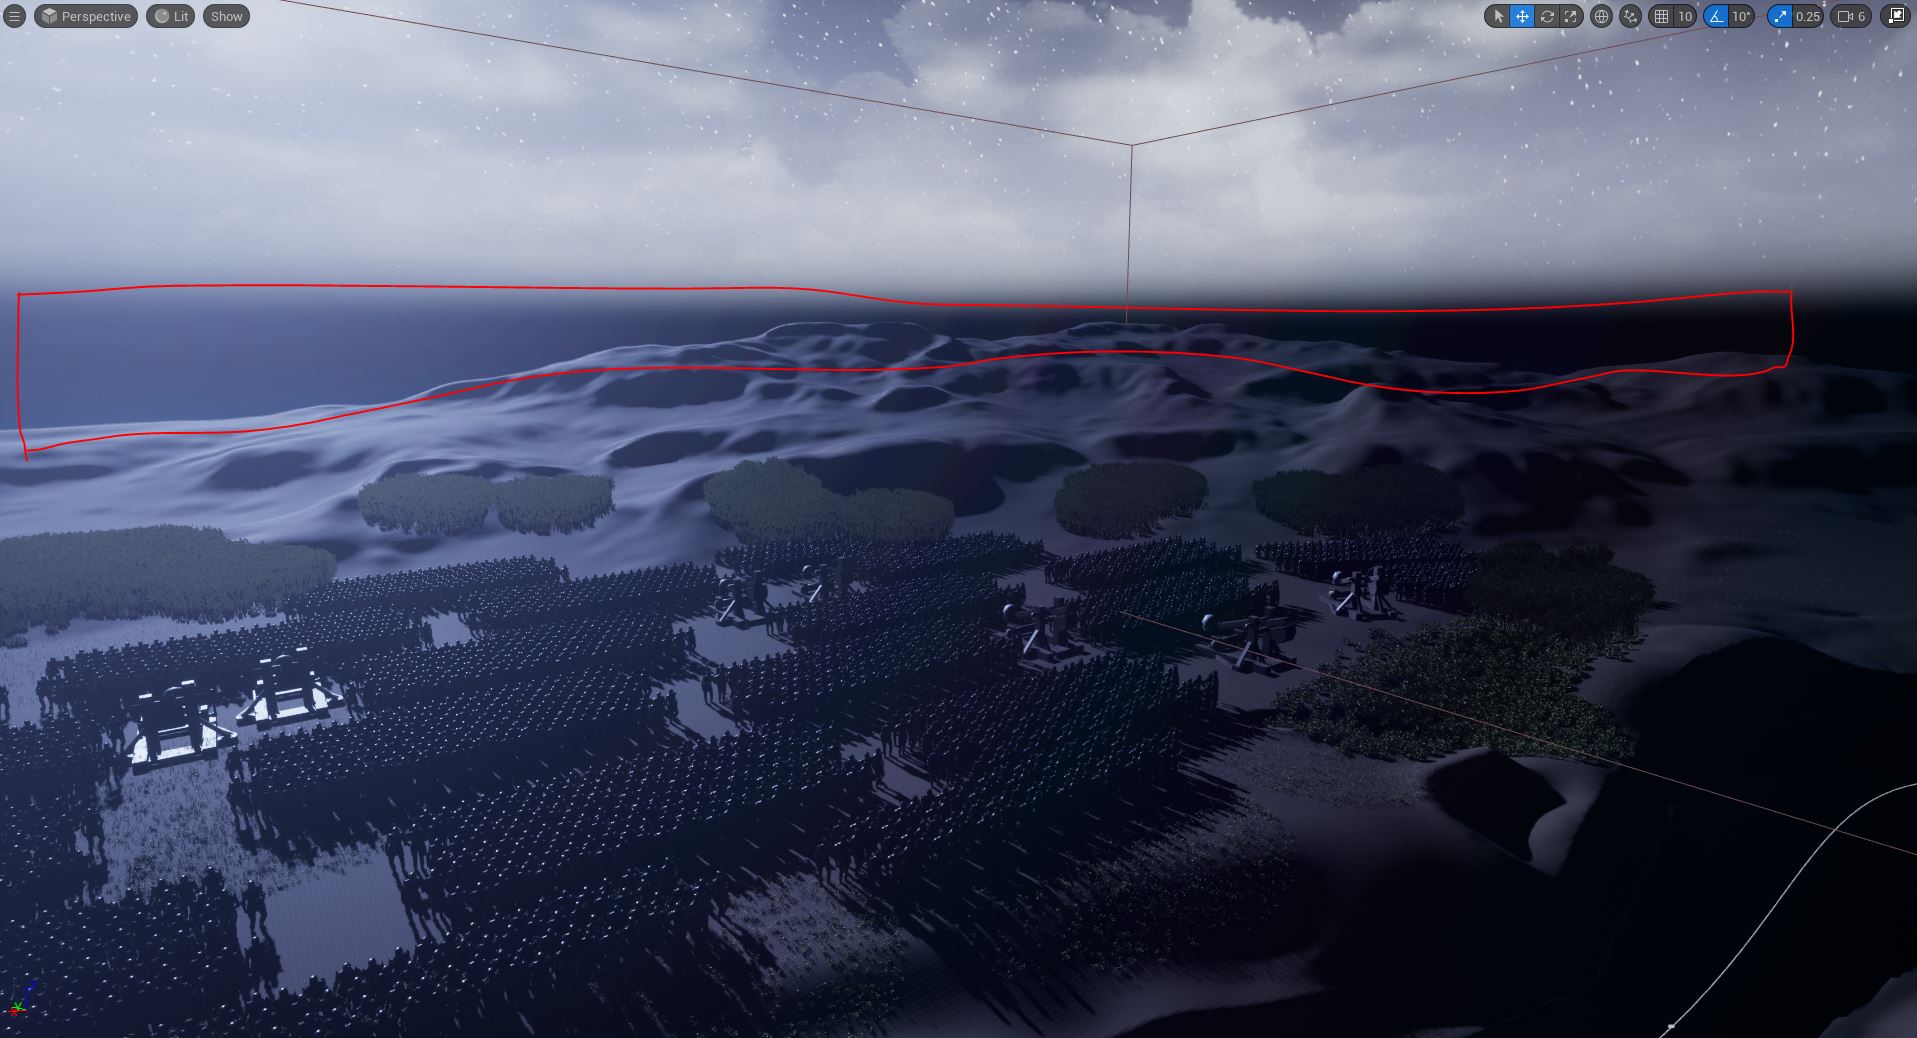
Another issue here was the rather abrupt horizon line I was left with (Fig.9) however this fortunately doesn’t appear in the finished video piece, as much of the video is closely focused away from the far background.
:: VFX Creations ::
With my scene created and lighting in place I could move onto creating the various effects I would need to populate my scene. I had a lot of fun exploring the different aspects of Niagara with specific results in mind and found it tremendously satisfying adding life to the scene using visual effects. I like to use Unreal Engine to set my 3D environments and find the prospect of adding extra life to my renders through adding subtle visual effects a very interesting prospect.
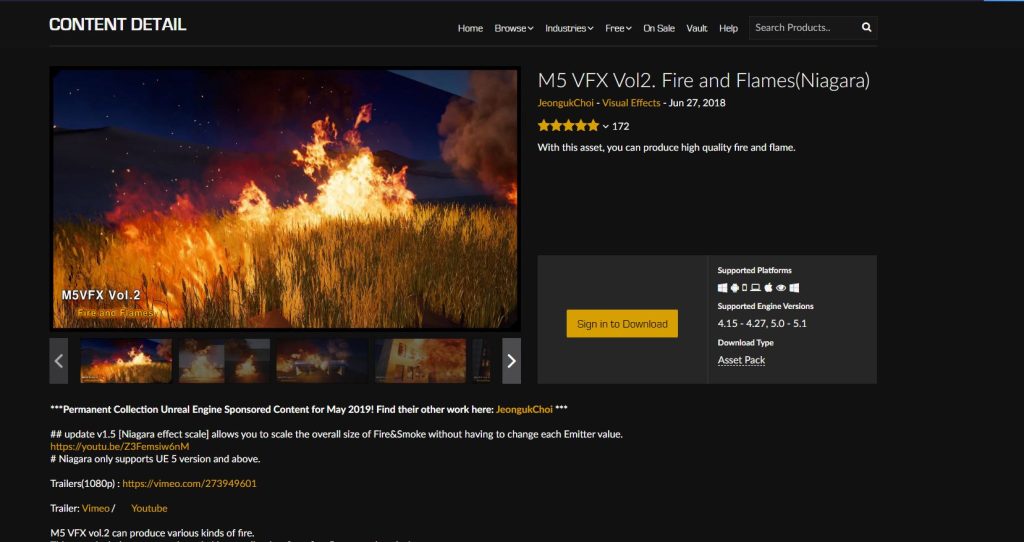
I used the above asset pack to give me access to a wide selection of nice flame sprite materials, which I could then use in my own emitters to create nice looking flame effects. This was something vital to my piece as most of my effects involve some kind of flame element.
:: Rock Impact ::
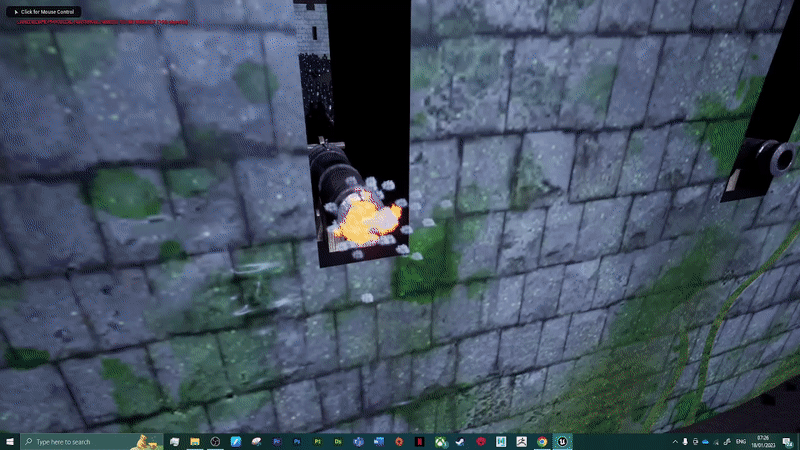
The first element I created was for the rock impact. These effects would be triggered when the rocks from the trebuchet impacted the castle wall. I chose to make this effect first as it didn’t involve any new processes for me to try and figure out. It was simply two directional burst emitters, one of which has a smoke sprite particle and the other a flame.

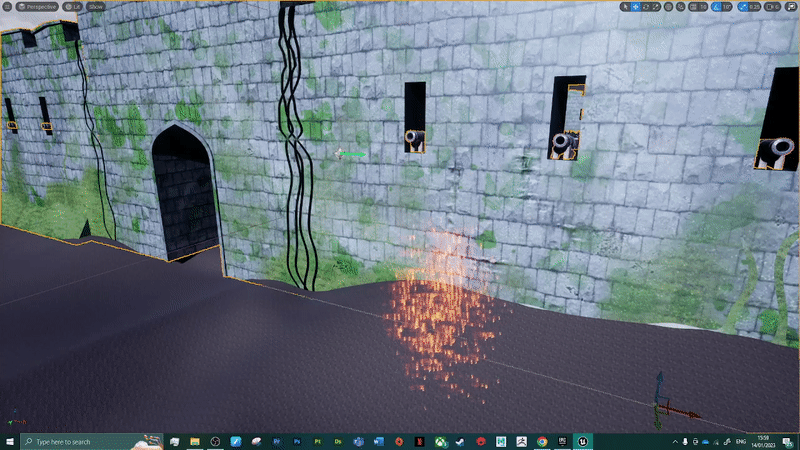
I did vary the velocity, drag and lifespan of the two emitters, to make it seem like the smoke was separate to the flame. Plus I do think the amount of sprites produced is just right, not becoming excessive but successfully selling the idea of a heavy impact.
There are things I would have liked to alter with the effect however, it would have been nice to include some debris from the emitters, perhaps using a mesh emitter to sell the idea of stone being damaged. Also an additional smoke emitter would have been nice, creating thick plumps with a gravity force moving them up along the Y axis, as things stand the smoke effect actually looks more like debris than smoke because it follows the same path as the flame emitter.
:: Flaming Rock ::
With the next effect I did face the question of making an effect stick to an actor in the game space while it moves. While this could in theory be done by moving both the actor and the effect spawn together I found that in the movie sequencer I wasn’t able to add effects on their own. Meaning I couldn’t keyframe an effect not parented by a actor, and simply parenting the effect to an actor didn’t appear to work as the effect wouldn’t dynamically move with the actor.
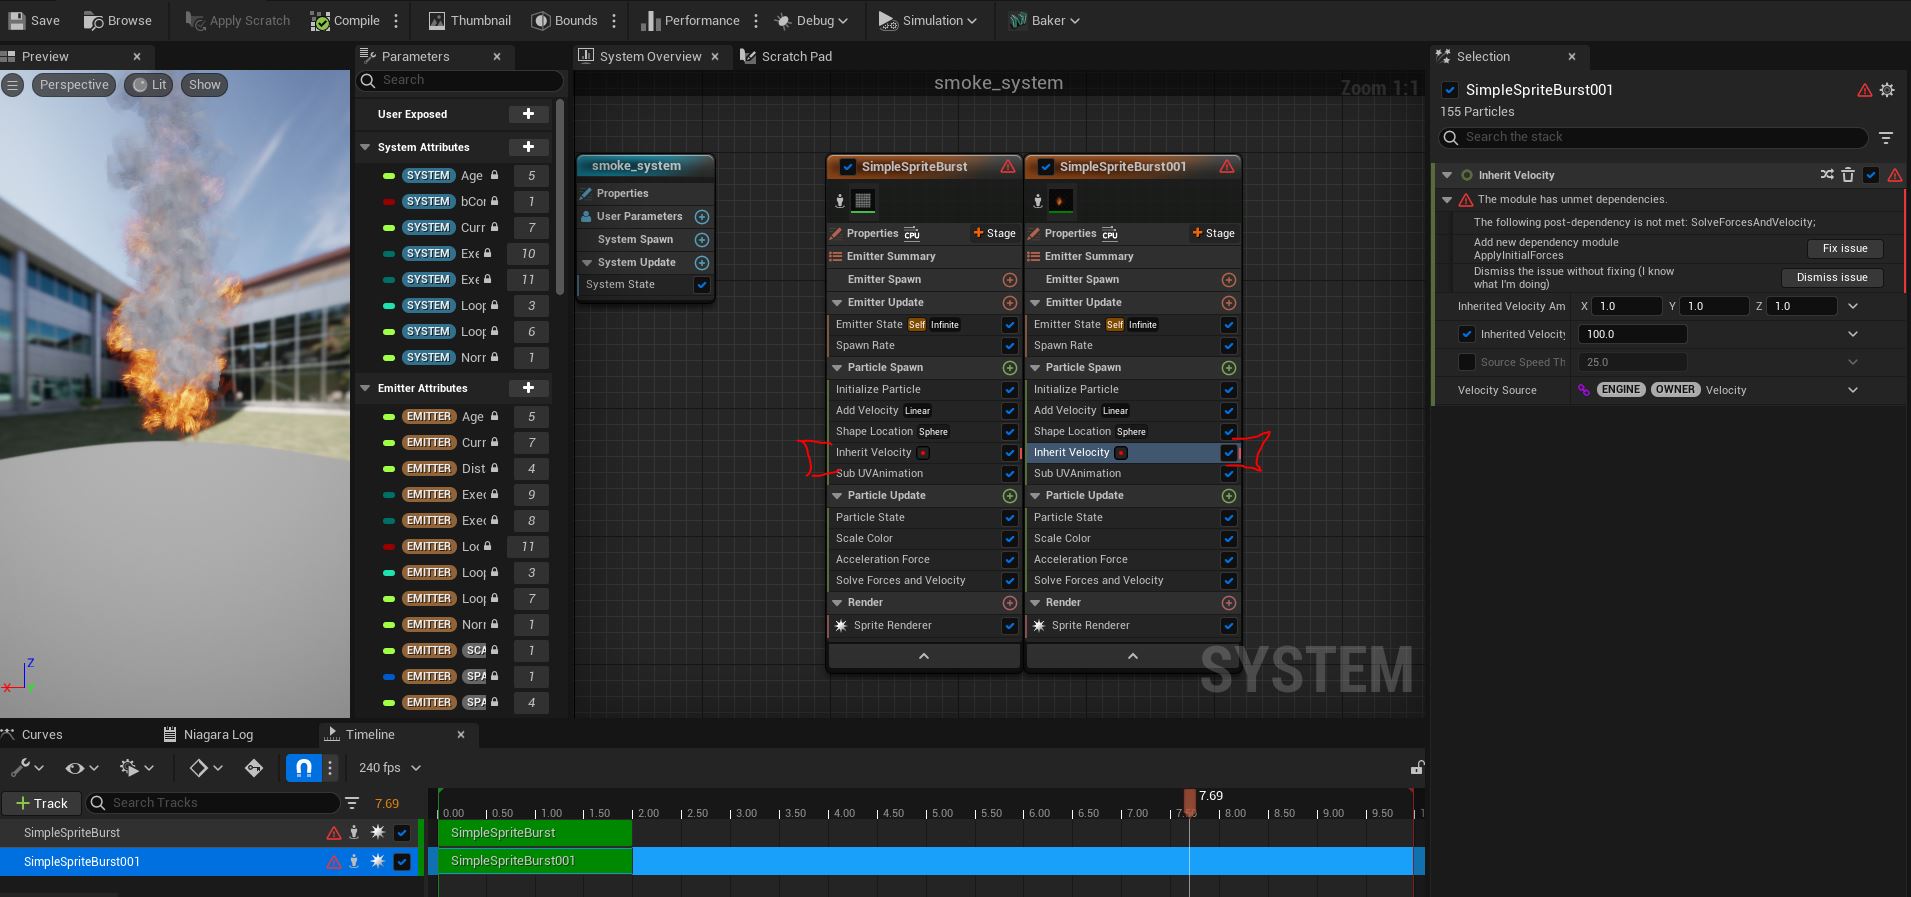
Fortunately with the help of the above video (PrismaticaDev (A, 2022)) I discovered that parenting an effect would work as I intended so long as I set the effect emitters to inherit their velocity in the game world (Fig.12)
This meant I could create the fire effect by altering the smoke pillar I had produced during my initial Niagara exploration. Adding an additional fire emitter which spawn more sprites than the smoke, creating a thick plume of flame. Also altering the lifespan to create the look of the smoke flowing much higher than the flames themselves did (Fig.13). The result of this meant that when the stones are keyed flying through the night sky we should see the fire and smoke trail the stones leave behind.
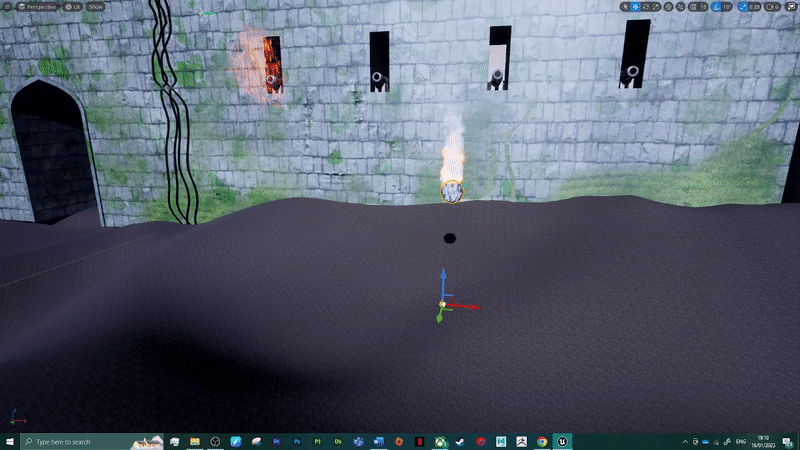
It would however have been nice to be able to add an additional flame effect that grew upward and around the boulder asset, to give the look of the entire stone being on fire. As things stand the fire simply sits on top of the boulder. While this is fine for the purposes of my final video, I would have liked to see how I could get a sprite emitter to interact directly with a actor model in such a way as to have the emitter be altered.
:: Glitter Trail ::
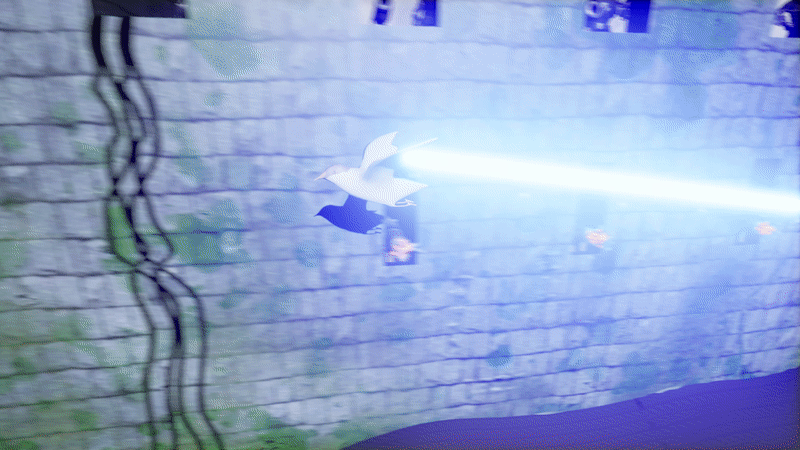
I originally imaged a simply glitter light effect following my bird actor, functionally the same as the flaming rock but instead of a sprite renderer using a light renderer and parenting it to the bird actor instead of the rock. This had to change however as I further explored the different renderers offered in Niagara, ultimately using a sprite rendered with the edge detect material to create the glowing balls (Fig.14).
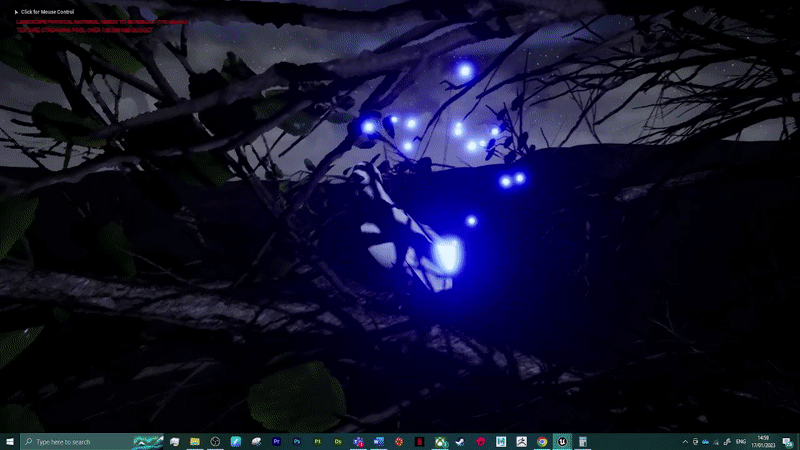
This gave a nice effect when the bird was stationary (Fig.15) however I thought it a little bland and worried that the effect would be somewhat lost when I have the bird in motion, which was going to be most of the sequence.
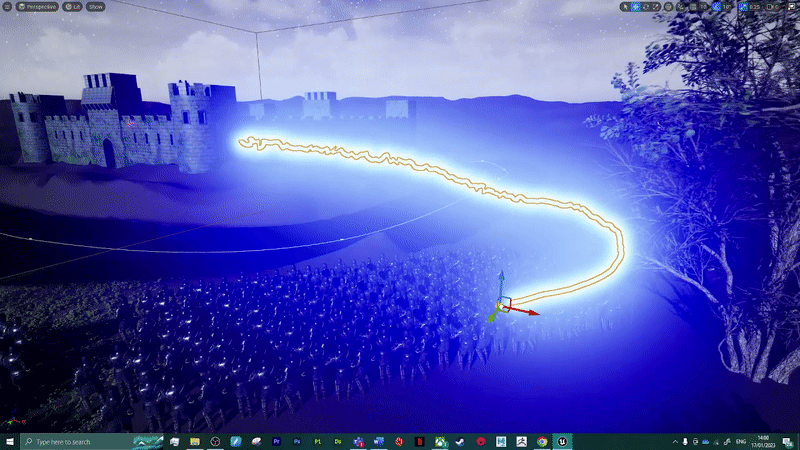
Using the below video for a guide (PrismaticaDev (B, 2022)). I explored how to create ribbon emitters in Niagara (Fig.16) This gave a really nice effect and could be parented to the wing tip skeleton bones of the bird model I used for the flying sections of the video.
PrismaticaDev (B) (2022) ‘Beginner’s Guide to Ribbon Particles [Unreal Engine]’
I did have difficulty figuring out how to colour the ribbon renderer, which resulted in me using the edge detect material which came with pre established glow. However this meant I had to use a sprite renderer with this material for the glitter trail in order to make sure they matched.
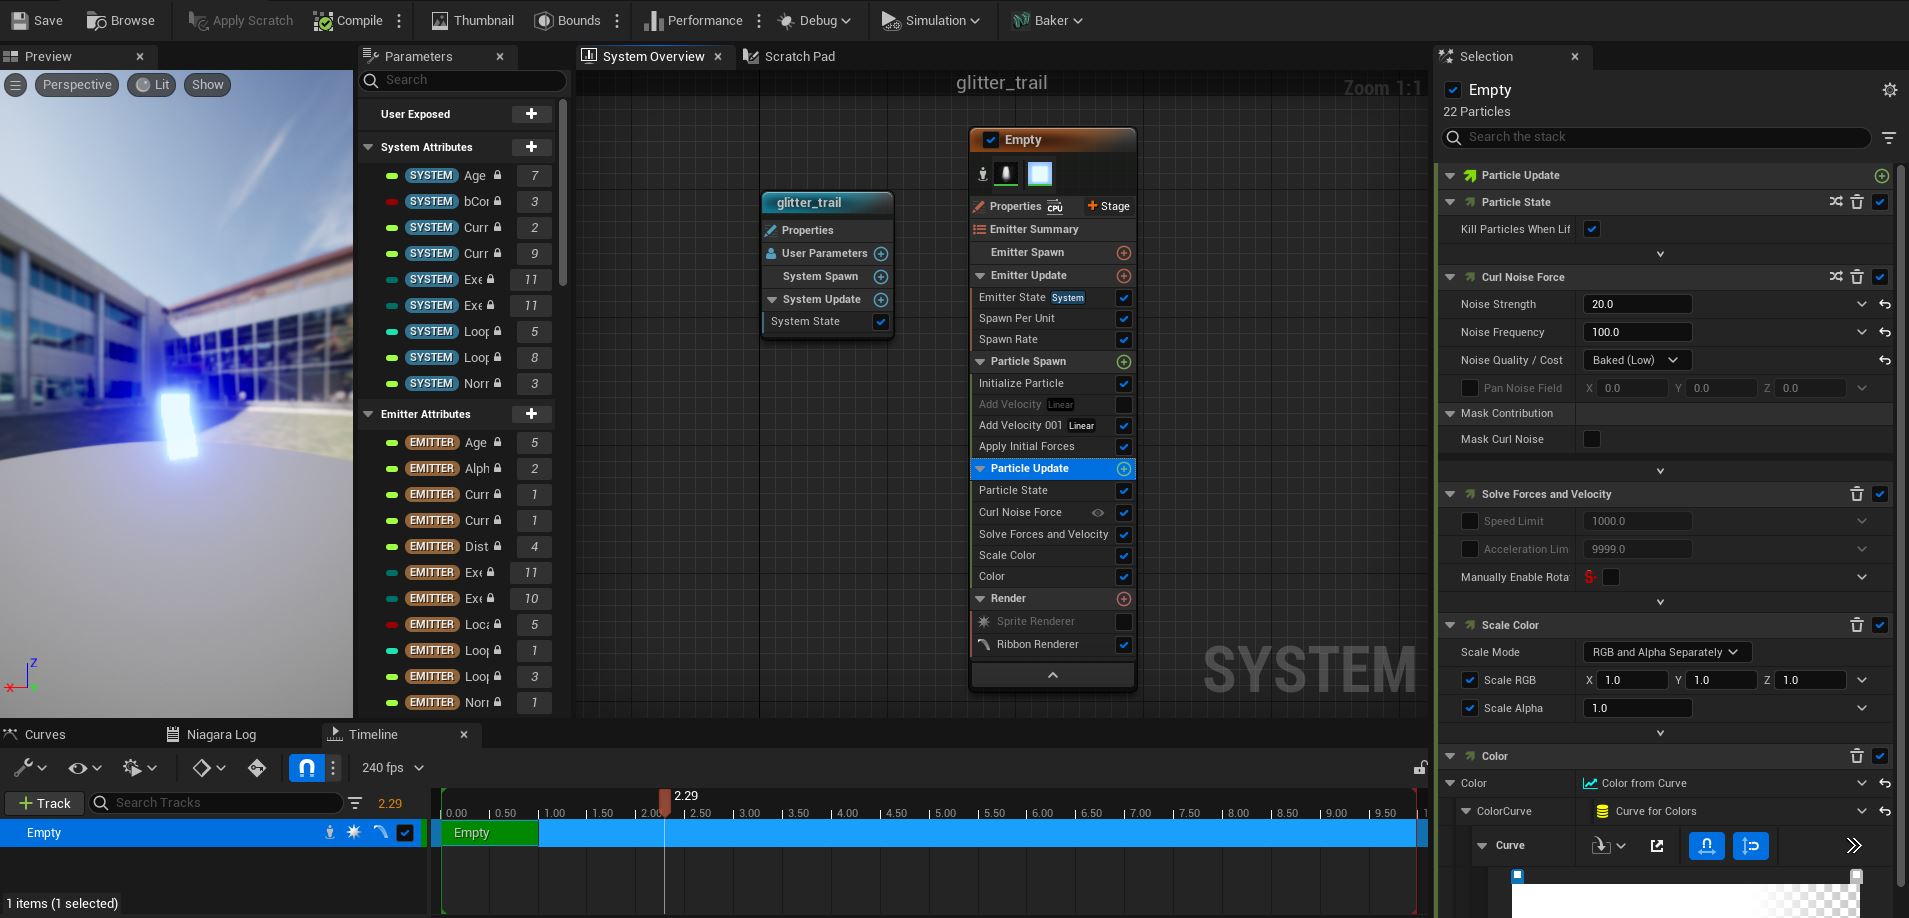
The big frustration with using this material is the glow effect is brighter than I would have ideally wanted, which I worry could cause the bird to become almost invisible behind the light show in the final video piece. (Fig.17). There needed to be a balance between making the bird actor enough that the change in model was negligible while not washing out the screen in a sea of blue, and I worry the material used went too far toward the latter.
:: Cannon Flash ::
Next up I worked on the cannon flash effect, this would function mostly as a background effect and so I wanted it to be scale back somewhat from the rock impact effects that would be triggering close to the cannon assets.
I originally intended to make the particles move around the spawn point in a somewhat rounded manner, giving the impression that the explosion is originating from the end of the cannon barrel. I used the below video (PrismaticaDev (C, 2022)) in the hopes that it would demonstrate how to alter the path of the particles lifespan to make them more circular. Sadly this wasn’t really shown as much as I had hoped, which resulted in me having to alter my original intent with this effect.
The video did however show several ways to alter the behaviour of the particles spawned during their lifetime. Introducing me to nodes such as the ‘curl noise’ node which allowed me to make the particles seem like they were moving while they floated more than they would without the node.
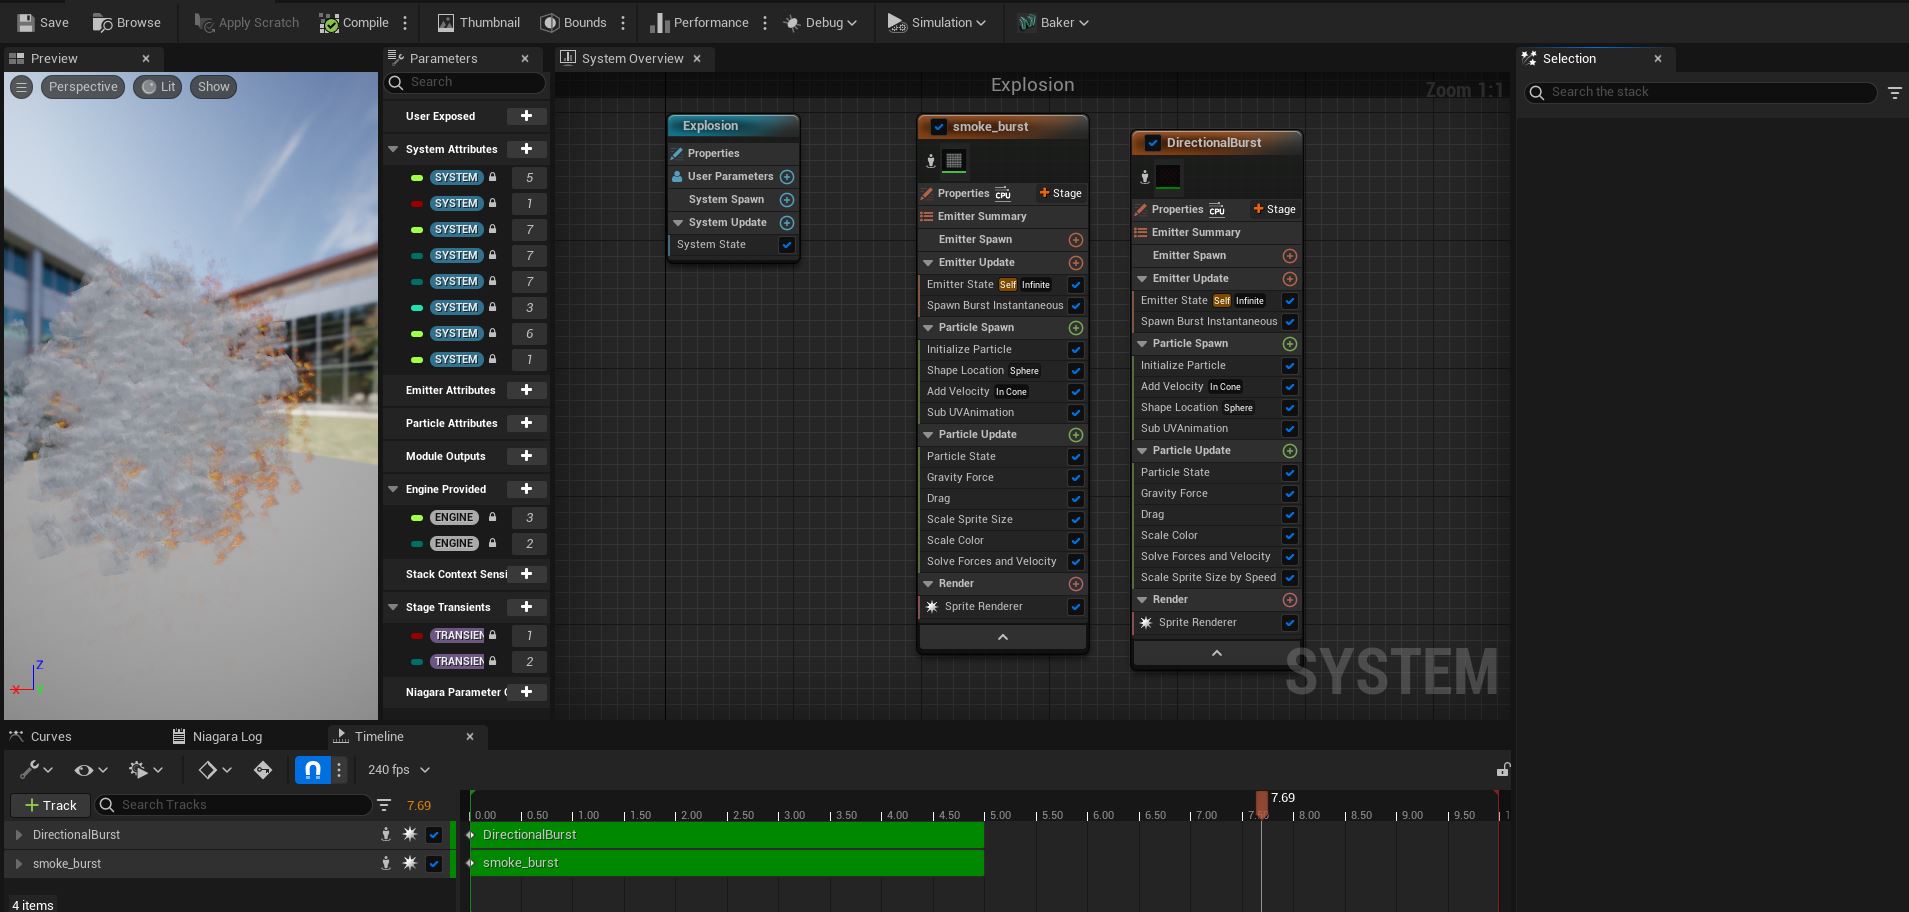
Ultimately I used four emitters to create the effect I ended with (Fig.18). Two smoke sprite emitters, one which moved outward along the z axis and the other moved outward from a initial spawn point, giving the impression that the smoke both clung to the cannon and floated away. Two additional emitters using fire sprites acted similarly, with one spawn clustering around the barrel and another striking outward.
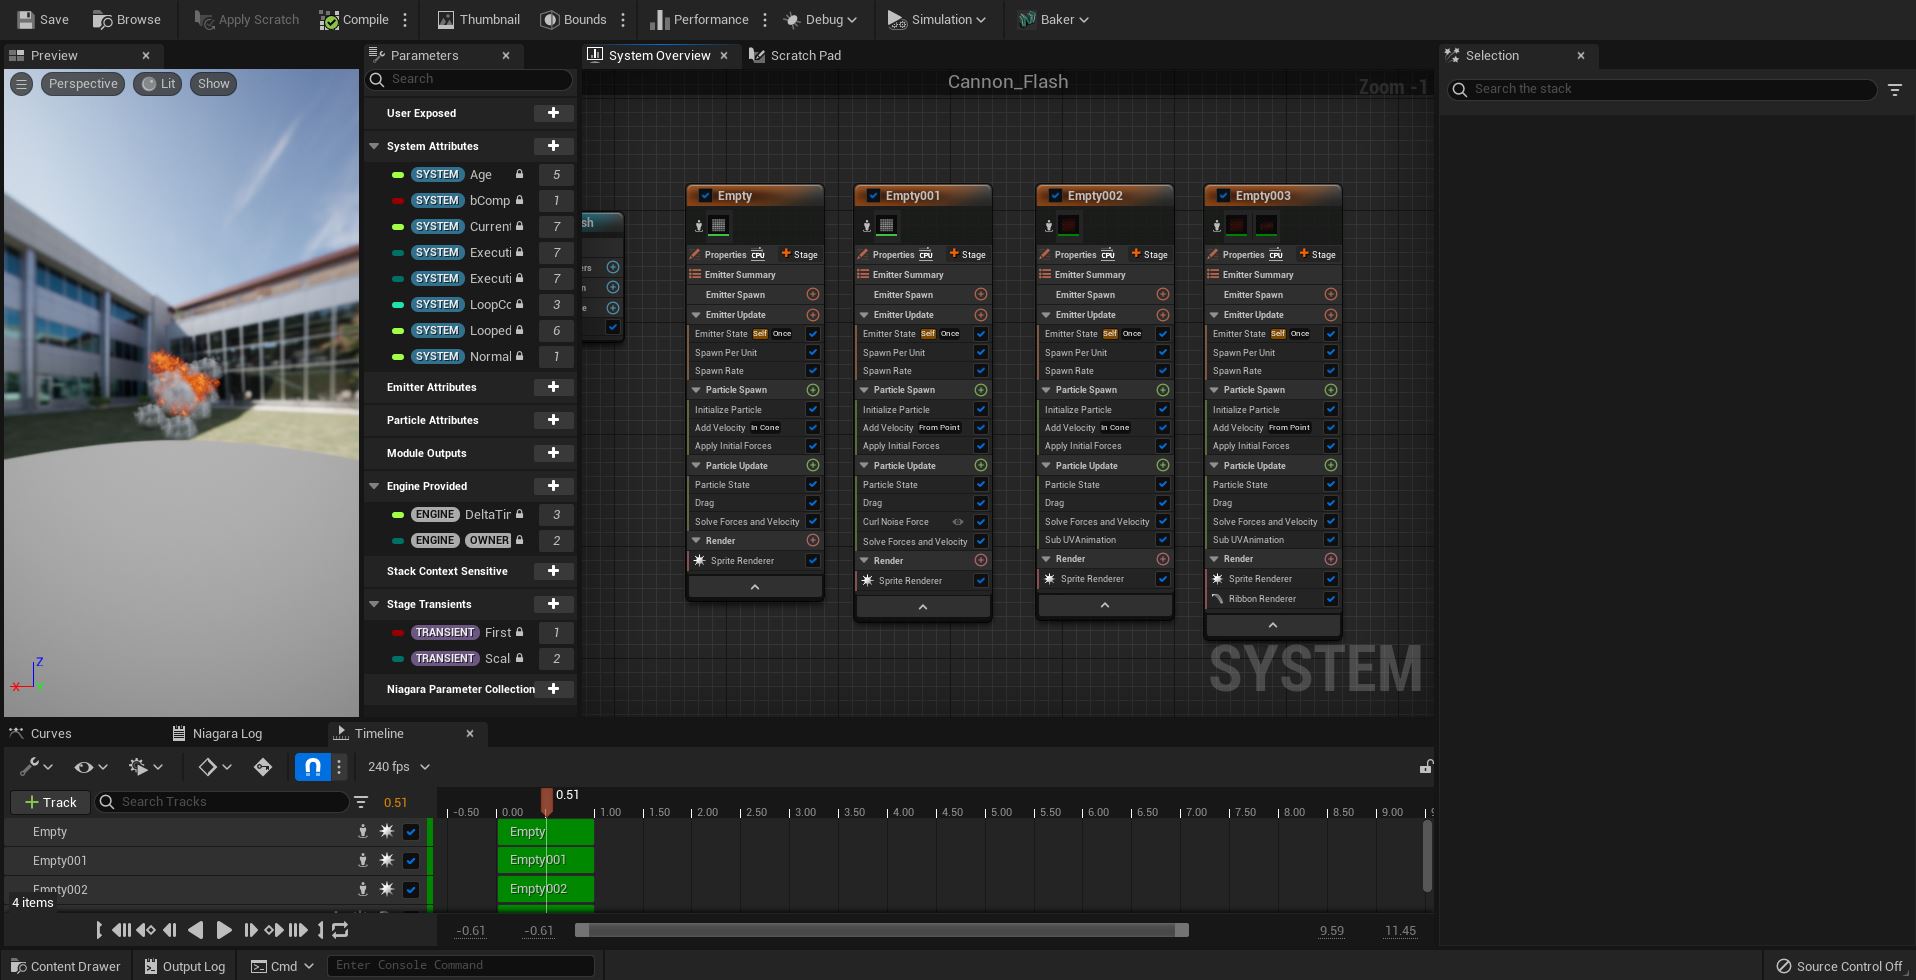
I think this is probably the weakest of all the effects I created, with the finished effect (Fig.19) not really looking like a muzzle flash of any kind. The lifespan of the particles is too long, especially with the flame which doesn’t really disappear as it should do. The smoke of a muzzle flash should outlive the flame far longer than it does with this effect. It also would have been nice to add a mesh emitter, with a black ball which could spawn flying outward, which would have really helped make the cannon seem like it was firing.
Also it would have been good to alter the colour of the smoke particles, as the pale grey doesn’t suit the effect I was trying to create as much as a black or dark grey smoke sprite would have done. I would have liked to redo this effect after having created the others however I ran out of time for the project and so had to make do with what I had already created.
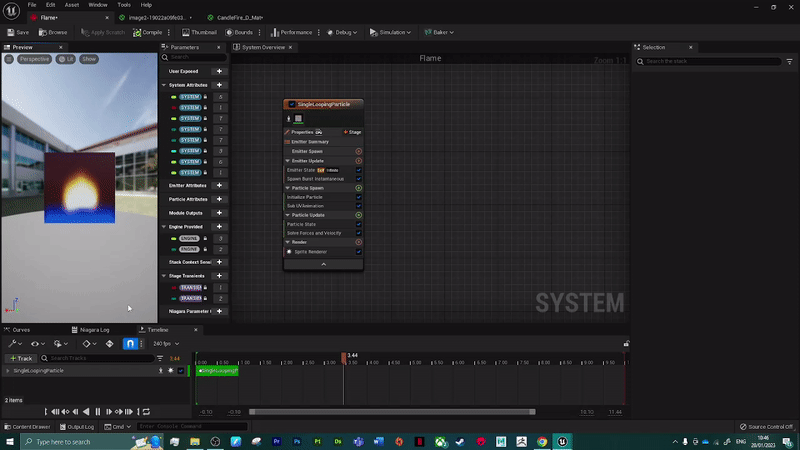
:: Wick Flame ::
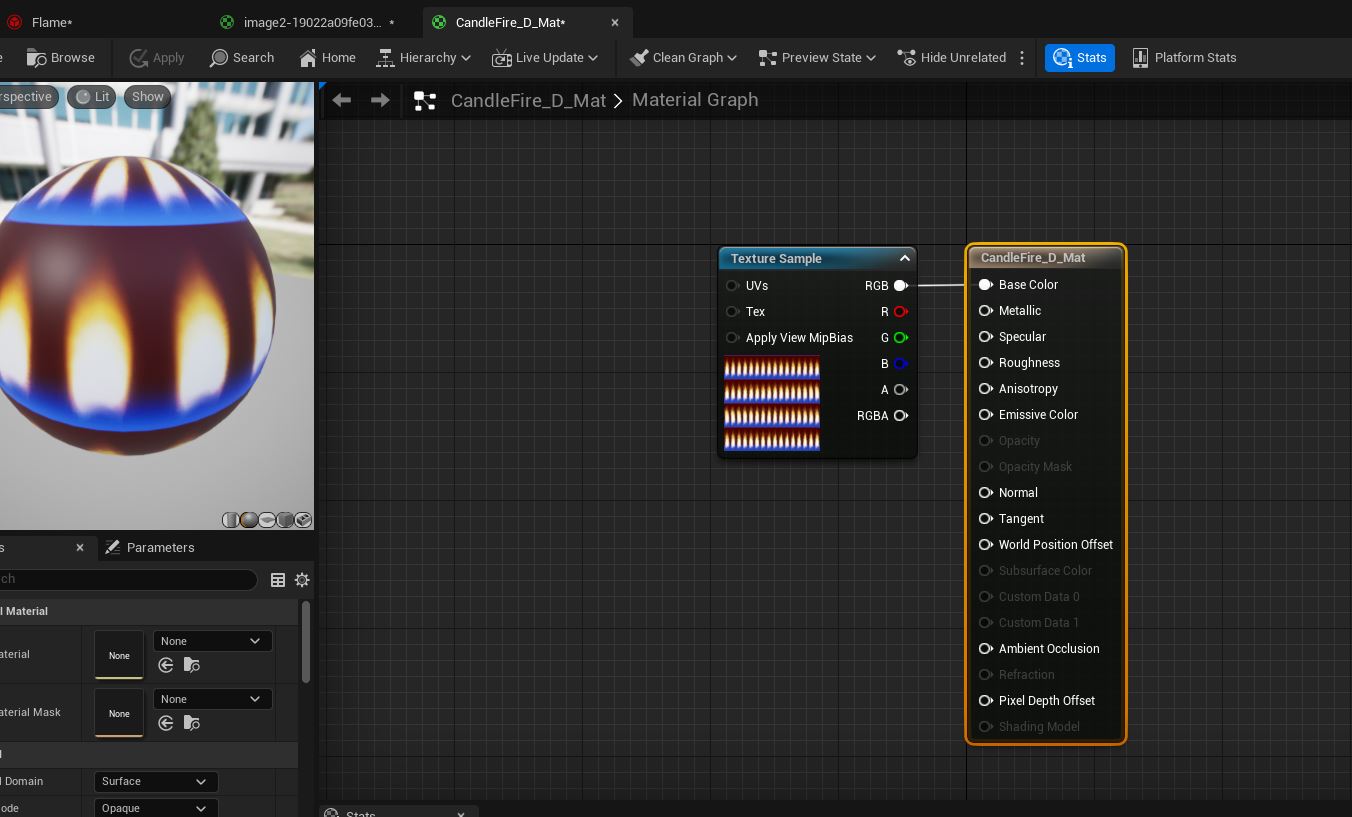
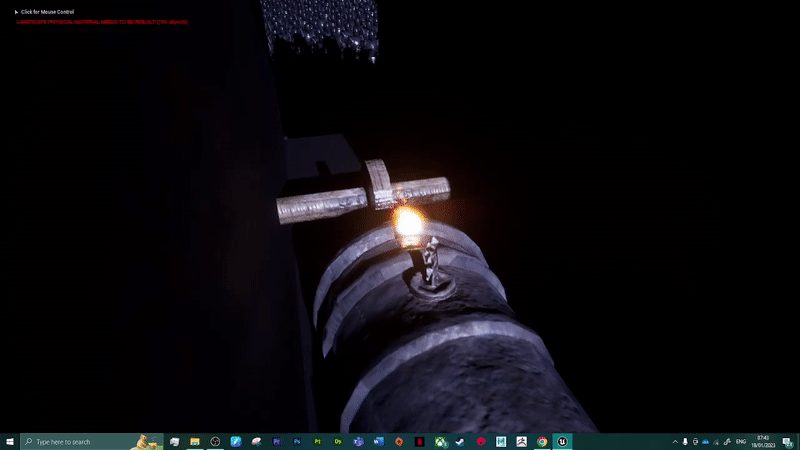
Next I moved to creating the flame effect that would hug the wick of the cannon in one of my shots, I originally intended to use the textures that came with the 3D asset pack I downloaded earlier (Ref.10 (JeongukChoi, 2018)) However I found that when creating a material from a PNG texture image Unreal would add a background to the sprite sheet (Fig.21) meaning that the sprite spawned would also have a opaque background around it (Fig.20).
Then I researched videos showing how to make a candle flame effect within Unreal Engine (Reids Channel, 2020) However the process they described more so discussed hoe to alter a point light in Unreal to make it flicker, not really discussing how to make the effect using Niagara.
When looking at the Niagara emitter that came as part of the asset pack I downloaded for the material sheets (Ref.10, (JeongukChoi, 2018)) the emitter they created was very simple (Fig.22) however instead of the material used being a simple sprite sheet they instead used a material instance.
This meant that the emitter only needed to spawn the material instance, and the distortion of the flame sprite came through the instance. I have never used material instances before and didn’t have time to try to figure out how to create one from a sprite sheet, so sadly I had to directly use the flame effect from the asset pack (Fig.23). Only editing the emitter slightly to randomise the sprite size and lifetime to make it seem like the flame was flickering more than the standard study candle flame.
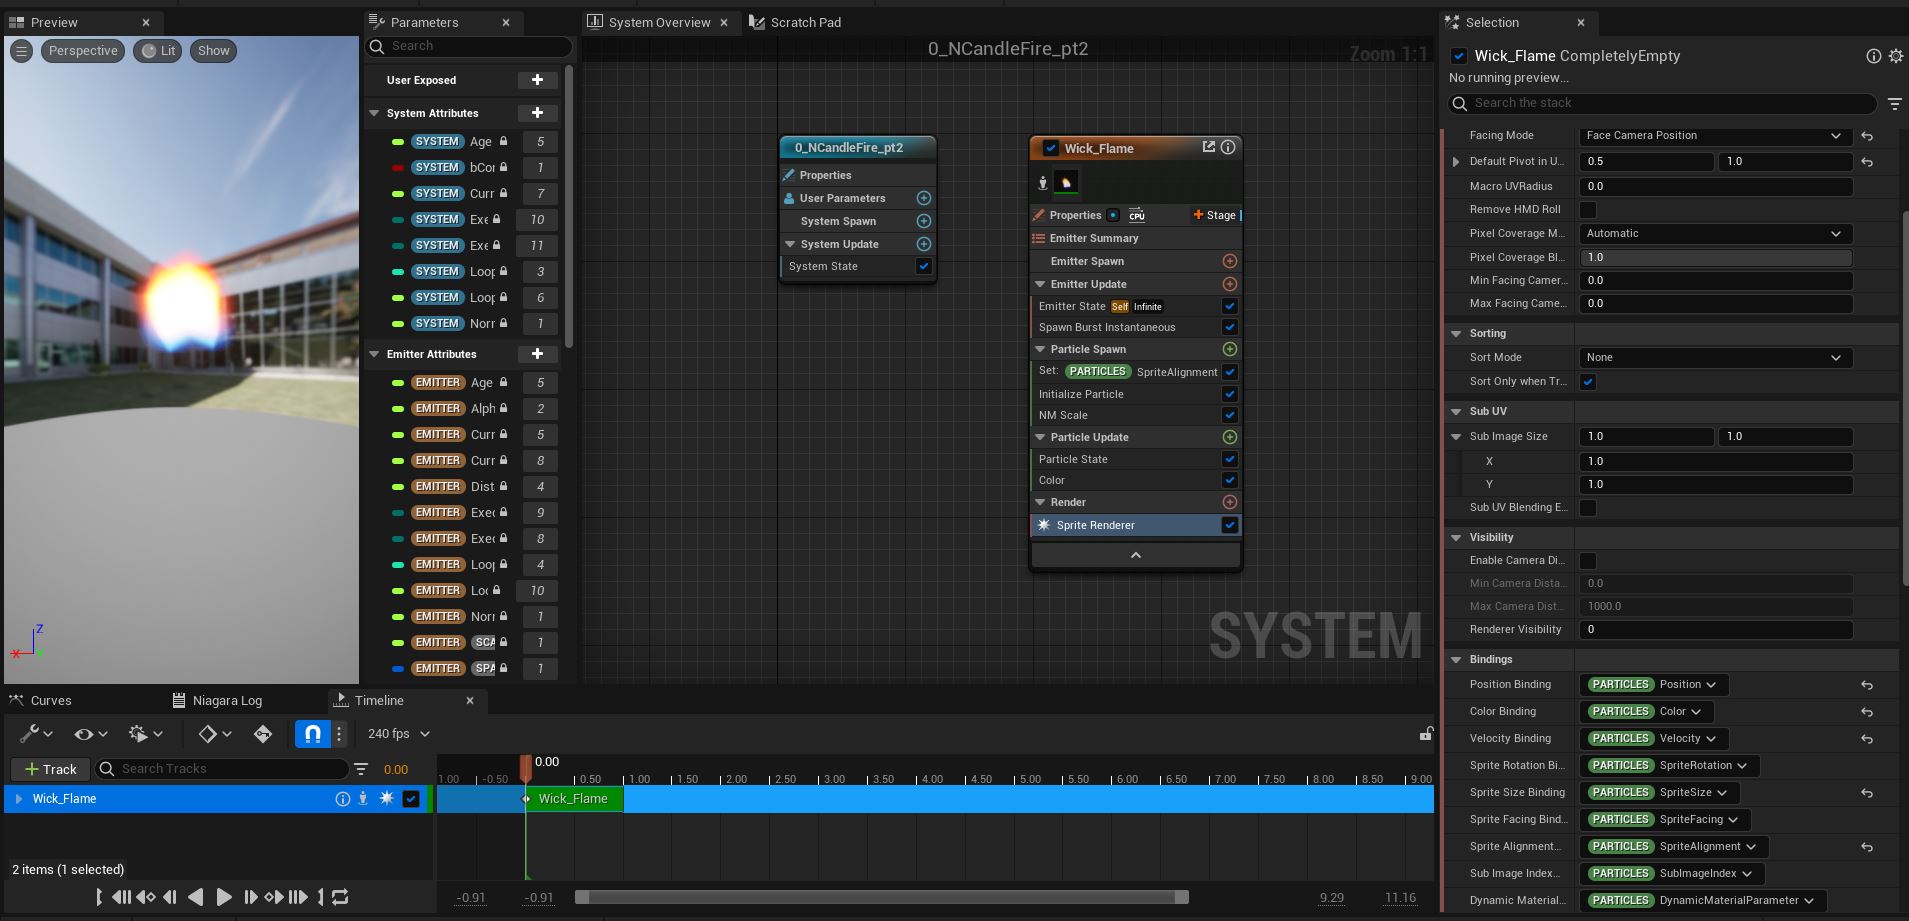
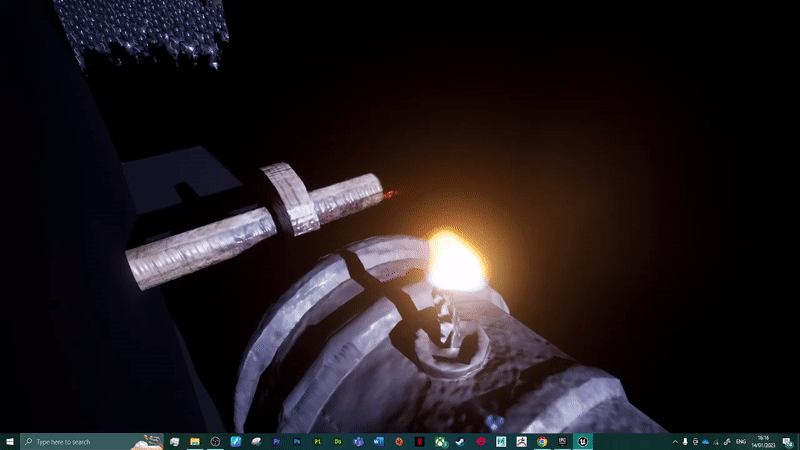
I didn’t feel comfortable using an emitter from the asset pack directly with only some rudimentary emitter editing. So, I thought of ways I could make the effect more unique, the flame was designed for a steady candle, whereas I need it to burn down a wick. So, I decided to add some sparkling flame emitters to add on top of the flame (Fig.24).
By parenting my own effect to the candle effect I could make the final effect look far more like a flame burning its way down a wick than the original steady candle flame I took from the asset pack (Ref.10, (JeongukChoi, 2018)).
While I do like the final effect, I don’t feel comfortable having used the candle flame from the asset pack, and while I do like the edits and additions I made to the effect it would have been nice to learn how to go about using material instances. It would have been much more satisfying to discoverer how to create and manipulate material instances to make a completely original flame effect.
:: Lightning Strike ::
The final effect I needed for my production piece was a lighting strike, this would serve to cut through the various fire effects I have created to be placed around the castle. The original plan was to use the red fire effects during the shots that had the castle as the backdrop and then contrast that with blue effects when the army is used as the backdrop.
I used the above video to show me how to create a lighting effect using Ribbons within Niagara (CHHOW, 2022). What was really interesting with this tutorial was exploring scratchpad nodes, which really showed me the many possibilities Niagara is capable of making outside of the basic nodes I have otherwise explored.
The scratch nodes I created allowed me to create a ribbon particle that would rapidly alter its spawn point along the horizontal axis (Fig.25) While allowing the top of the ribbon to remain still, really giving the look of a supercharged ribbon. I then used the same edge detect material I used for the ribbon particles I attached to the bird actor in order to give me that pale blue glow (Fig.26)
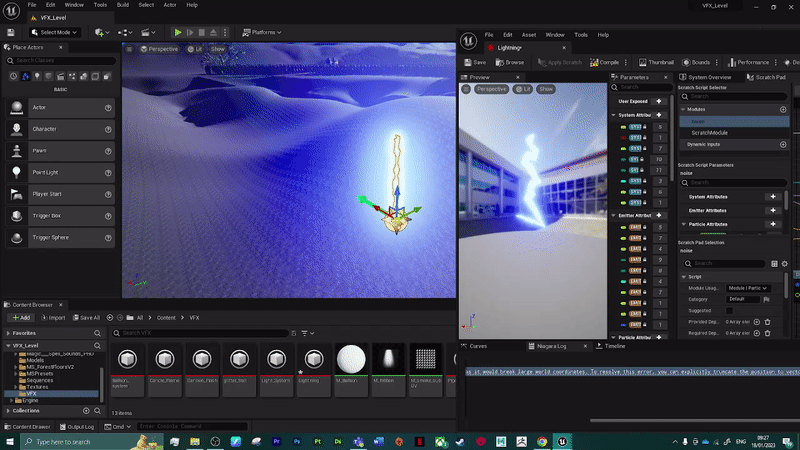
Sadly I ran into an error when moving the effect into the game world. Where instead of the wide side to side movements I saw from the effect in the Niagara window the ribbon would remain almost entirely straight in the game world (Fig.26). There was an error which stopped the emitter from compiling (Fig.25)
In order to fix this error it suggested I ‘explicitly truncate the position to vectors first’ which was not something I understand how to do or even understand the language of. There wasn’t really much I could do at this stage as I couldn’t place the lightning strike I originally intended and couldn’t find anything to help understand what the issue is or how to fix it.
This meant that I needed a different effect for my final video. The video is meant to trigger an explosion that nocks the bird back toward the castle. So I needed a large effect that could visually justify moving the bird off its course.
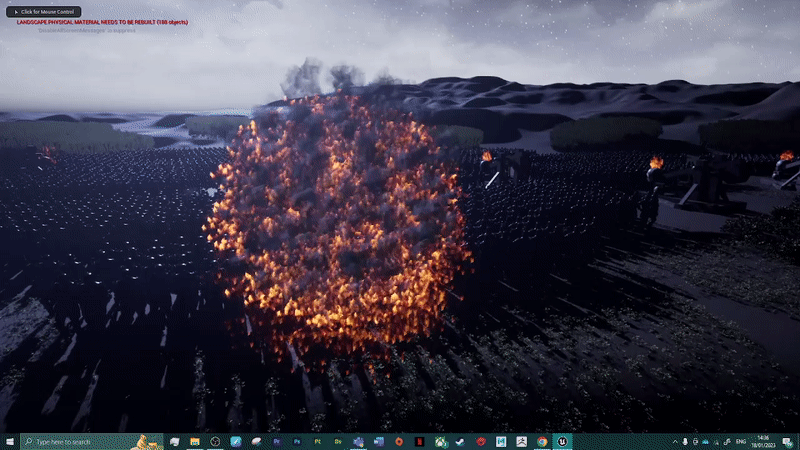
Ultimately, I ended up adjusting the rock impact effect I had created previously (Fig.27). Widening the spawn circle radius massively and the spawn number of particles. I also added a heavier gravity to the effect and set the spawn to spawn from point as opposed to the directional burst template I used previously.
I actually think the effect works much nicer here than it did as the rock impact, especially making the smoke particles rise off the flame effects. While not what I originally intended I do think the effect is large enough to convince a viewer of a large explosion nocking the bird off course (Fig.28).
:: Camera Mapping ::
With my visual effects now in place the last step I need to complete before I can render my final video piece is to place the camera rigs around the area. While I do intend to make use of the tools available just within the movie sequencer tool I did make sure to make use of crane rigs (Fig.29) and rail rigs (Fig.30)
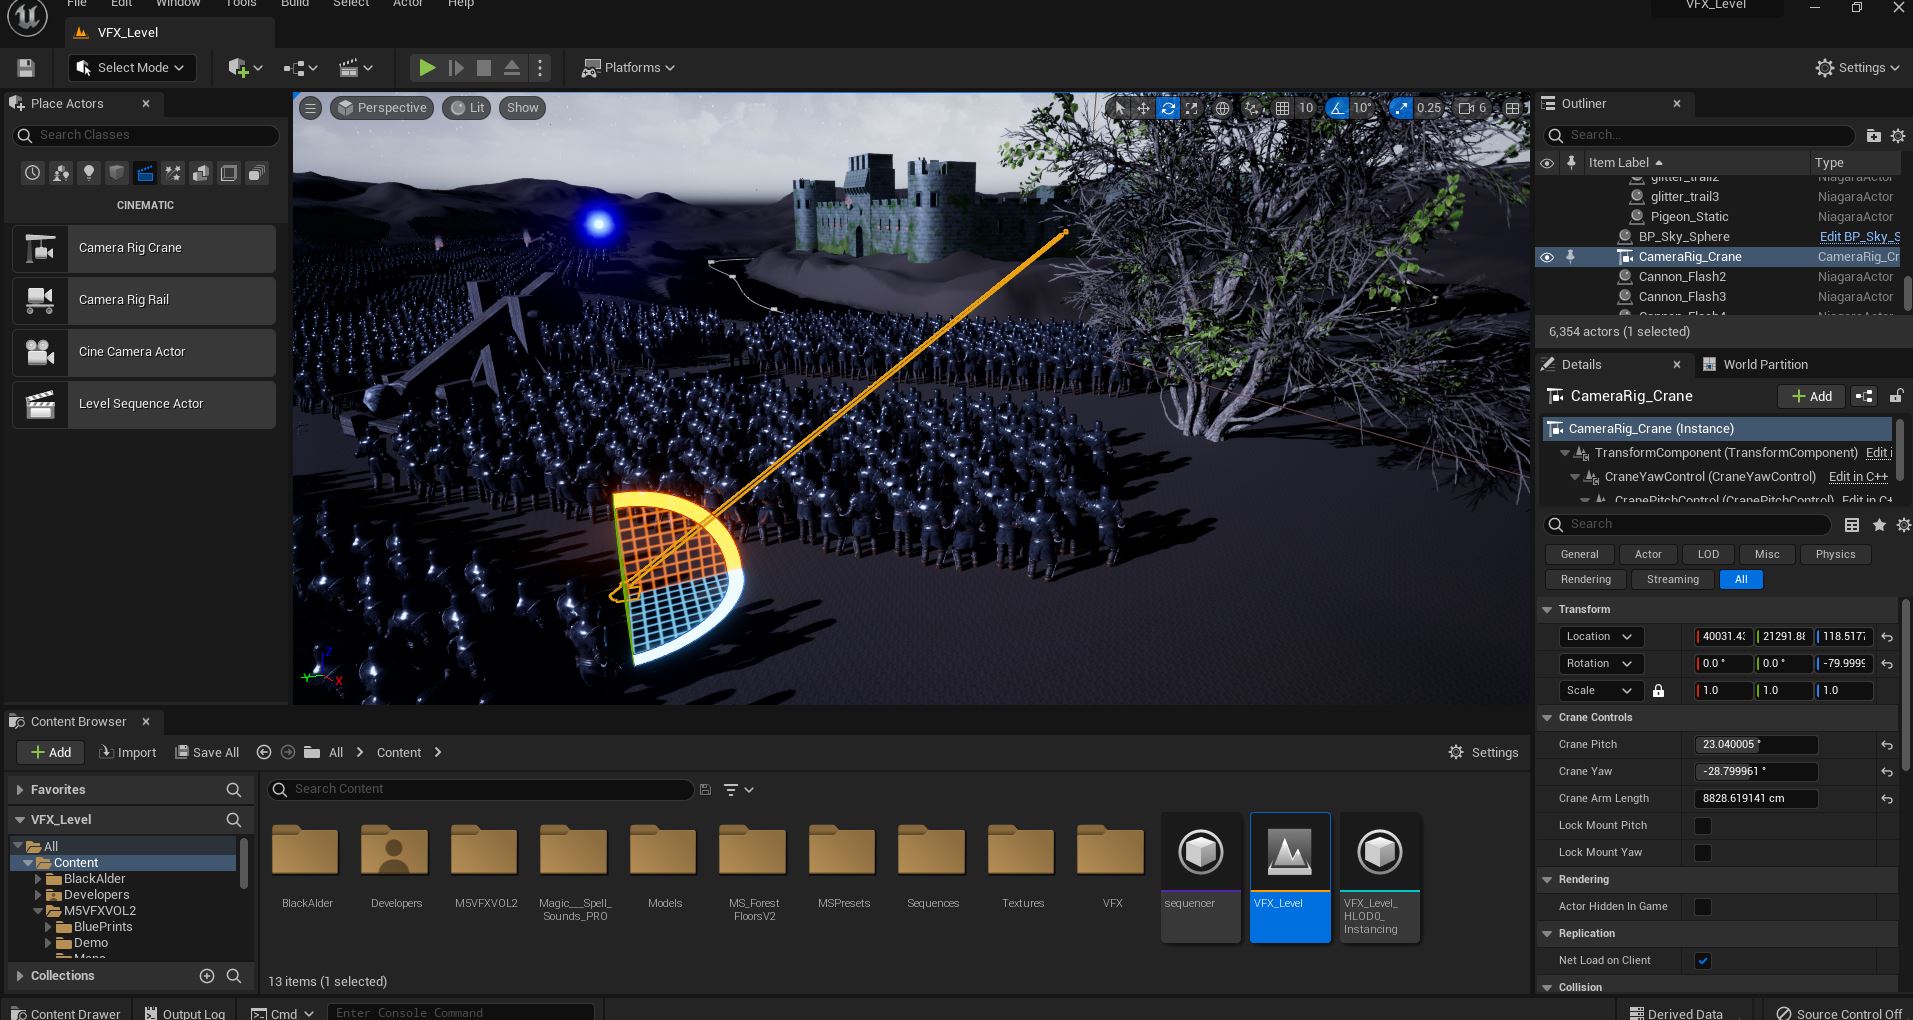
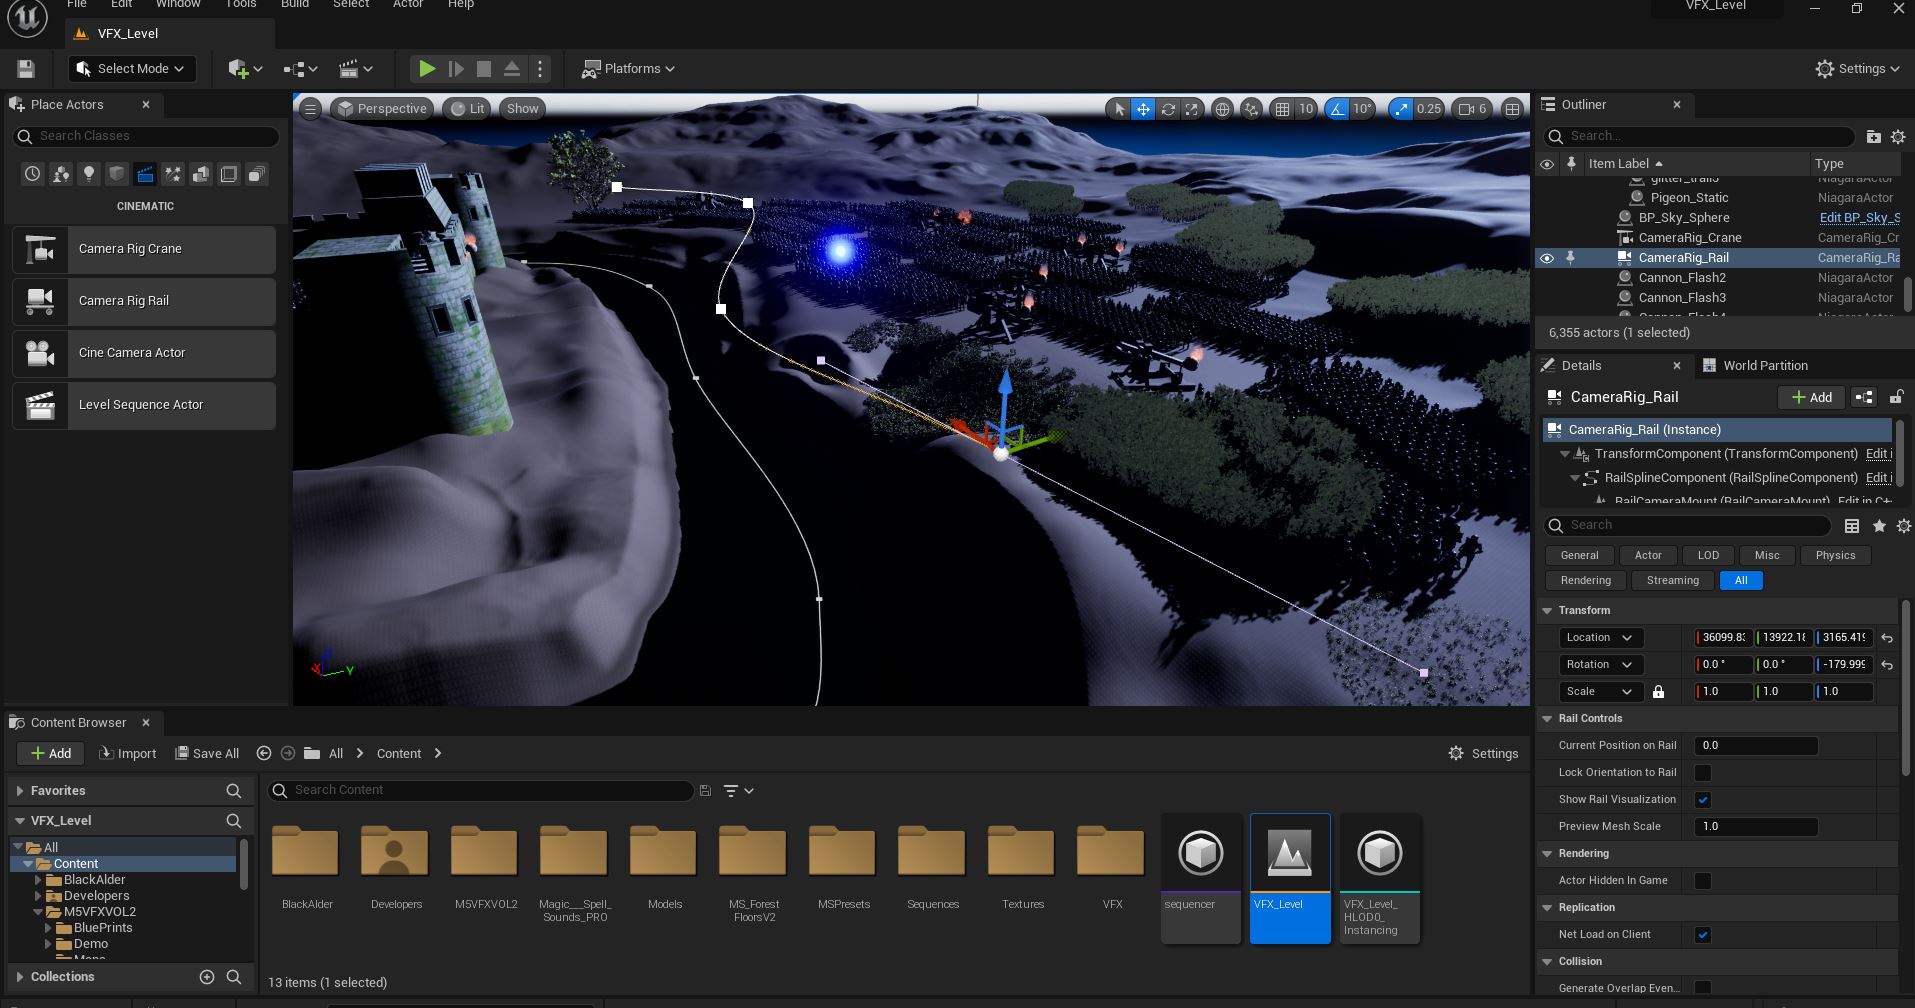
Given how most of my sequence is in essence a tracking shot the rail rig in particular will be a powerful tool. I will also make use of camera shake blueprints in key moments of my production piece (Fig.31), to sell the impact of the events on screen along with adding to the effects I place.
:: References ::
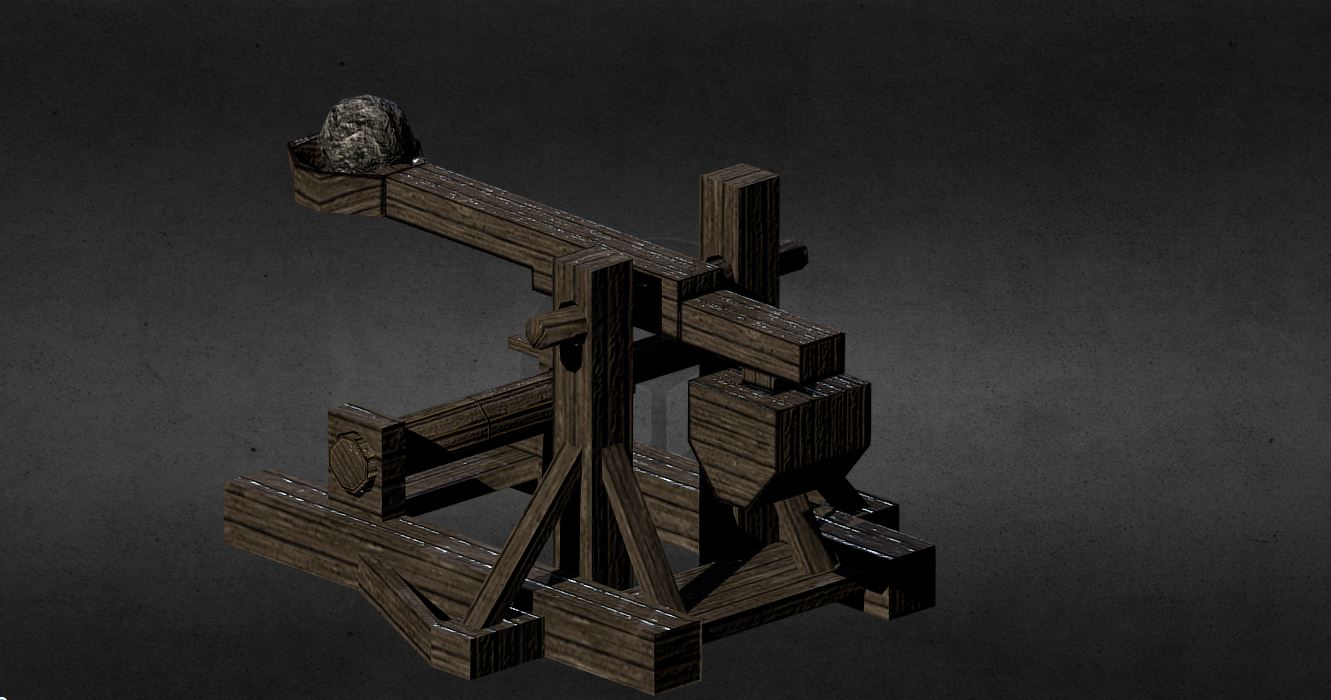
Ayden1994 (2017) ‘Trebuchet’ [3D Model] Available online: https://sketchfab.com/3d-models/trebuchet-cba06d74dac24c7eb236fb73753243a4 [Accessed 18/11/2022]
CGHOW (2022) ‘best way to create Lightning in UE5 Niagara Tutorial | Download Files’ [YouTube Video] available online: https://www.youtube.com/watch?v=igG9-xOxWFI&ab_channel=CGHOW [Accessed 16/01/2023]
Charlie Tinley (2017) ‘Low Poly Bird (Animated)’ [3D Model] Available online: https://sketchfab.com/3d-models/low-poly-bird-animated-82ada91f0ac64ab595fbc3dc994a3590 [Accessed 19/01/2023]
Epic_Tree_Store (2016) ‘Tree’ [3D Model] Available online: https://sketchfab.com/3d-models/tree-c25e5fc2bfa54d24a165a8a207c0a6d7 [Accessed 18/11/2022]
FourthGreen (2020) ‘Pigeon’ [3D Model] Available online: https://sketchfab.com/3d-models/pigeon-5884a0f5200c44ceaa7d0399bea577f9 [Accessed 18/11/2022]
Gorka Games (2022) ‘How to Make a Night Sky and a Moon in Unreal Engine 5’ [YouTube Video] available online: https://www.youtube.com/watch?v=4b33FJ6yjuE&ab_channel=GorkaGames [Accessed 10/01/2023]
JeongukChoi (2018) ‘M5 VFX Vol2. Fire and Flames(Niagara)’ [Asset Pack] Available online: https://www.unrealengine.com/marketplace/en-US/product/m5-vfx-vol2-fire-and-flames [Accessed 19/01/2023]
Medhatelo (2019) ‘Under water Castle’ [3D Model] Available online: https://sketchfab.com/3d-models/under-water-castle-0187538094694a47b9de4d1c1f61464a [Accessed 18/11/2022]
PrismaticaDev (A) (2022) ‘Making Particles Move! | Niagara [UE4/UE5]’ [YouTube Video] available online: https://www.youtube.com/watch?v=BadHGIYkrMw&ab_channel=PrismaticaDev [Accessed 16/01/2023]
PrismaticaDev (B) (2022) ‘Beginner’s Guide to Ribbon Particles [Unreal Engine]’ Available online: https://www.youtube.com/watch?v=Zn9-U5vQl3g&ab_channel=PrismaticaDev [Accessed 17/01/2023]
PrismaticaDev (C) (2022) ‘Applying Particle Forces | Niagara [UE4/UE5]’ Available online: https://www.youtube.com/watch?v=IOY0yiEvV8s&ab_channel=PrismaticaDev [Accessed 17/01/2023]
Quixel Megascans (2021) ‘Megascans Trees: European Black Alder (early access)’ [3D Asset Pack] Available online: https://www.unrealengine.com/marketplace/en-US/product/megascans-trees-european-black-alder-early-access [Accessed 19/01/2023]
Reids Channel (2020) ‘Unreal Engine 4 – Simple Candle Tutorial’ [YouTube Video]. Available online: https://www.youtube.com/watch?v=px1QxFr8wzg&t=30s&ab_channel=ReidsChannel [Accessed 17/01/2023]
Soidev (2019) ‘Lowpoly PBR Knight Armour’ [3D Model] Available online: https://sketchfab.com/3d-models/lowpoly-pbr-knight-armour-7e8485a272784e6cb3b5bda68ff319fa [Accessed 18/11/2022]
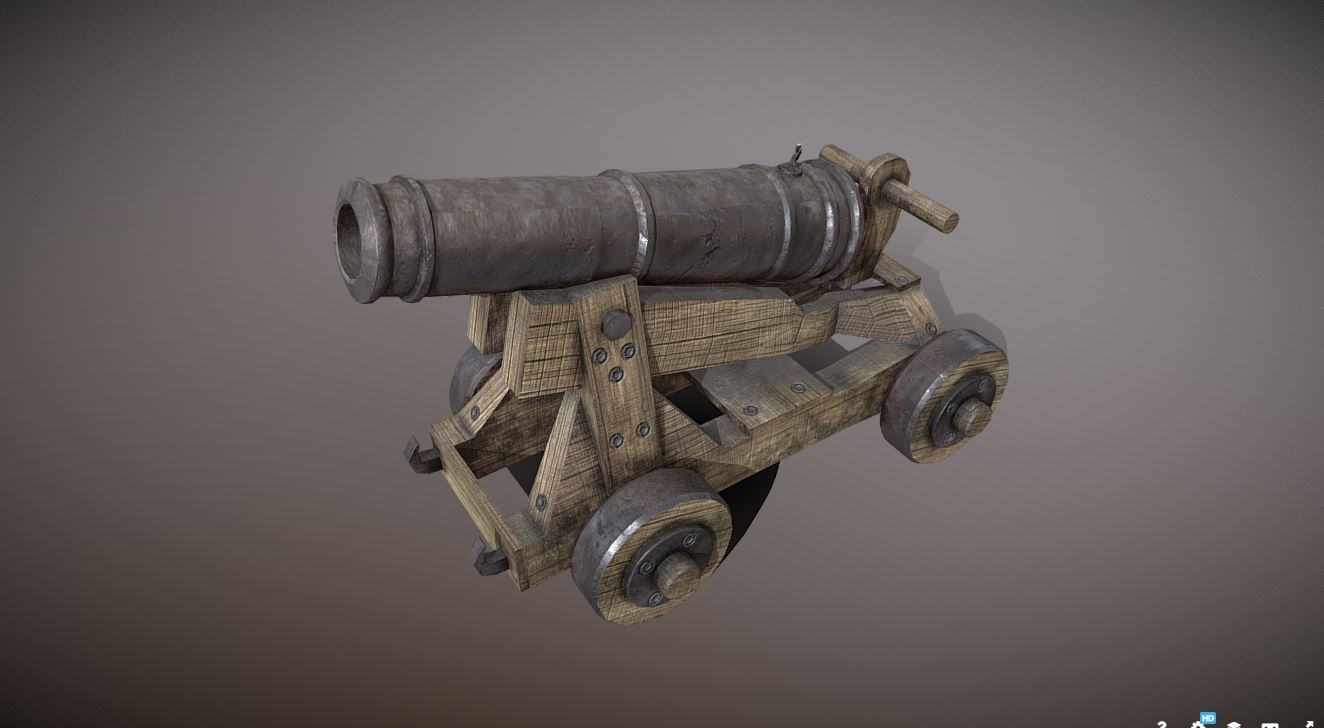
Thunder (2021) ‘Cannon’ [3D Model] Available online: https://sketchfab.com/3d-models/cannon-a6d5398c77ef436986835dea85042f4e [Accessed 18/11/2022]
Virtus Learning Hub (2022) ‘Unreal Engine 5 Water System (Buoyancy Physics, Oceans, Rivers, Lakes) | Beginner Tutorial’ [YouTube Video] Available online: https://www.youtube.com/watch?v=lxTUak5fxRA&ab_channel=VirtusLearningHub [Accessed 05/01/2023]