Now I have explored both lighting and camerawork within Unreal Engine I can move onto the final new aspect of this module. Creating the visual effects using Niagara in Unreal Engine. I require specific effects for my production piece but before I go about trying to create them I first need to explore the process of effects creation in general in order to under how to create high quality effects for my production piece.
:: What is Niagara? ::
Niagara is a subsystem packaged within Unreal Engine that allows you to create particle emitters to create a wide range of visual effects. There is another subsystem called ‘cascade’ which does a very similar job however with the advent of unreal engine 5 cascade is no longer supported the way it used to be, leaving Niagara as really the only way of created visual effects within Unreal Engine.
I have never used Niagara previously, so before I begin creating the effects I am to use in my production piece I need to come to terms with the different opportunities that can be made within the subsystem. By using videos such as the one above (PrismaticaDev, 2022) along with the materials on canvas I am going to explore a few of the basic methods used in Niagara to create its visual effects.
:: Sprite Particle Emitters ::
The most common visual effects, sprite particle emitters make use of the sprite renderer to spawn image particles. These manipulate static sprites, whether that be a 2d image or taken from a sprite sheet these are very effective at creating effects to fill a scene. They also don’t add too much stress to the game engine, which ensures that the game engine can run smoothly.
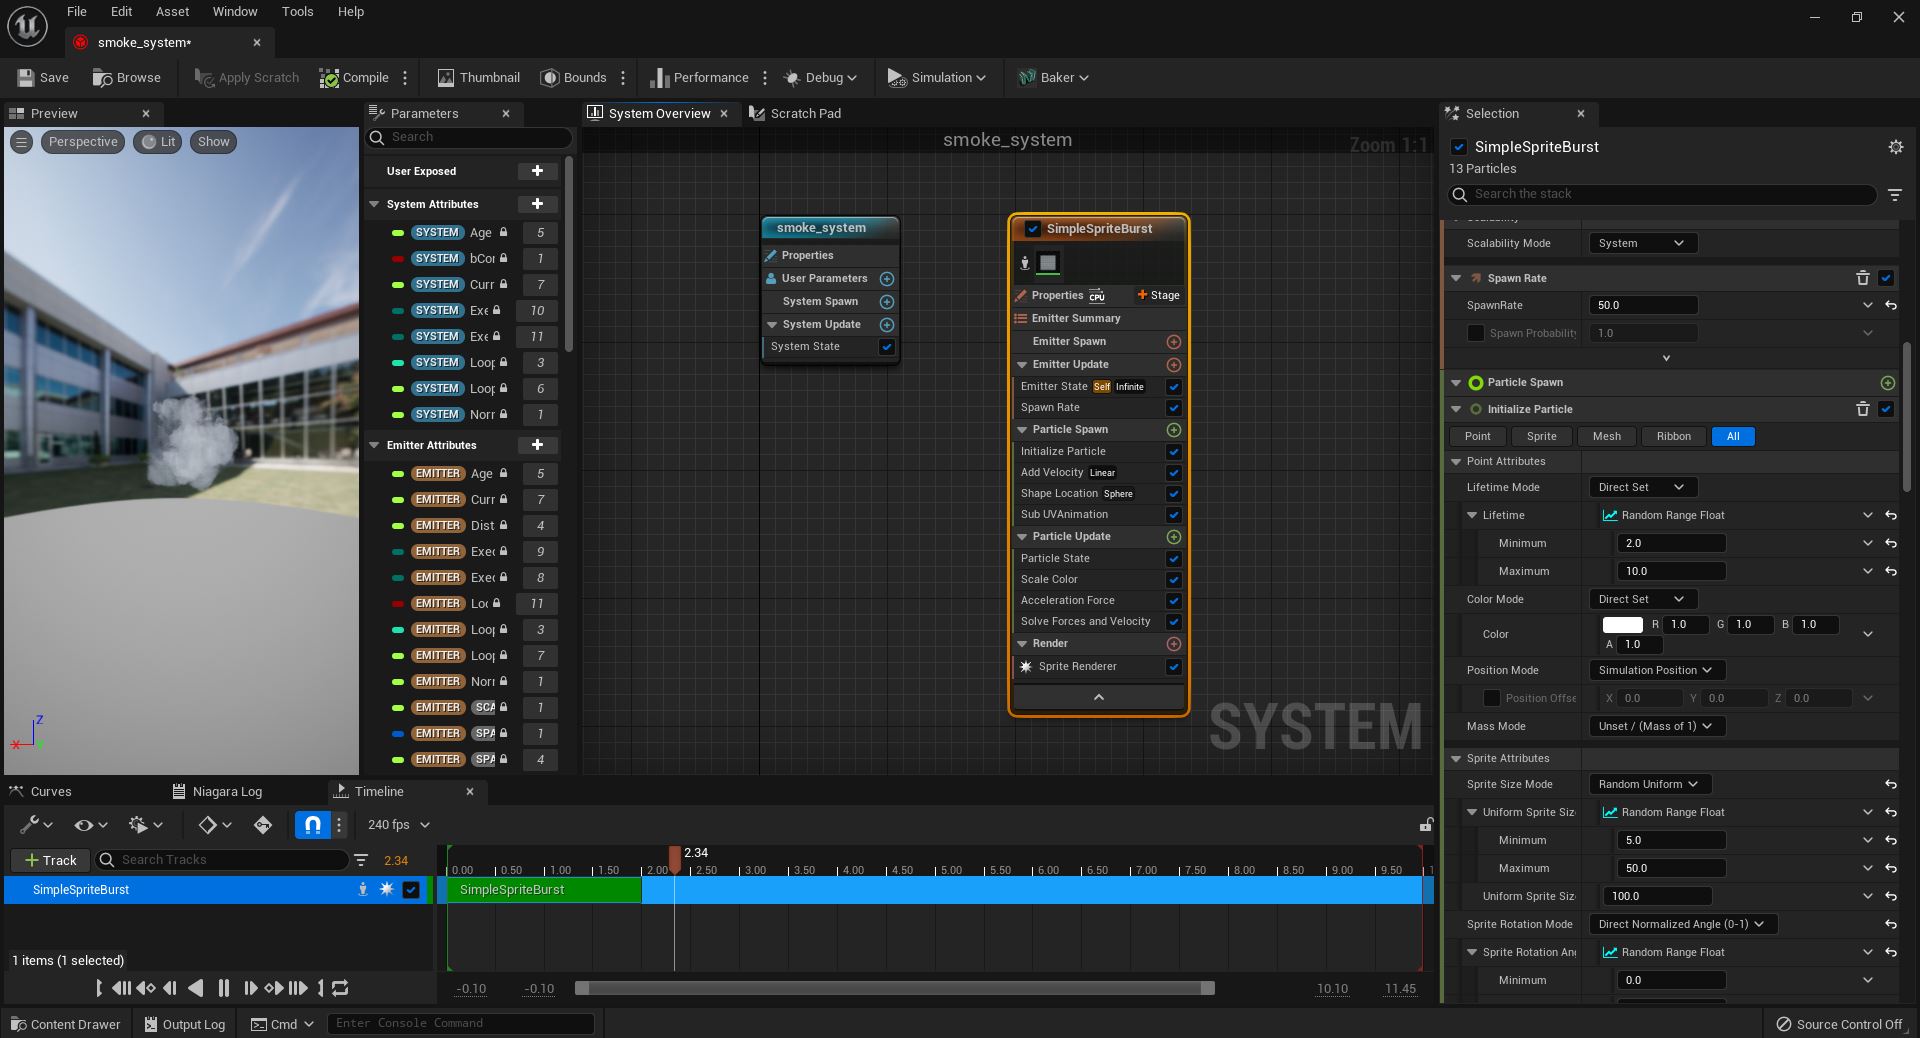

Following the canvas tutorial to create a smoke emitter I explored nodes such as ‘acceleration force’ in the particle update section, as well as adding nodes such as ‘velocity’, ‘shape location’ and ‘sub UV animation’ within the particle spawn section of the effect.
The sub UV animation node was especially important with an emitter such as a smoke pillar as it allows for variation in the sprite image used. Meaning that when the sprite is taken from a sheet of five different smoke sprites there will be variation in the images spawned, making the effect look much more lifelike.
:: Mesh Particle Emitters ::
Next I explored mesh particle emitters. Which while functionally almost identical to the sprite emitters they spawn 3d models instead of 2d image materials. This would benefit a game if the player camera is to see an effect close up or in great detail as the objects spawned are as detailed as the 3D model spawned. However, naturally demanding the engine spawn and despawn a bunch of 3d models with mesh data is a lot more taxing than asking it to spawn a simple 2d sprite image. So they are to be used only when the added detail is absolutely vital to the visual.
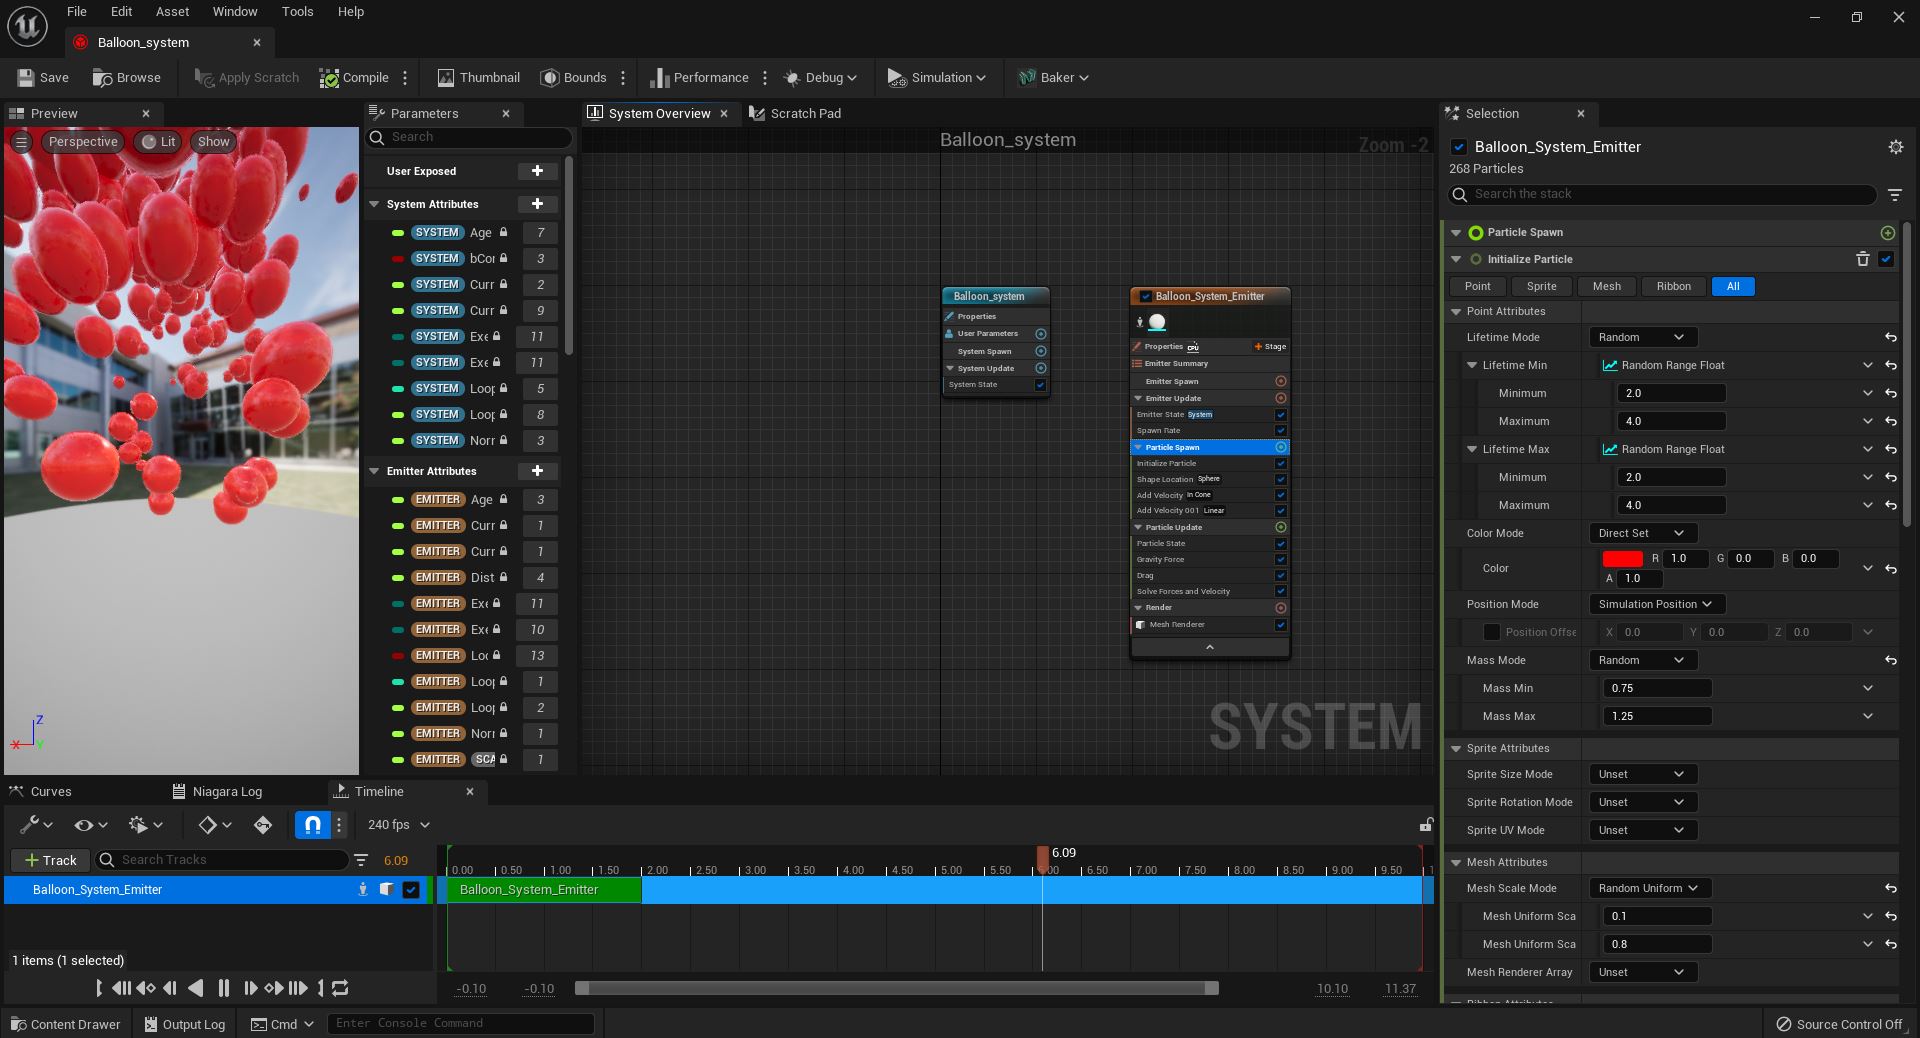
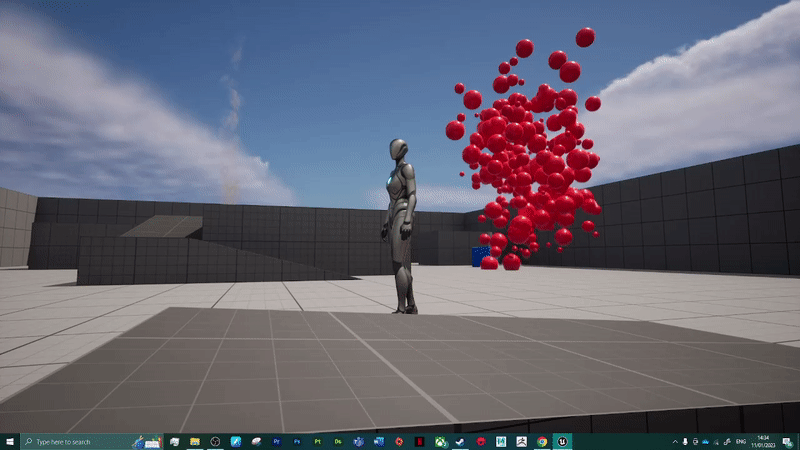
The example shown on canvas takes you through creating a balloon system. Using many of the same nodes as the sprite emitter but with more variation amongst the mesh sizes than in the smoke sprite column. I also experimented with the size of the spawn sphere to increate the radius the mesh balls would spawn and used more random range floats in order to add more variety amongst the various models.
:: Lighting Effect ::
Finally, I explored using the light renderer. This was especially important to explore as for my final piece I will almost exclusively be using sprite and light emitters to create things like glowing trails through the sky and explosions. These emitters again make use of the same nodes as the mesh and sprite emitters but with the addition of dictating things like the glow of the particles.
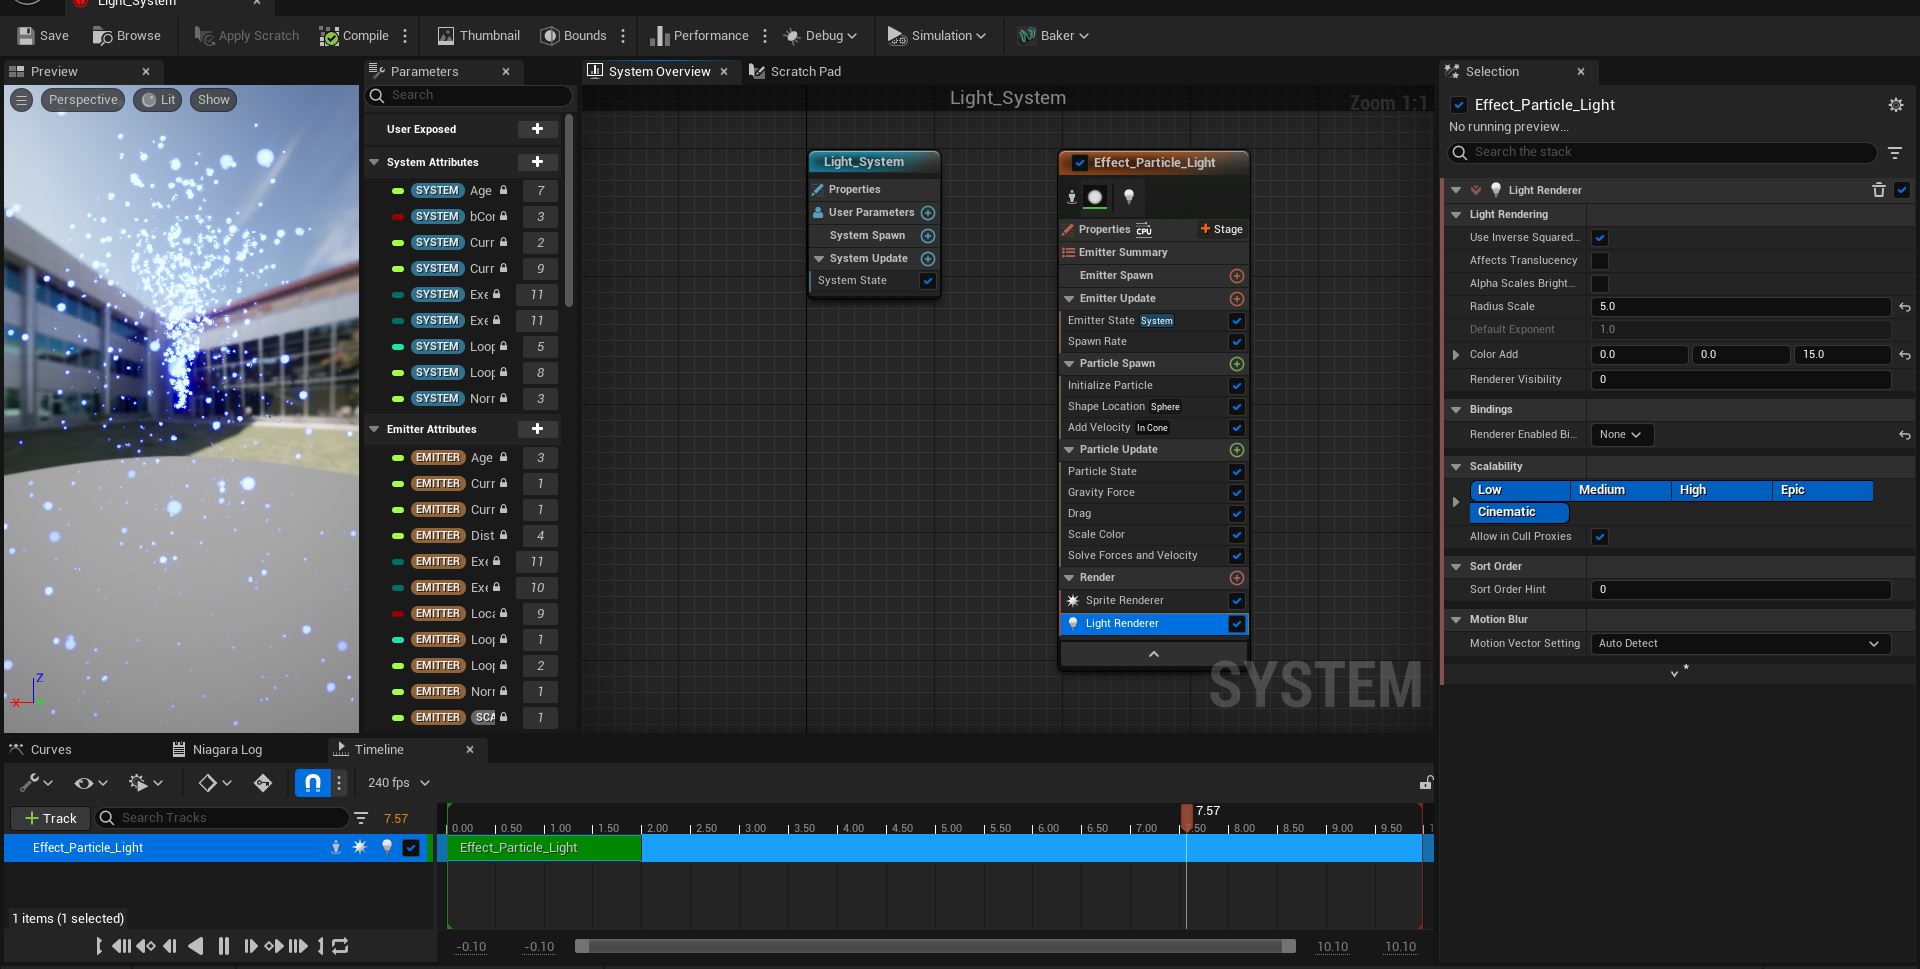
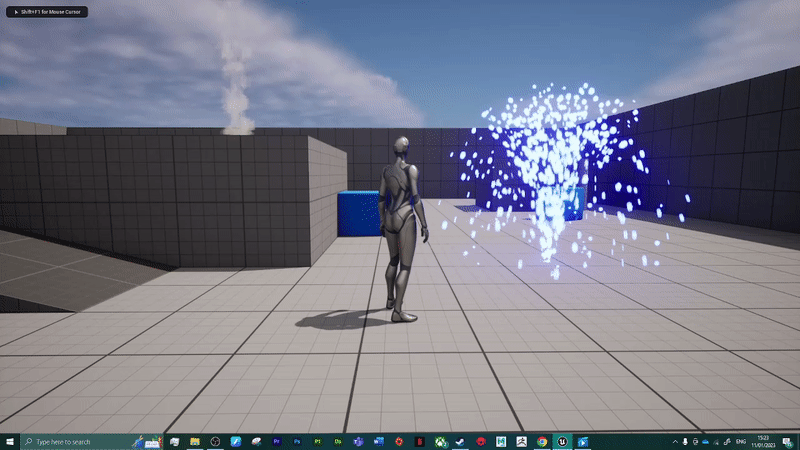
The canvas tutorial showed a simply fountain emitter, altered to produce sparks of glowing light instead of simple sprites. While the effect is nice, I will need to explore how to get the particles to follow a dictated actor within a scene for my final piece.
:: What Effects do I Need for my Sequence? ::
Below you can find a list of the visual effects I intend to create for my final piece. Most of these will require the use of sprite sheets, so I will likely further explore the nodes I can use to create interesting sprite emitters further when I begin production.
Flaming Rock (Smoke generator, large flame generator. Flame needs to stick to rock asset)
Wick flame flicker (Needs to follow down wick
close)
Lightning strike (Large effect, small particles around impact. Pale smoke around impact)
Glittering Trail (Needs to follow bird asset)
Rock Impact (Smoke effect with VFX rock particles from wall)
I will also need to combine renderers such as light and sprite renders to create effects such as lightning bolts, which is something I will need to further explore when production begins. Naturally this list is subject to change as I further explore effect creation. I will also need to balance the effects created with the scene, as stated previously I don’t want the final video to be a wash of various colours and effects but I do also want the focus of the piece to be the effects I create.
:: References ::
PrismaticaDev (2022) ‘Intro to Niagara Particles [UE4/UE5]’ [YouTube Video] Available online: https://www.youtube.com/watch?v=04k9JDx-KTM&ab_channel=PrismaticaDev [Accessed 10/01/2023]