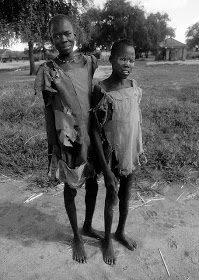
As mentioned in my character personality post I want to show my character as a slave in poor health, imprisoned by some unseen master. While I can show my character malnourished using just the body structure, I feel like showing them to be a slave will come with the accessories given.
:: Accessories ::
Firstly, I want to add chains to the characters wrists and ankles (REF.1). Now the assignment requires the character to be positioned in a T pose, leaving me with two options. Either I have the various cuffs chained to each other with a long enough chain that the character can still spread their arms. Or I show the chains to be broken, leaving just the cuffs in place with dangling chains attached. To me the latter is obviously more logical than the former and will help hint to the characters power which I want the audience to see.
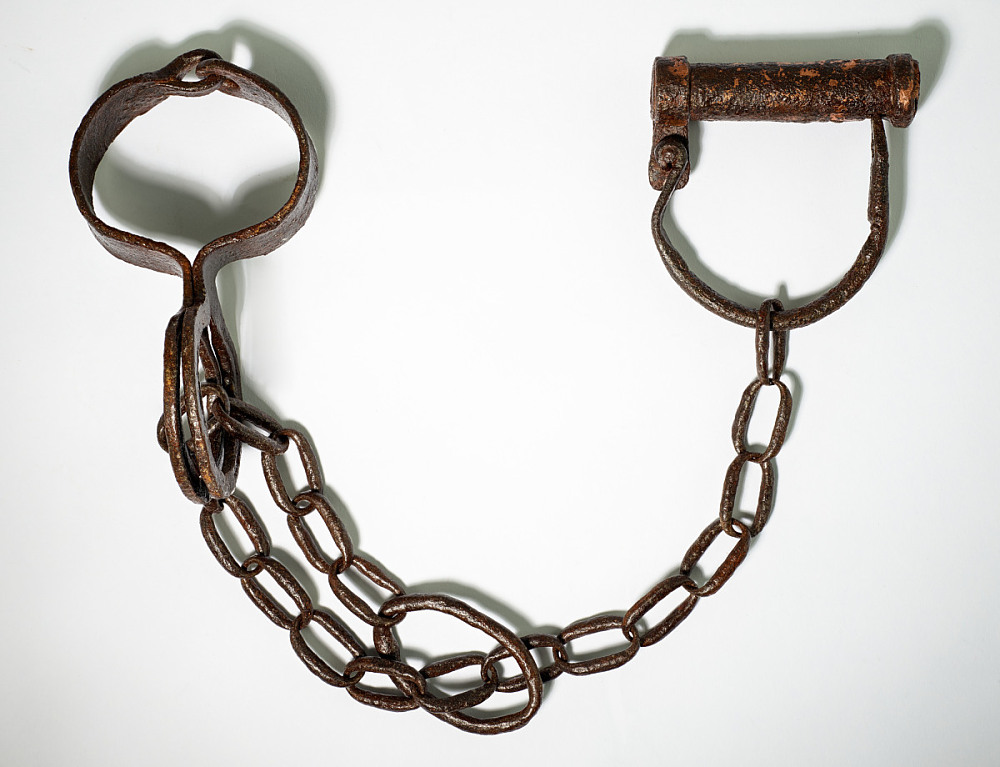
REF 1. – Americanhistory.si.edu (n.d.) 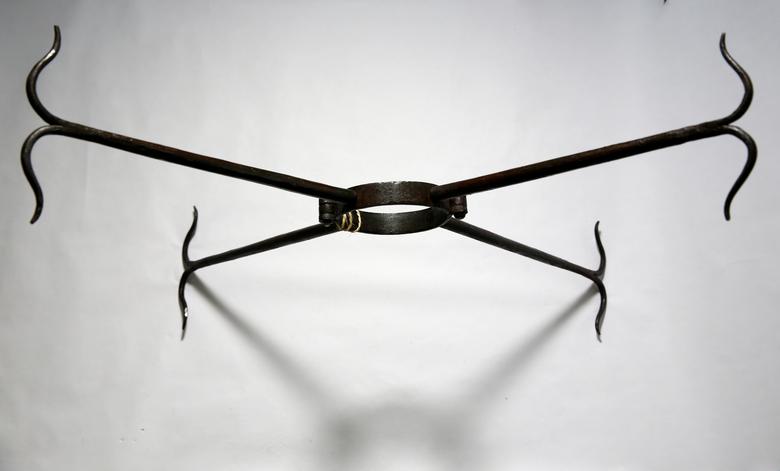
REF. 2 – Reuters (2019) 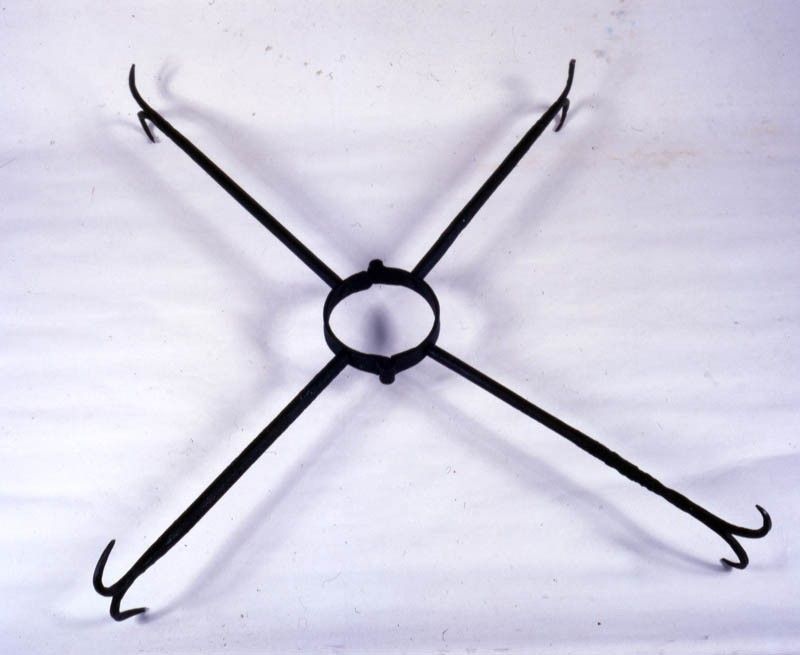
REF. 3 – abc ict10 (n.d.) 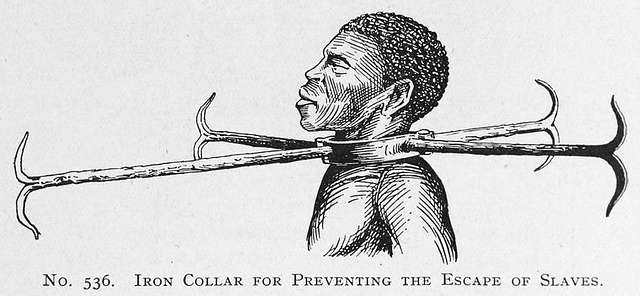
REF. 4 – Picryl (n.d.)
I also want to give my character a collar, which I feel is the most obvious sign that the character is enslaved. While cuffs could potentially make the character look like a criminal rather than a slave, by adding a collar this becomes visually obvious. There are various collar designs, some of which go up over the face, however I don’t know how well that would interact with the characters hair, and I don’t want to cover up the work I do on the characters face. As such I will follow the design shown above (REF.2/3/4). Where the spikes protrude outwards from the neck.
This will help make the character seem imposing, by adding width to an otherwise very tall and thin design as well as giving a visually striking element. Which I feel will be needed as I do not intend to give my character any weapons other than the claws.
:: Production ::
I did originally intend to produce the accessories for my character after I had fully textured the rest of the character. However, over the Christmas break I found myself stuck with the polycount of my character, and while I waited to organise a meeting with my lecturer I produced the accessories for the character. The only issue with this is that I would be making the accessories without using the character model for scale. This will be a problem more for the shackles than it would be for the collar.
I would have liked to try to create the accessories in ZBrush, but I was on a tight time constraint and as the accessories were all non-organic hard surfaces I could achieve a good result solely using Maya, which I am more comfortable with having learnt the software last year.
:: Collar ::
Naturally the first step to creating the collar was to import my references (Fig.1) Now, the references I could find were not of the best quality as they were not directly looking down or to the side of the object. Which meant using them to determine how long the arms would be was tricky. But they would still come in useful for other things.
I began by modelling where the collar would close (Fig.2), I was not going to try to actually make a open and close able collar as this would just drive the poly count of my final character up and I didn’t think the viewer would even notice If I worked to do so. I also imagine the bake would have been much more complex by creating a model that had overlapping geometry.
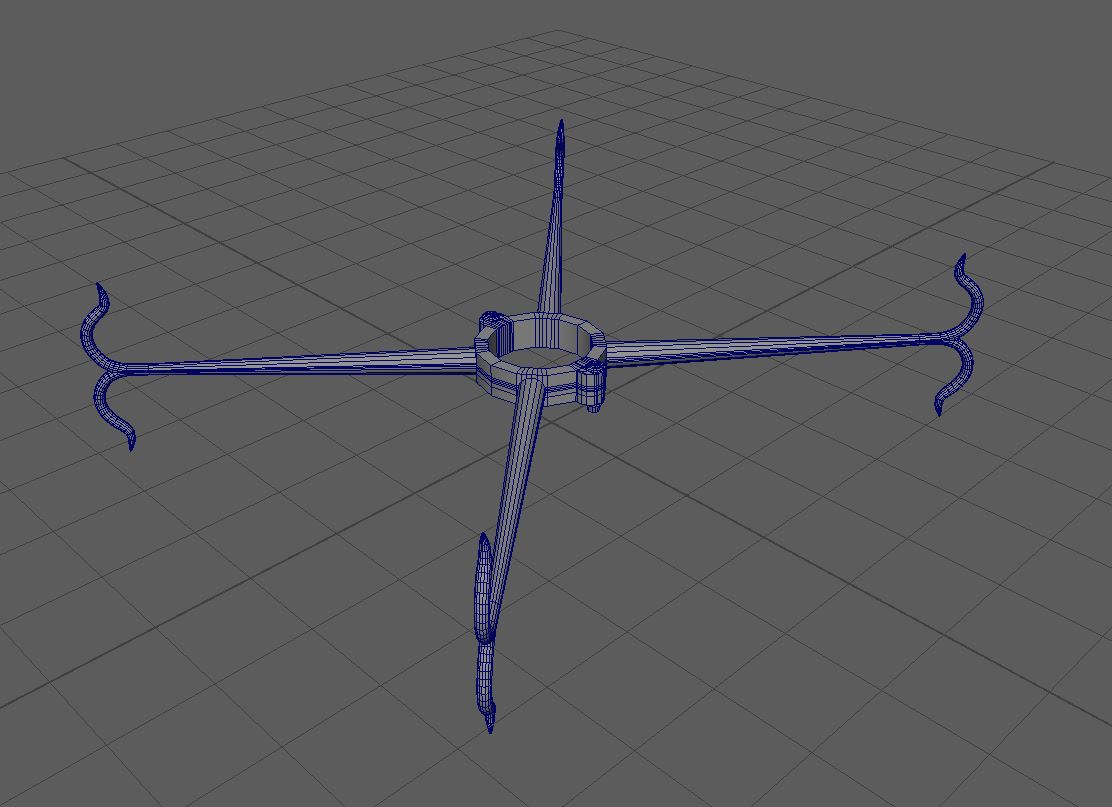
The arms were the most important part of the collar design, and I suspected it would be a challenge making the split tip of the collar. I began by creating a curve, using one of the references shown above to scale the bends of the curve (Fig.3). I then just had to extrude along the curve (Fig.4) and use the soft select on the top row of vertex to make the fingers end in a point.
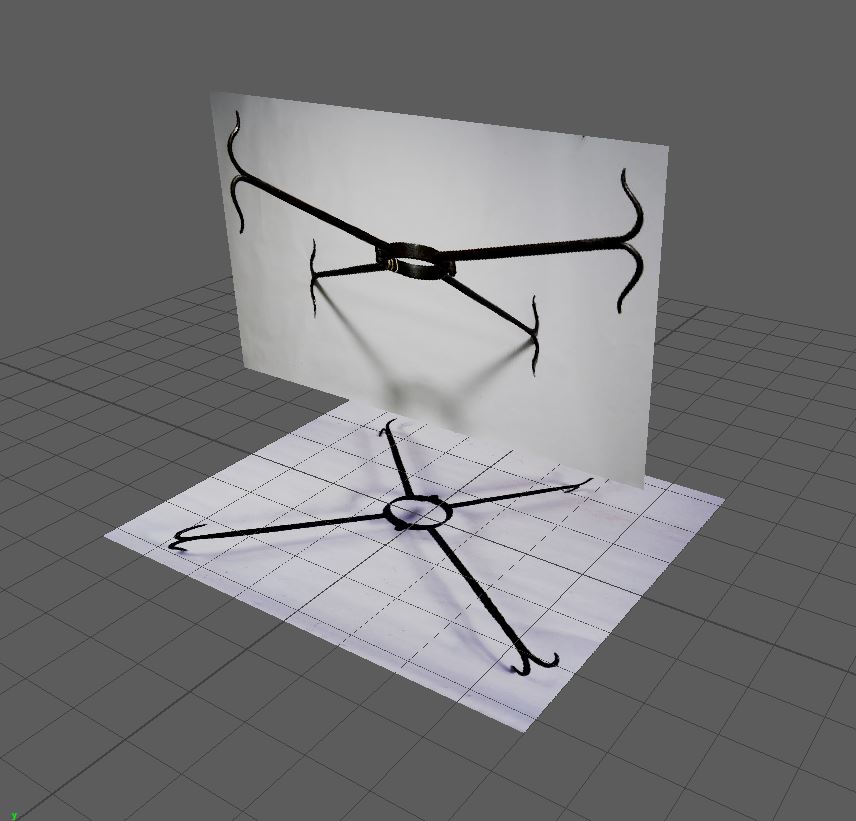
Fig. 1 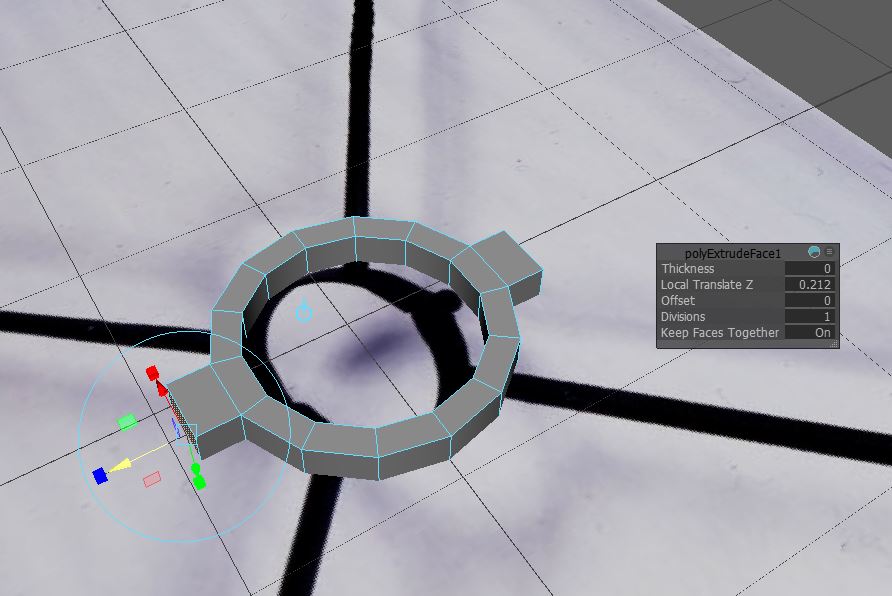
Fig. 2 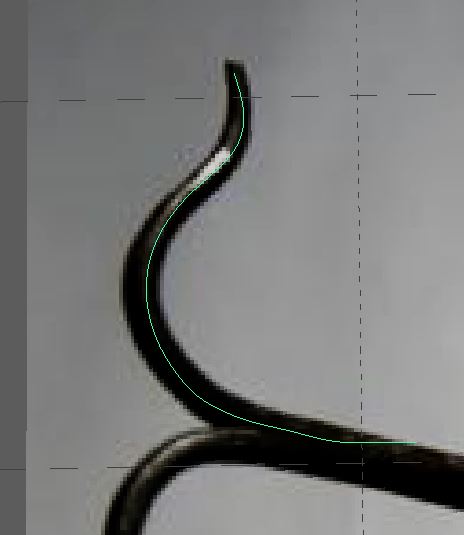
Fig. 3 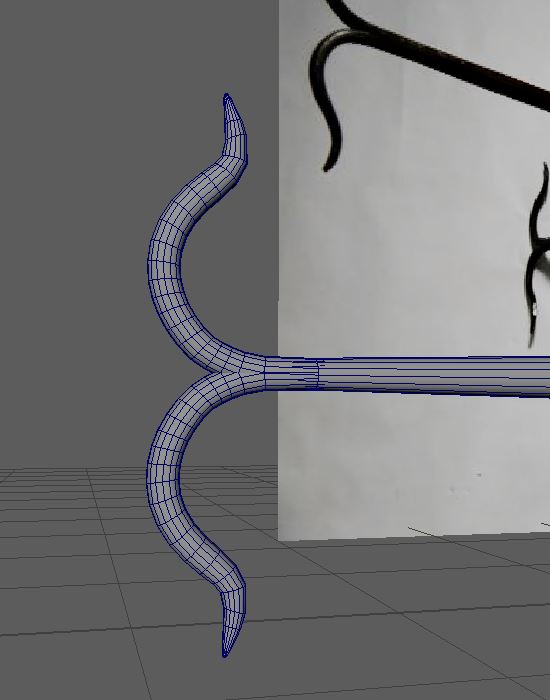
Fig. 4 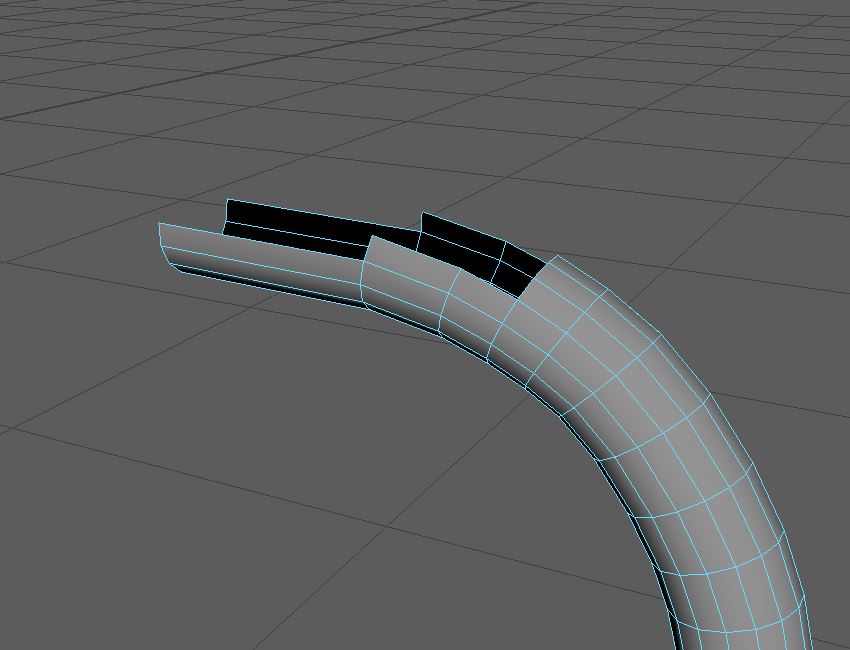
Fig. 5 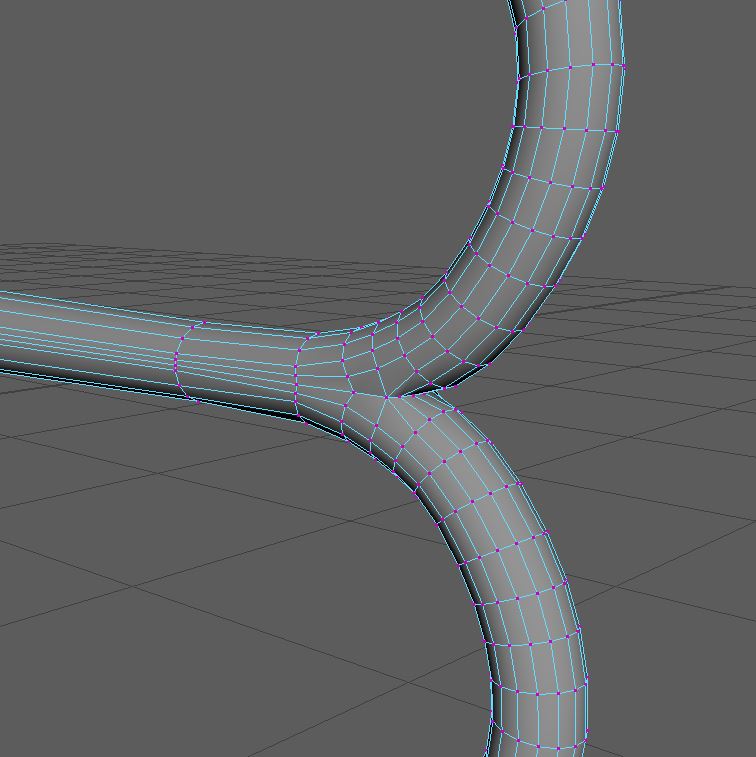
Fig. 6
Now came the more technical part of the asset. There would be a lot of overriding geometry that would need to be fixed. I originally thought I could simply Boolean the fingers and the arm together. But I knew from my previous experience with Maya that Boolean is very destructive to the geometry of an asset and would require a lot of cleaning up afterward.
I decided to manually stitch the pieces together. I did this by deleting the overlapping faces of the arm and two fingers (Fig.5), before stitching the various vertex together using the target weld or weld to centre options in order to give my asset clean geometry even with the unusual shape (Fig.6).
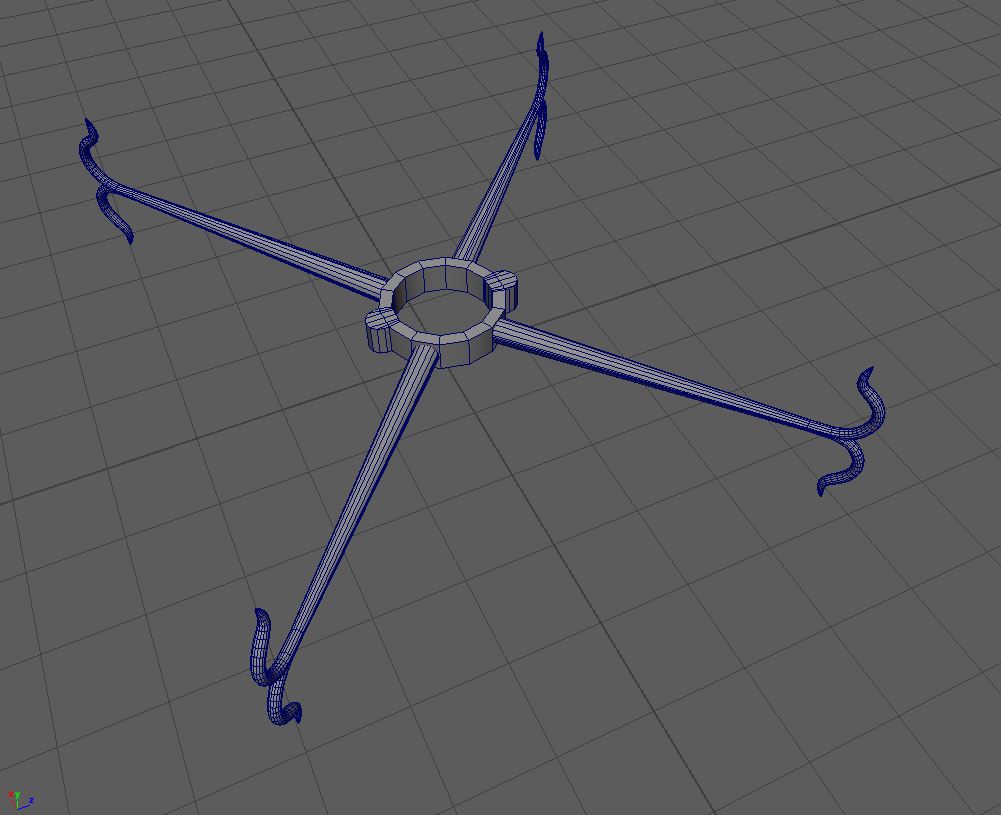
Fig.7 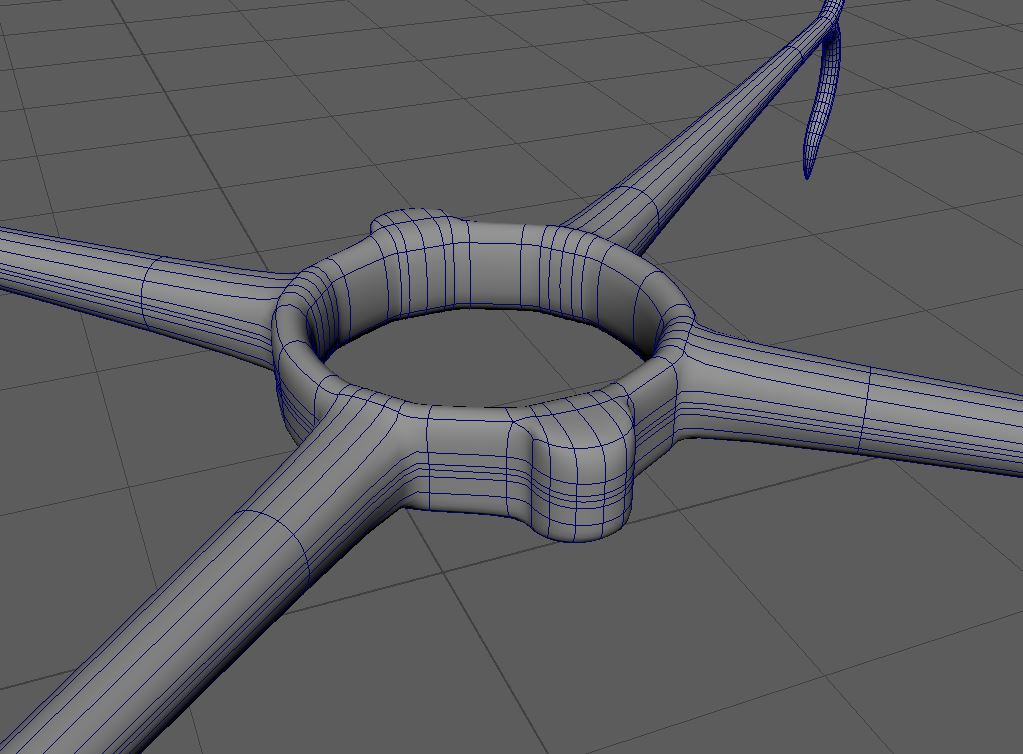
Fig.8 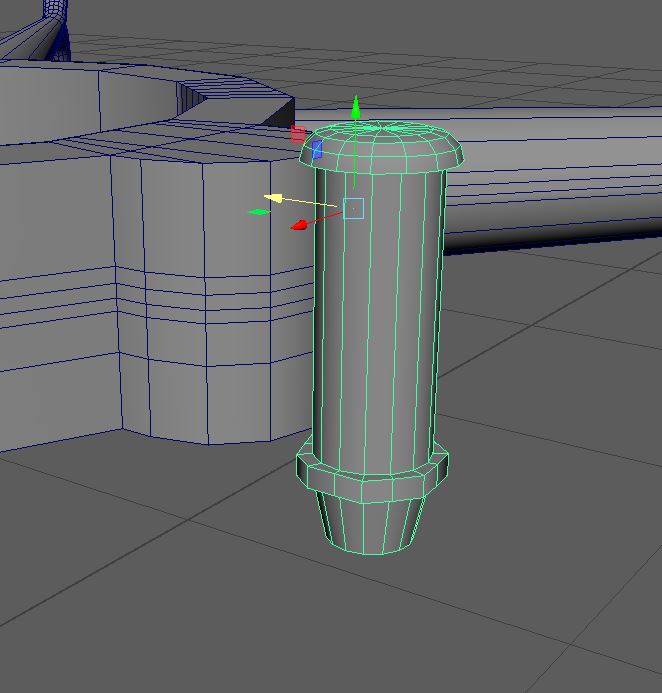
Fig.9
Next came the question of how to attach the arms to the collar. There was as far as I could see two ways of doing this nicely. One way would be to create a gird of lines on the faces of the collar where the arms met, circularize the mesh and then stitch together the arm and collar as I did the fingers. This might have worked but it would really drive up the poly count of the object and as the collar was already higher poly than I would like I didn’t think this the best option.
I decided to use Boolean to attach the arms to their collar faces (Fig.7). I hoped this would help keep the poly count reasonably low and I wanted to become more comfortable with the method as I do tend to avoid using Boolean at all costs because of the damage it tends to do to my geometry. I do think in hindsight however I would have been better off using the circularize mesh method. As I had to add a lot of edge loops to the model to clean up the geometry after the Boolean anyway. (Fig.8)
I then created the bolts that would complete the model. Which I did by using the same Boolean method that I did for the arms. This meant more cleaning up of the geometry was in order before I could consider the model complete (Fig.9)

Fig. 10 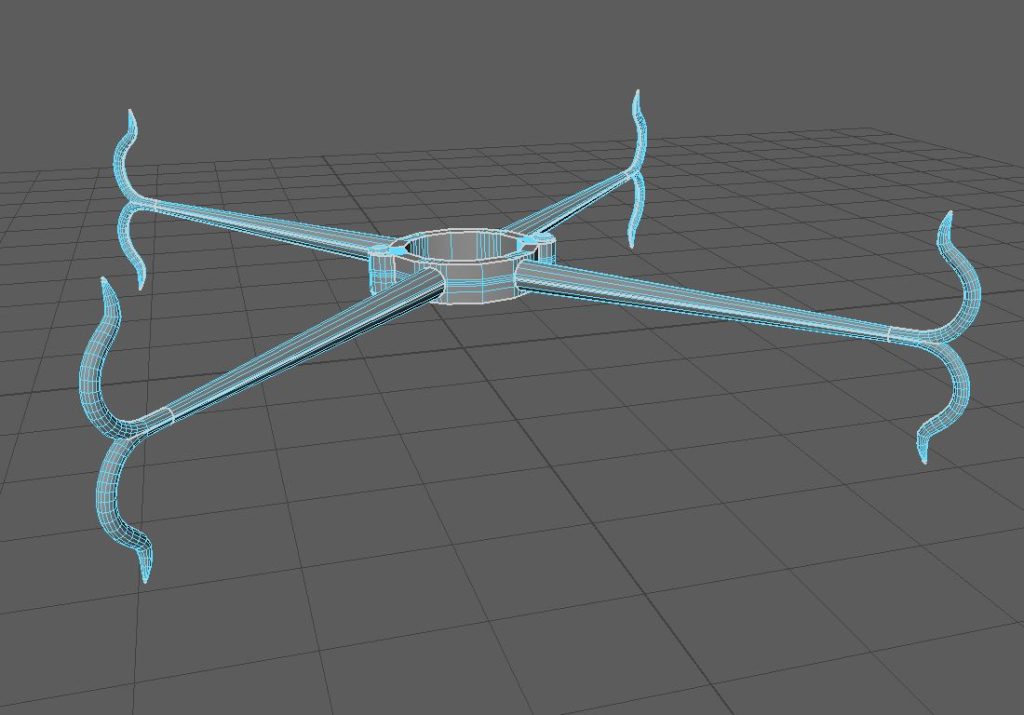
Fig. 11

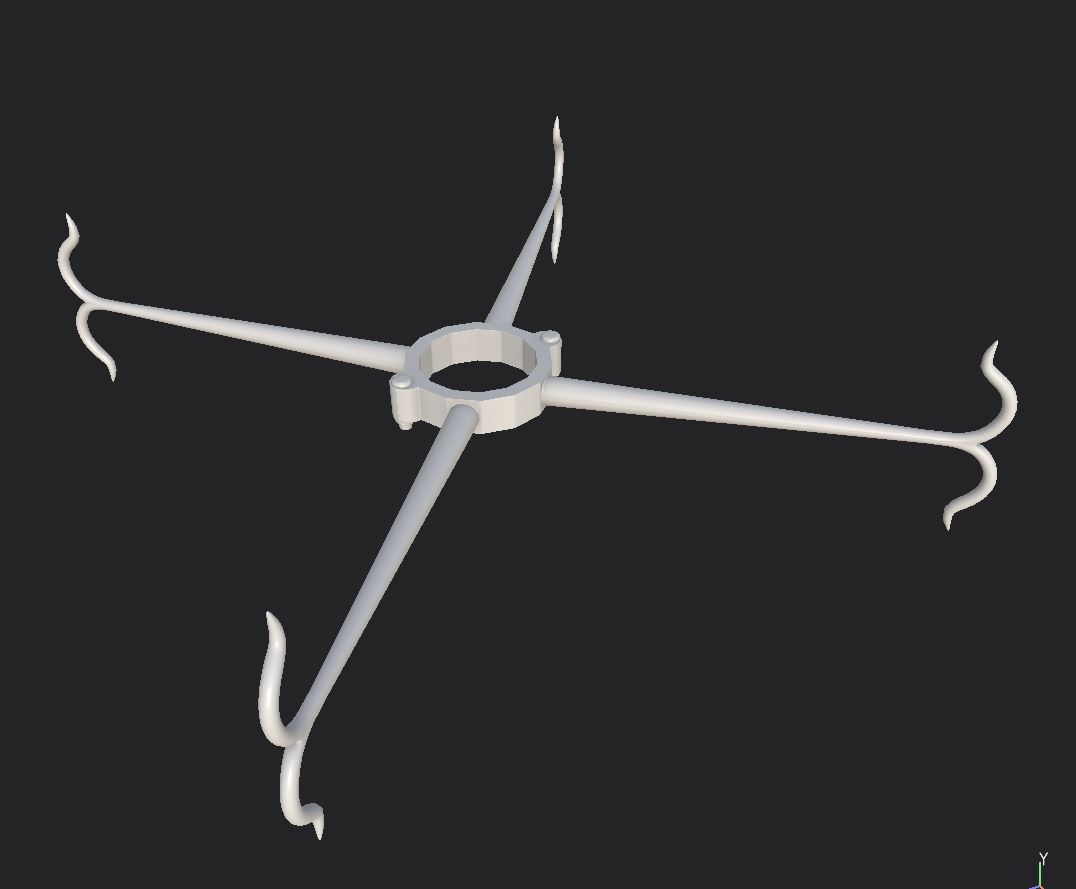
Here, you can see how high poly the model was even before I added the supporting edge loops and smoothed the model (Fig.10). I did try topologizing the asset however that would always damage the curve of the fingers, even when upping the poly count to high poly levels. I did also try remeshing the model, however even though I told the process to retain the hard edges it really struggled to keep the silhouette intact.
Ironically enough, I imagine if I had made the asset in ZBrush then I could have used Zremesher and decimate and probably ended up with a lower poly asset which would fit the silhouette of the high poly shape.
I manually UV’D my asset as I didn’t feel like using the automatic function would result in a clean result (Fig.12). Once I had my UV layout it was time to take the asset into Substance to texture it. Now, I was very aware that by texturing now I was driving up the number of UV maps the final character would use. I still must make the cuffs for the hands, ankles and the chain. Which will each share another UV map. This means that the final character may have three of even four UV maps depending on how I can bake the clothing I have created.
One good thing about having a relatively high low poly model was that the bake of the asset worked very well (Fig.13). There were no errors with the curves of the fingers which I was worried about and other than some visual errors around the circular parts of the bolt (Fig.14) there was no visual errors to detract from the visual.
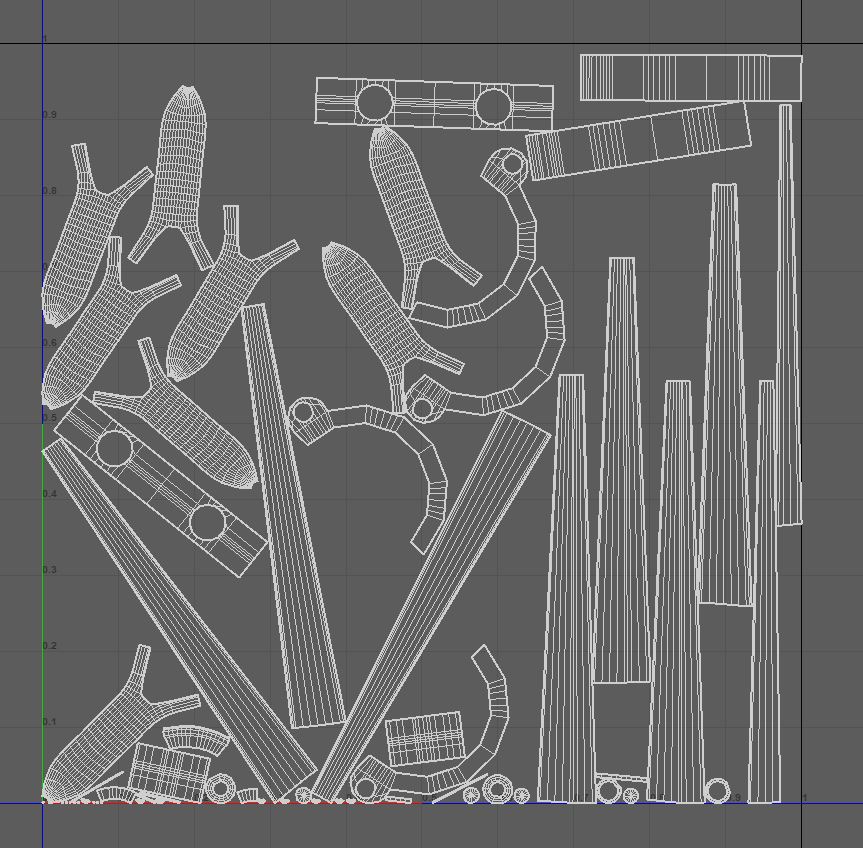
Fig. 12 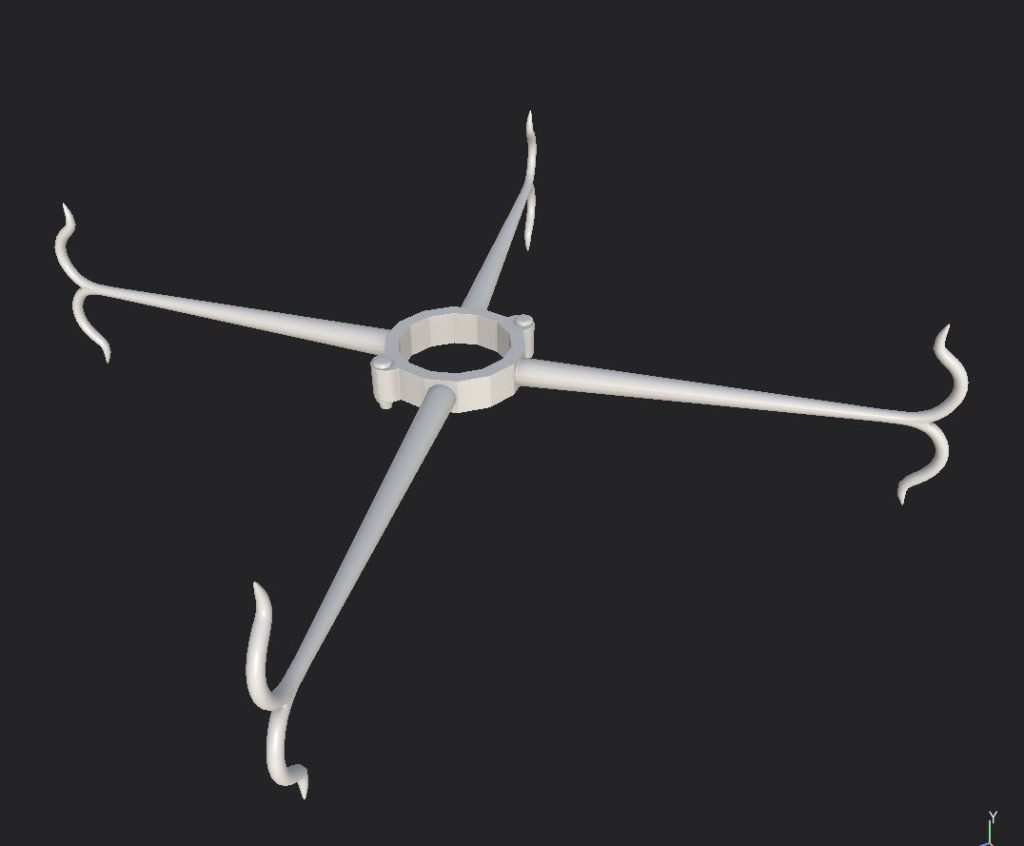
Fig. 13 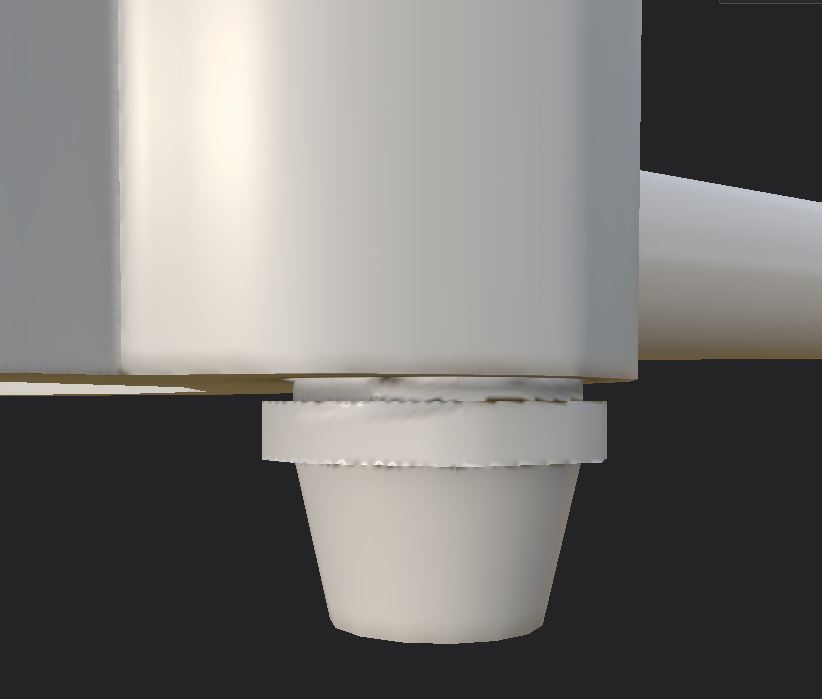
Fig. 14 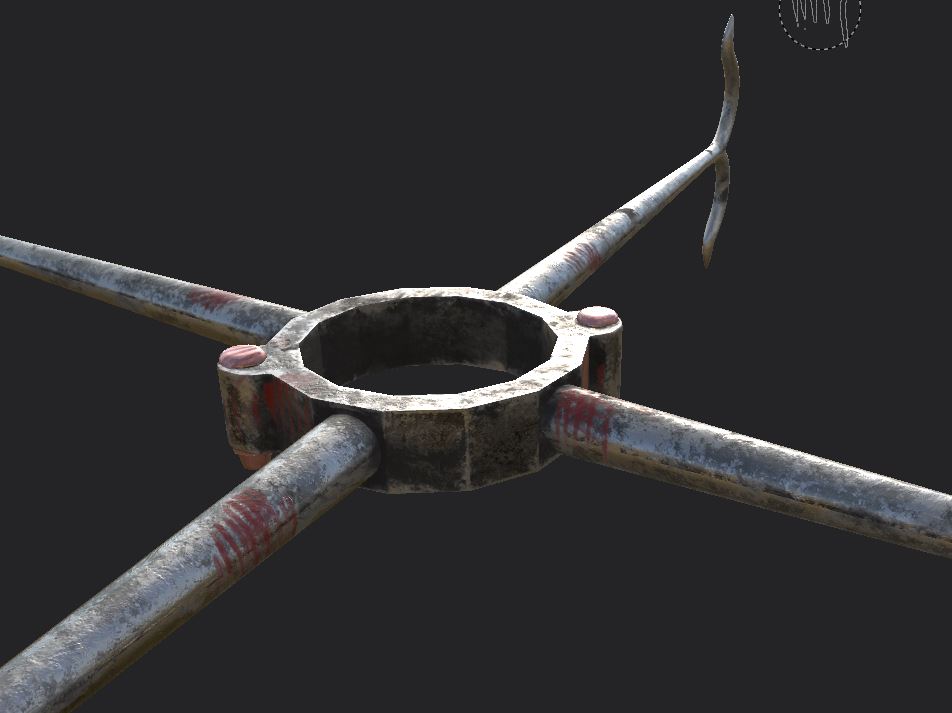
Fig. 15 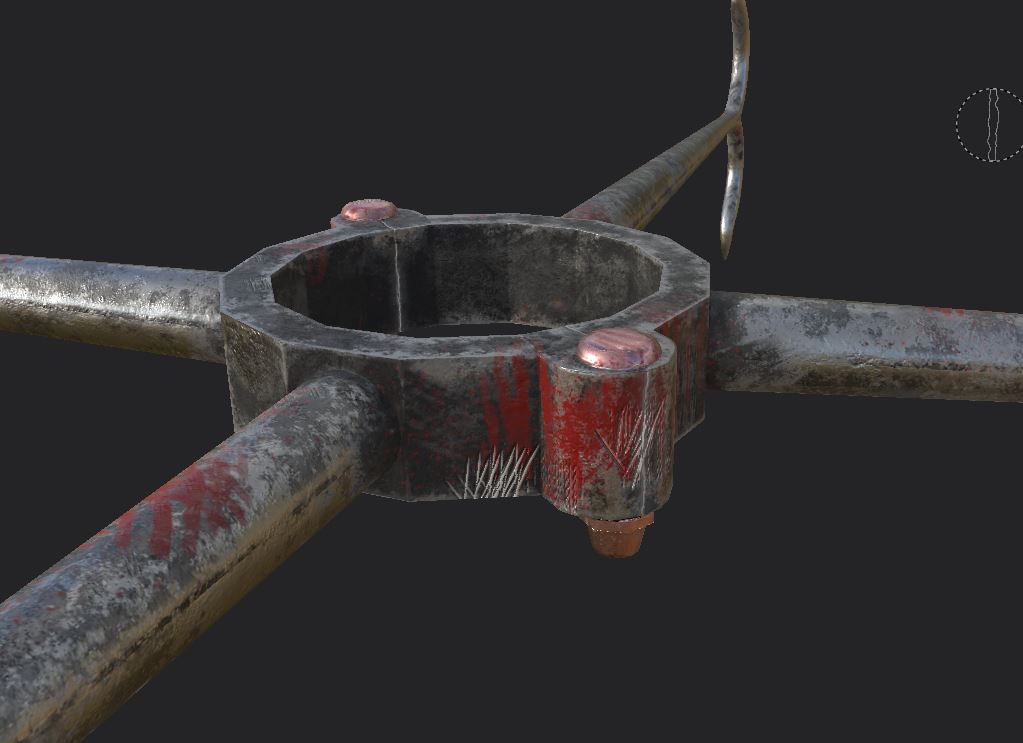
Fig. 16
I didn’t want to go overboard with the texturing of the model. I used a damaged steel smart material for the majority of the model (Fig.15) I then used a normal steel mask for the bolt which I changed to a contrasting copper colour (Fig.16).
Below you can see the renders of the asset. I am disappointed at how high poly the model ended up being (Fig.17, 18 & 19) but I do think the final visual is what I was hoping for. I really wanted to add as much visual storytelling as possible into the asset which is where the blood splatters and scratches come in. I wanted to make it seem like the character would have tried to take the collar off before but was unsuccessful.
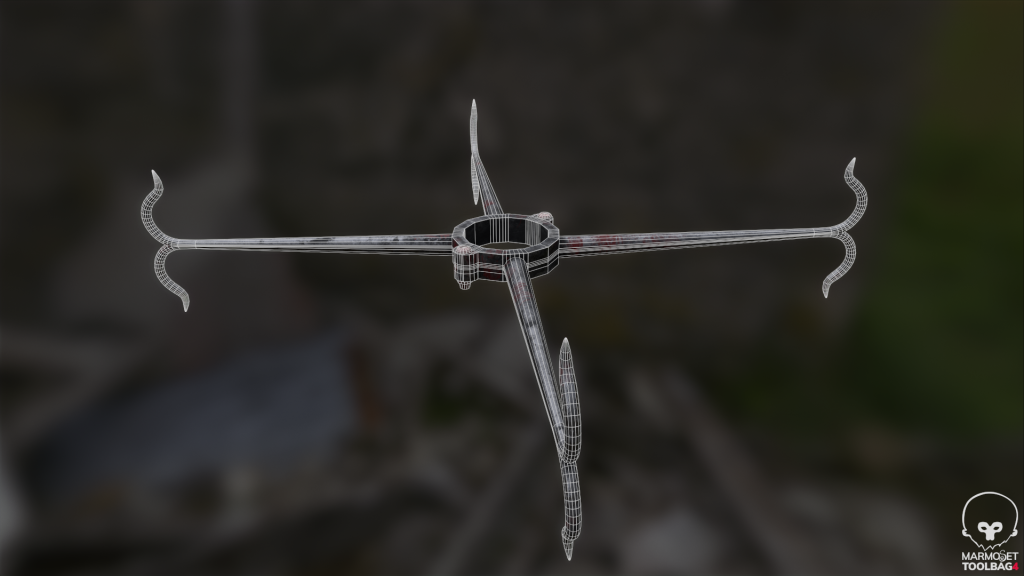
Fig. 17 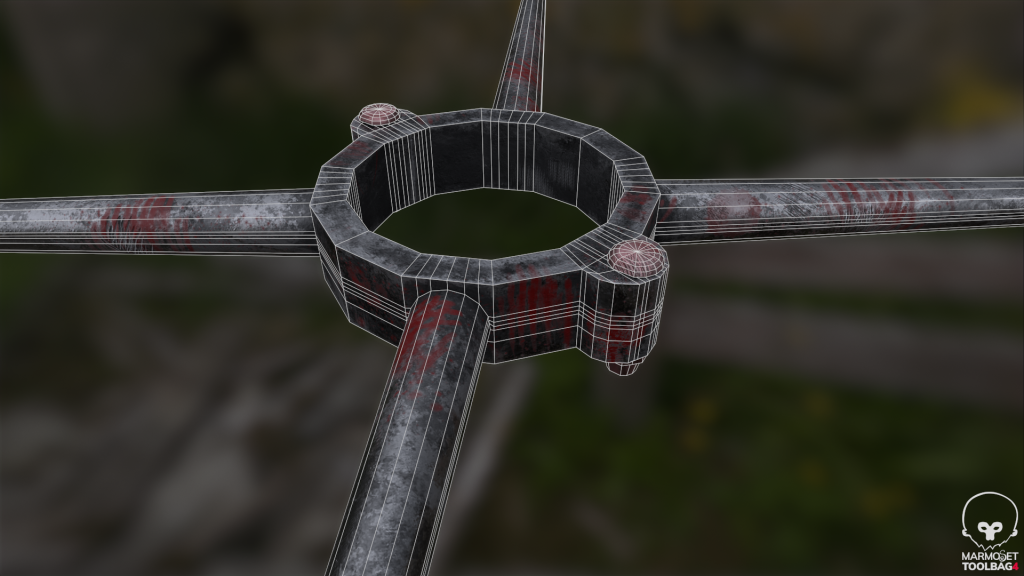
Fig. 18 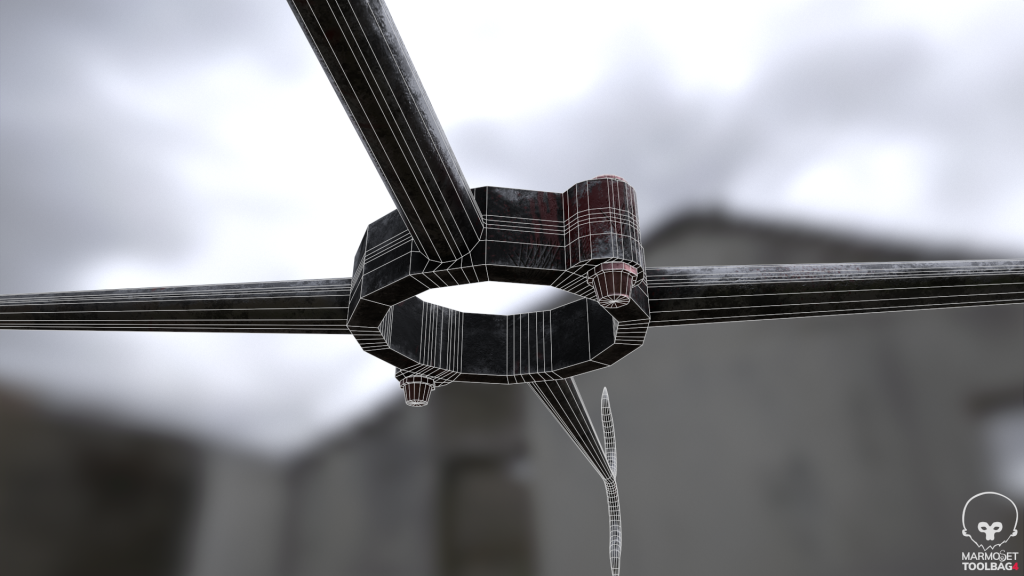
Fig. 19 
Fig. 20 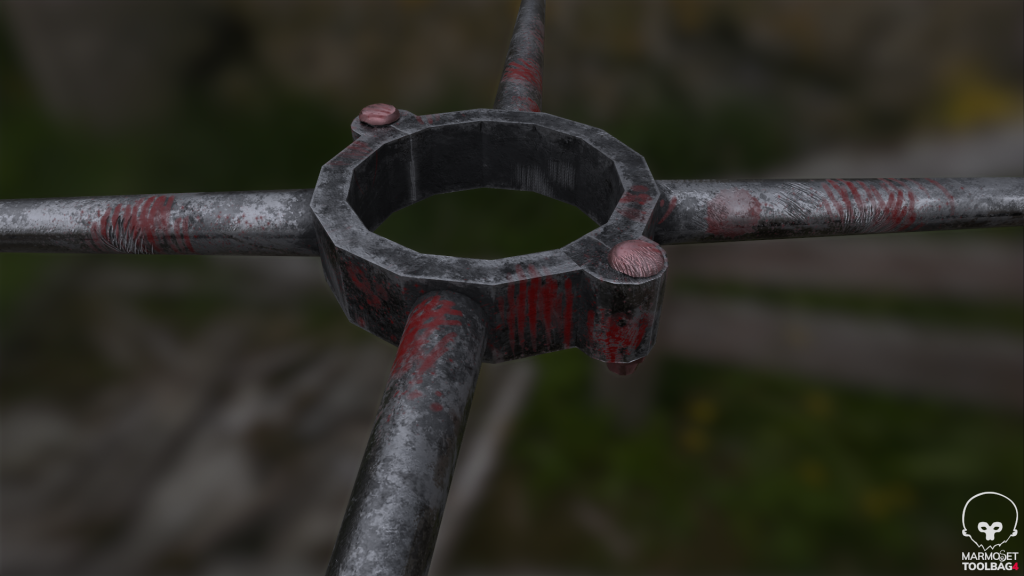
Fig. 21 
Fig. 22


It was only when I brought the collar into the same file as the rest of the character that I realized a mistake I had made. It was a silly mistake; I had already made the hair asset for the character before I made my collar which meant that the two objects collided with each other (Fig.23).
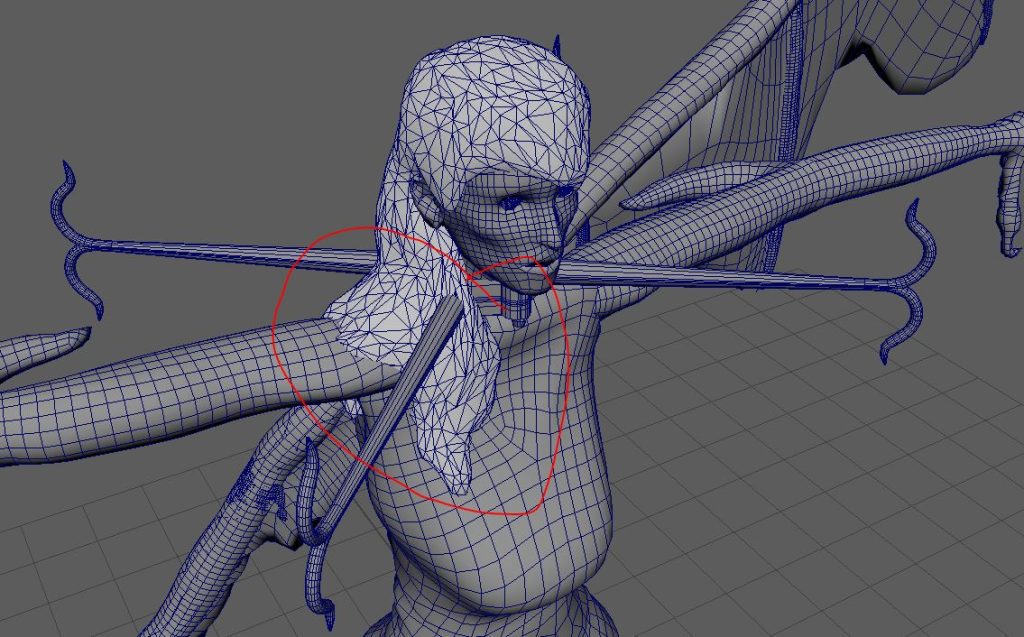
Fig.23

Now I could go about fixing this in two ways. One would be to take the character with the collar back into ZBrush and repeat the process of creating the hair as I did before but making sure the hair flows over the collar arms. I could also use some of the Xgen tools to create hair without making a poly-group asset. However both of these would require a fair amount of time to create and as time was rapidly running out I felt it wasn’t worth the time commitment to fit the collar nicely so instead simply dropped the asset.
:: Cuffs ::
Next, I started working on the cuffs. I began with a simple cylinder that I edited and extracted strategically using the outline of the reference to make it (Fig.24). Then in the same way I made the fingers for the collar I created a curve for the arm of the cuffs (Fig.25) before extruding a cylinder to make the arm of the cuff (Fig.26). I then deleted as many edge loops as possible to try to help keep the poly count down. It’s just difficult to have a good low poly bake when using curved shapes.
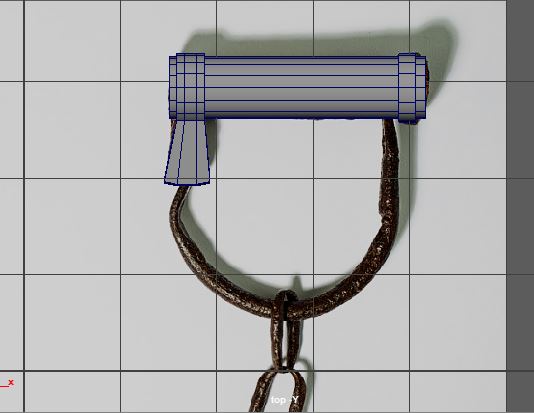
Fig. 24 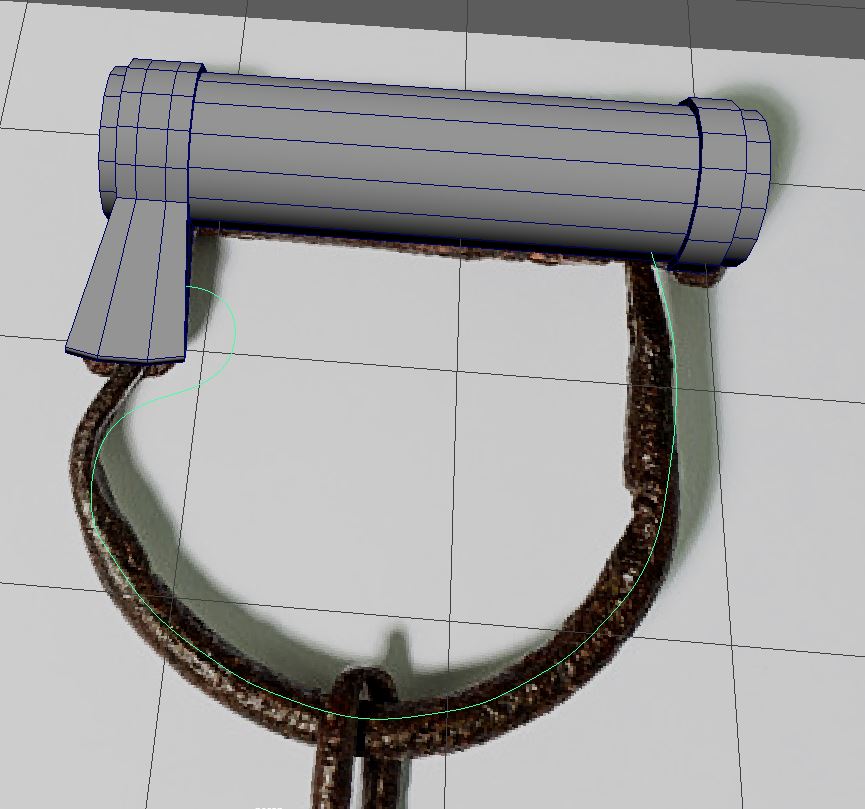
Fig. 25 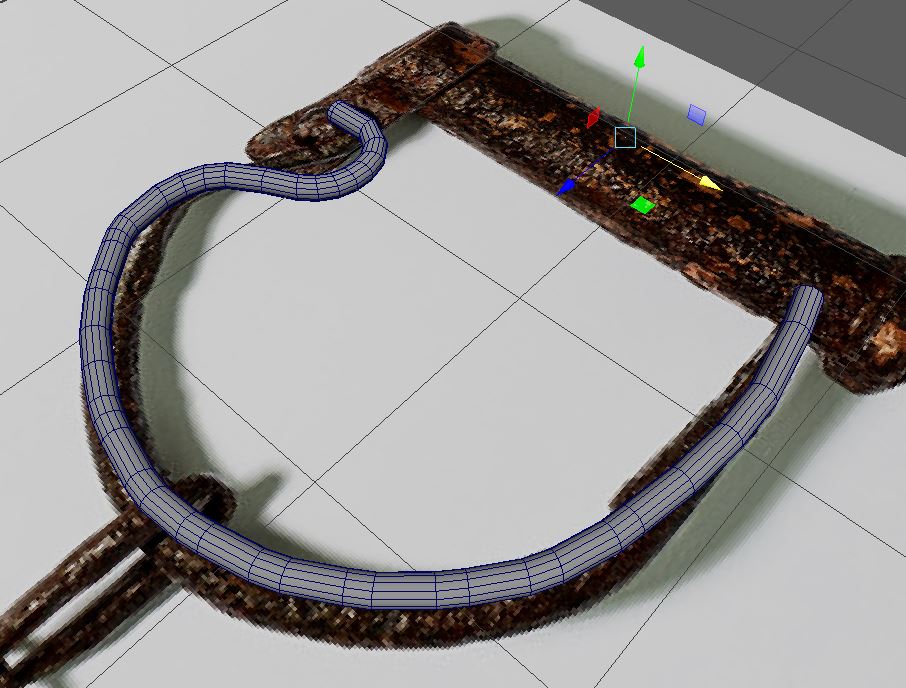
Fig. 26 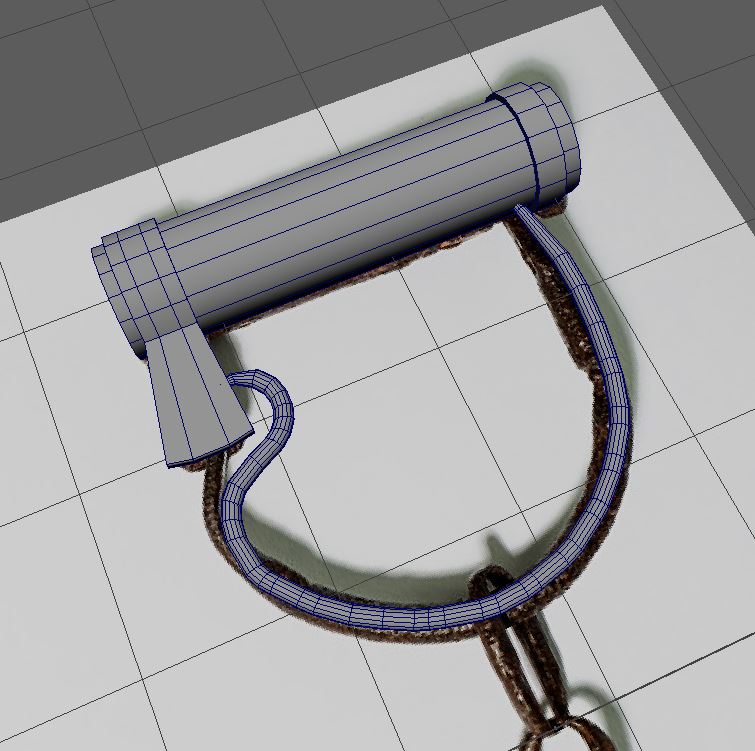
Fig. 27
Finally for the cuff I simply shrunk the edges of the loop using the soft select so that it fit nicely with the cylinder (Fig.27). Now, I had the dilemma of how to connect the two pieces together. Normally if I were just making the asset I wouldn’t need to connect the two geometries together and by doing so I would simply be adding more geometry to the cylinder in order to keep functioning topology. Because of this I decided to simply not connect the two parts together, I don’t know if this will be an issue when it comes to animating the character next semester but for this module I don’t really see much benefit from combining these objects.
Next, I started work on the linkage. Now, I wasn’t going to manually create the entire chain that would hang from the cuff as this would take a long time and would cause issues filling the UV with tiny faces. Which would then cause issues when trying to texture in high definition. To solve this I decided I would simply model, UV and texture one piece of the chain and then use the MASH system in Maya to create the long flowing chains I imagine.
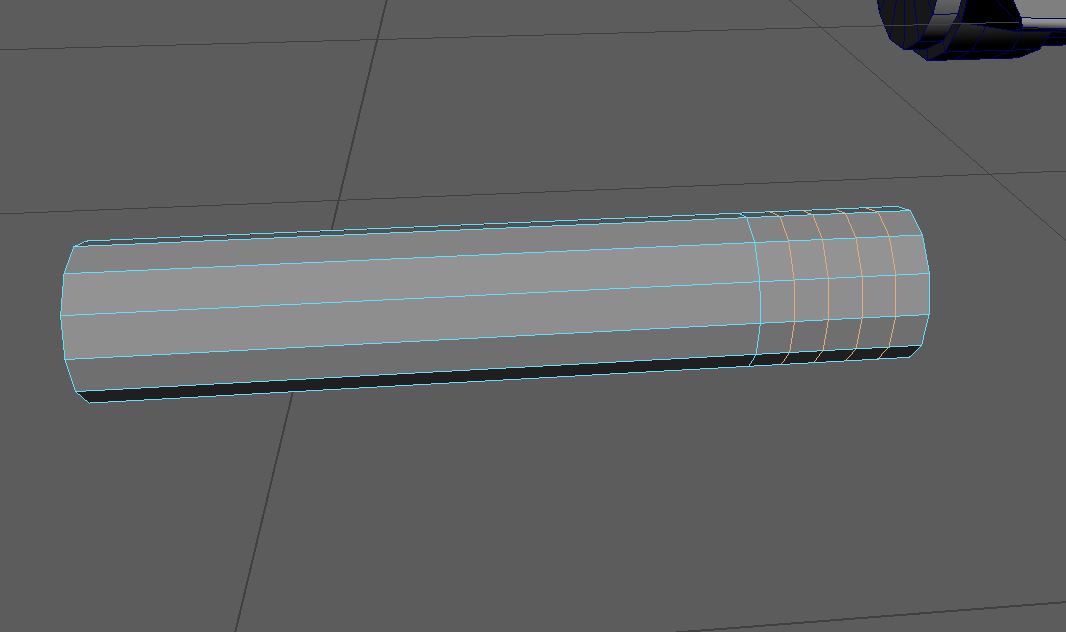
So, to make the chain link i would first need a cylinder than rotates at the corner 90 degrees. To do this my first step is to create a cylinder and add in enough edge loops (Fig.28) to then manipulate with moving the vertex to give a smooth 90-degree curve. I could then duplicate and rotate 180 degrees to give me a cylinder with a curve at either side (Fig.29).

Fig. 28 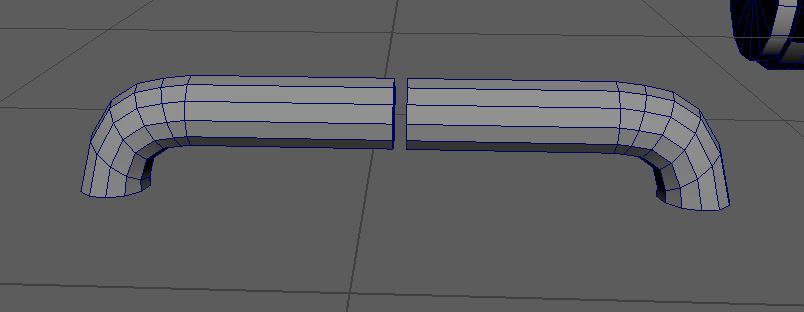
Fig. 29 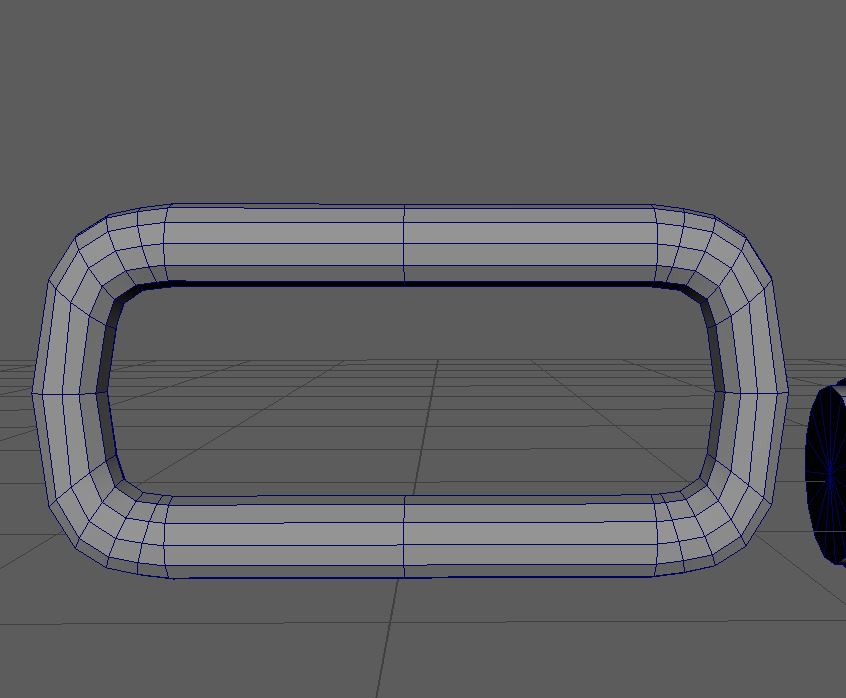
Fig. 30 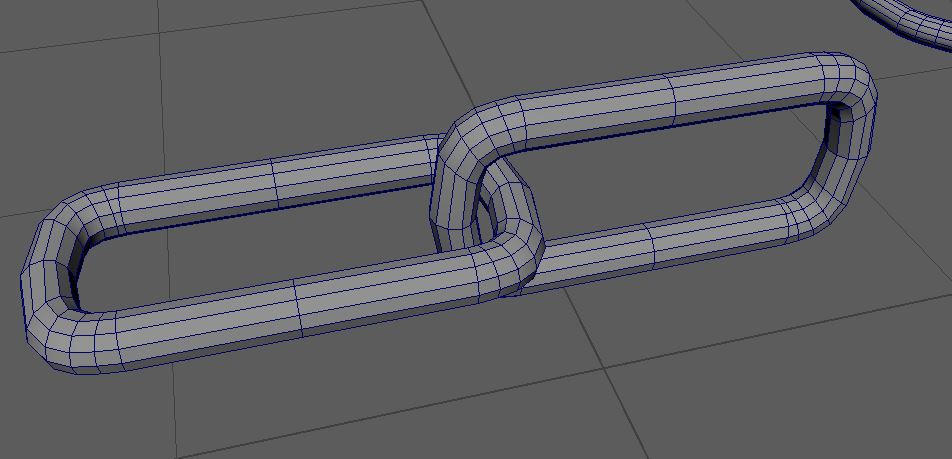
Fig. 31
Then I could simply duplicate and rotate again to before combining and deleting faces before target welding to give me a complete loop (Fig.30). Above you can see how the pieces with interlock once I have textured the one piece. Now when this one section is textured, I can duplicate in the same manner as shown above (Fig.31). This will work well with using MASH as I won’t have any issues with rotation or angle when I come to animating along the curve.
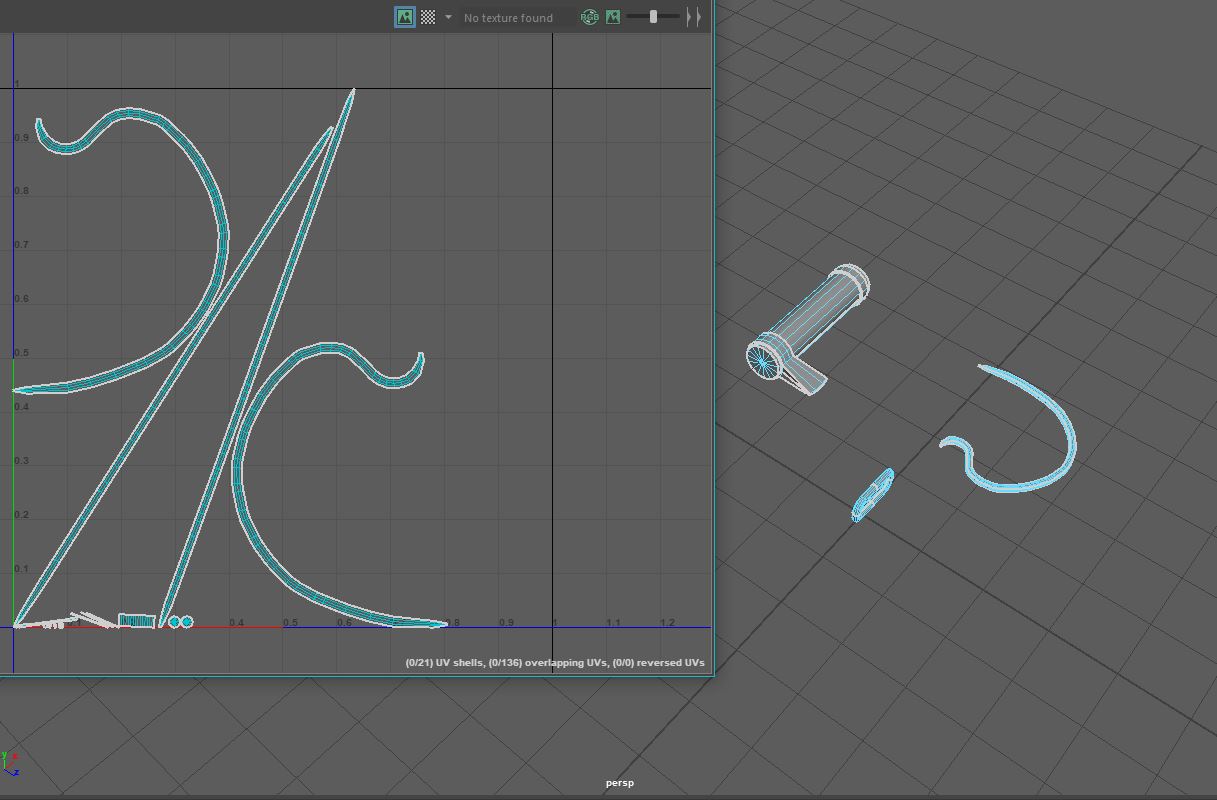
I manually UV’d the three parts that made up the cuffs. However this did create a small problem as one piece of the group was significantly longer which meant that the other parts of the model were tiny on the UV map (Fig.32). Which would result in very low resolution textures being applied to these parts. I Also had an issue as part of one of the model didn’t seem to be on the UV map for some reason, meaning that textures would apply to that part of the model (Fig.33).
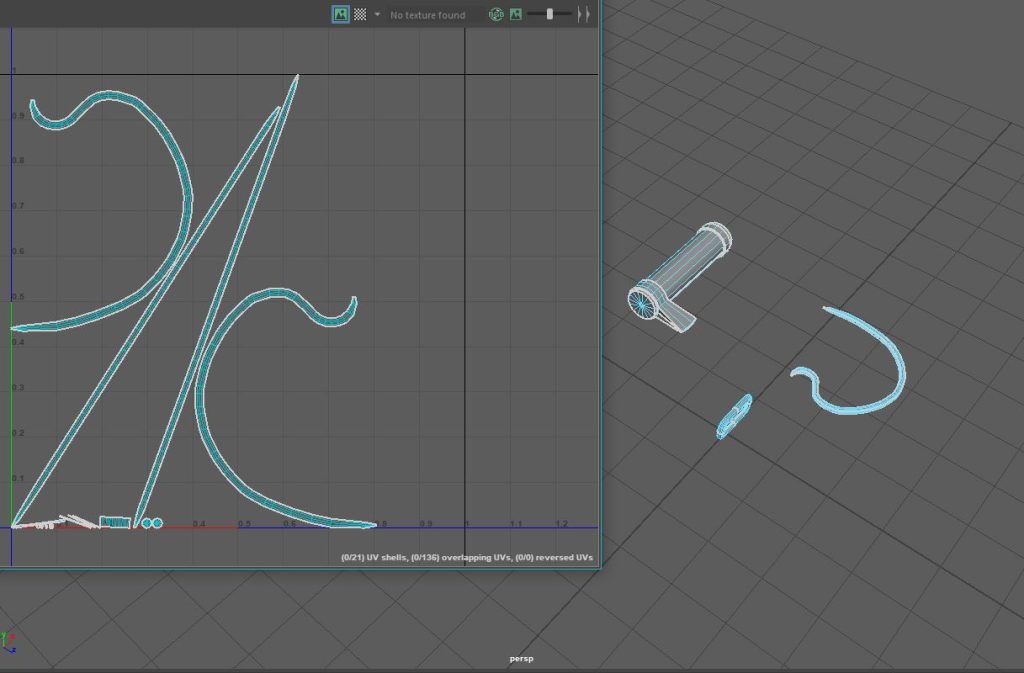
Fig. 32 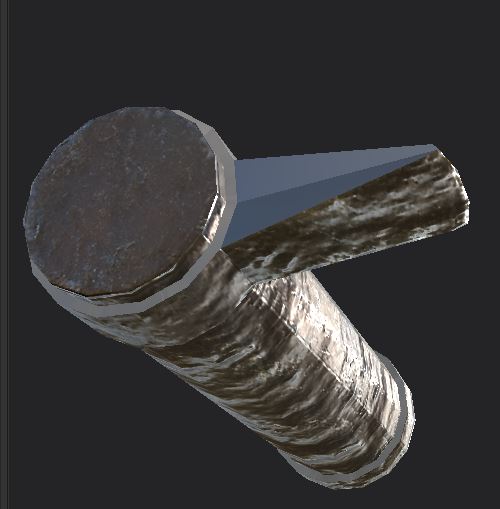
Fig. 33 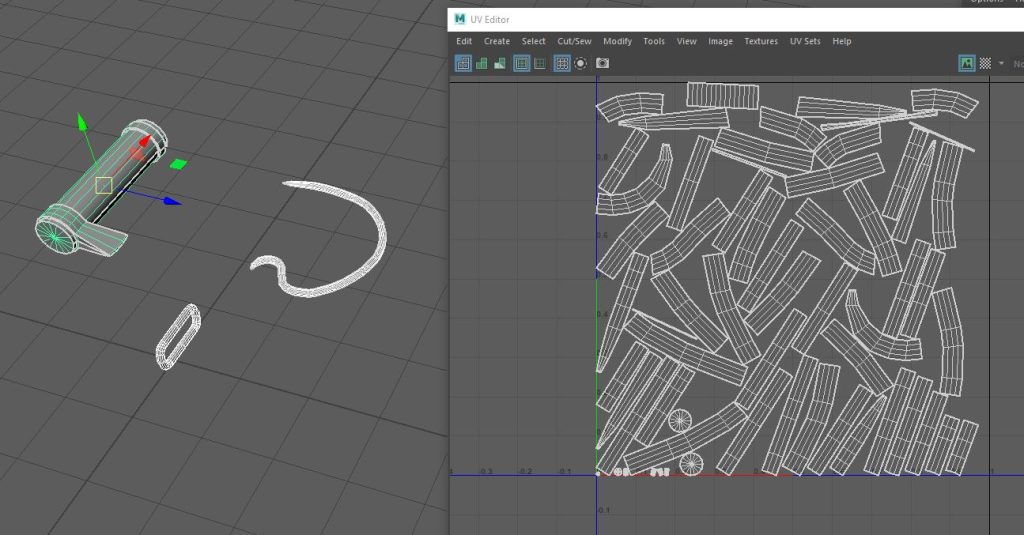
Fig. 34 
Fig. 35 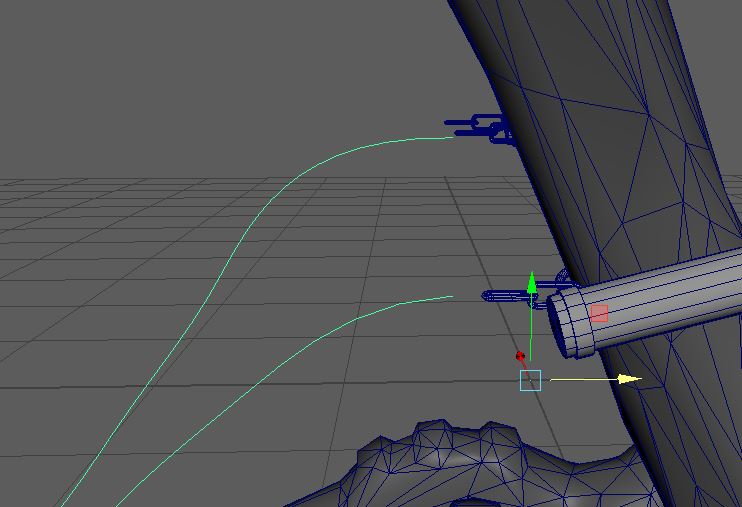
Fig. 36

I ended up having to automatic the UV before cleaning up the cut lines in order to make sure that every pane of the models were present on the UV map (Fig.34). This meant that I would be able to texture each part of the model before assembling the group together in my Body Maya file (Fig.35).
Next I turned my attention to using MASH in order to take the one chain piece I had textured and drag these out to a long linked together chain. My first step was to create the curve line that would connect the feet together (Fig.36).
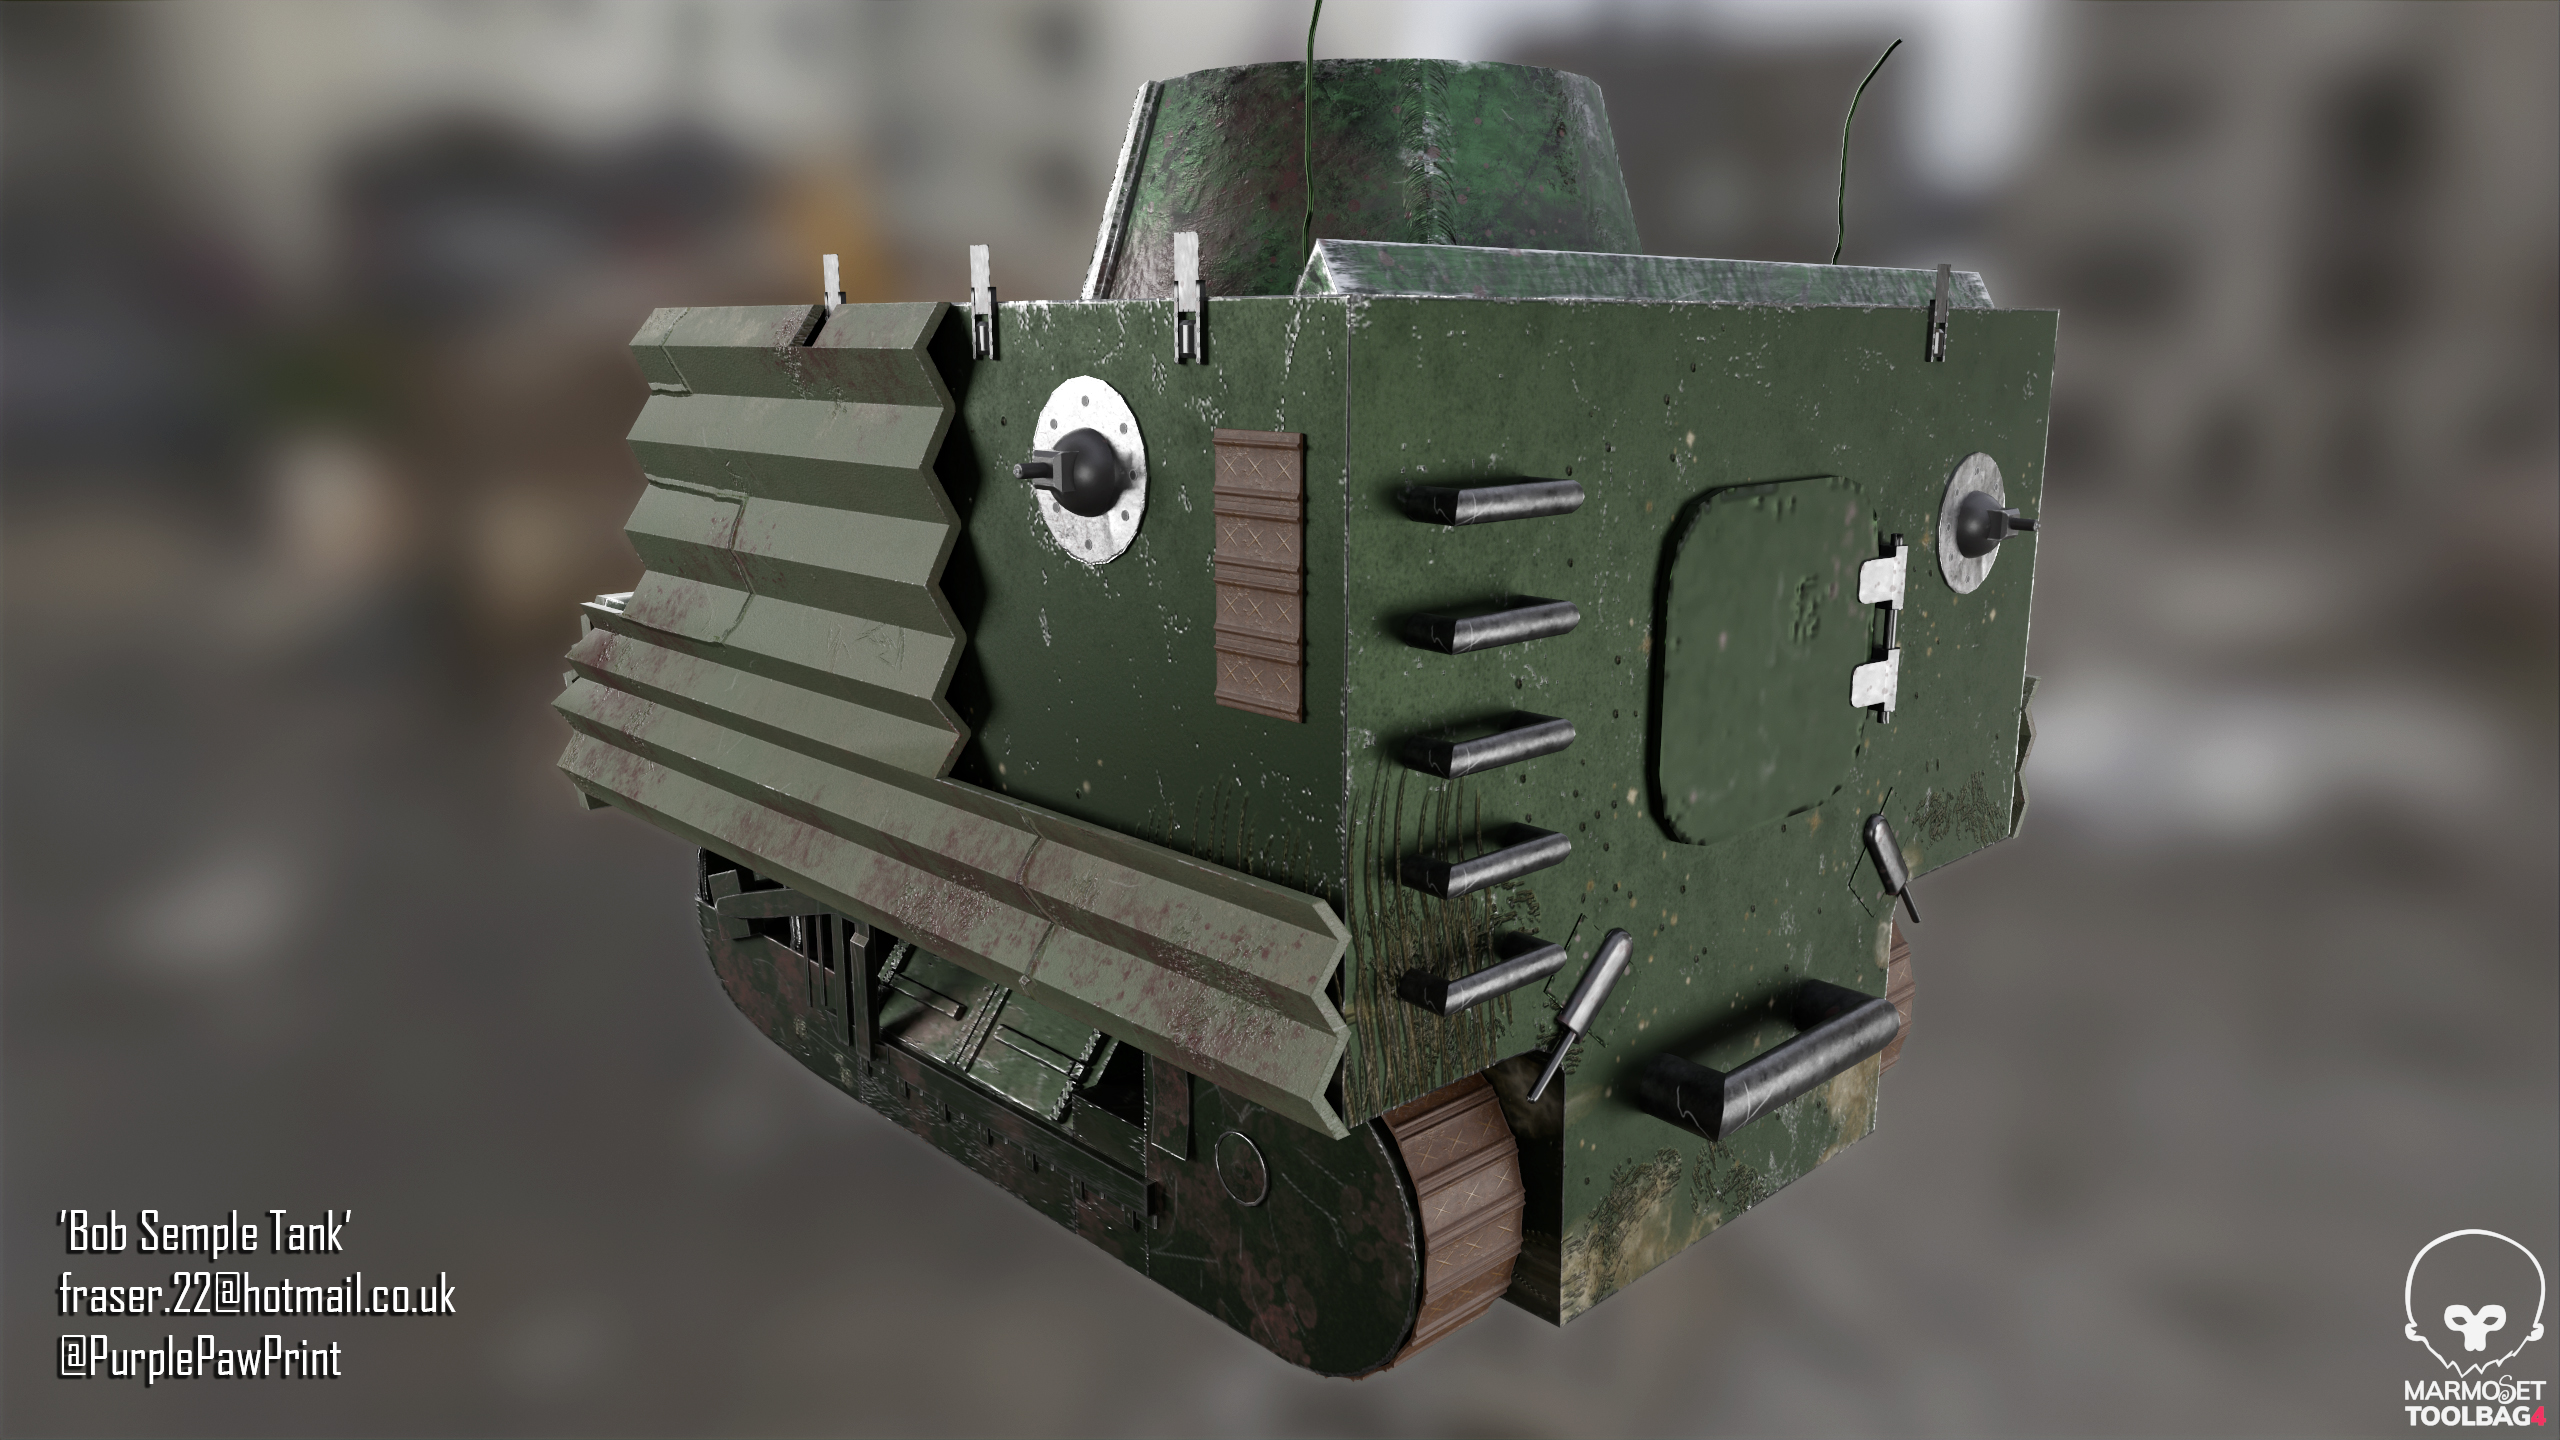
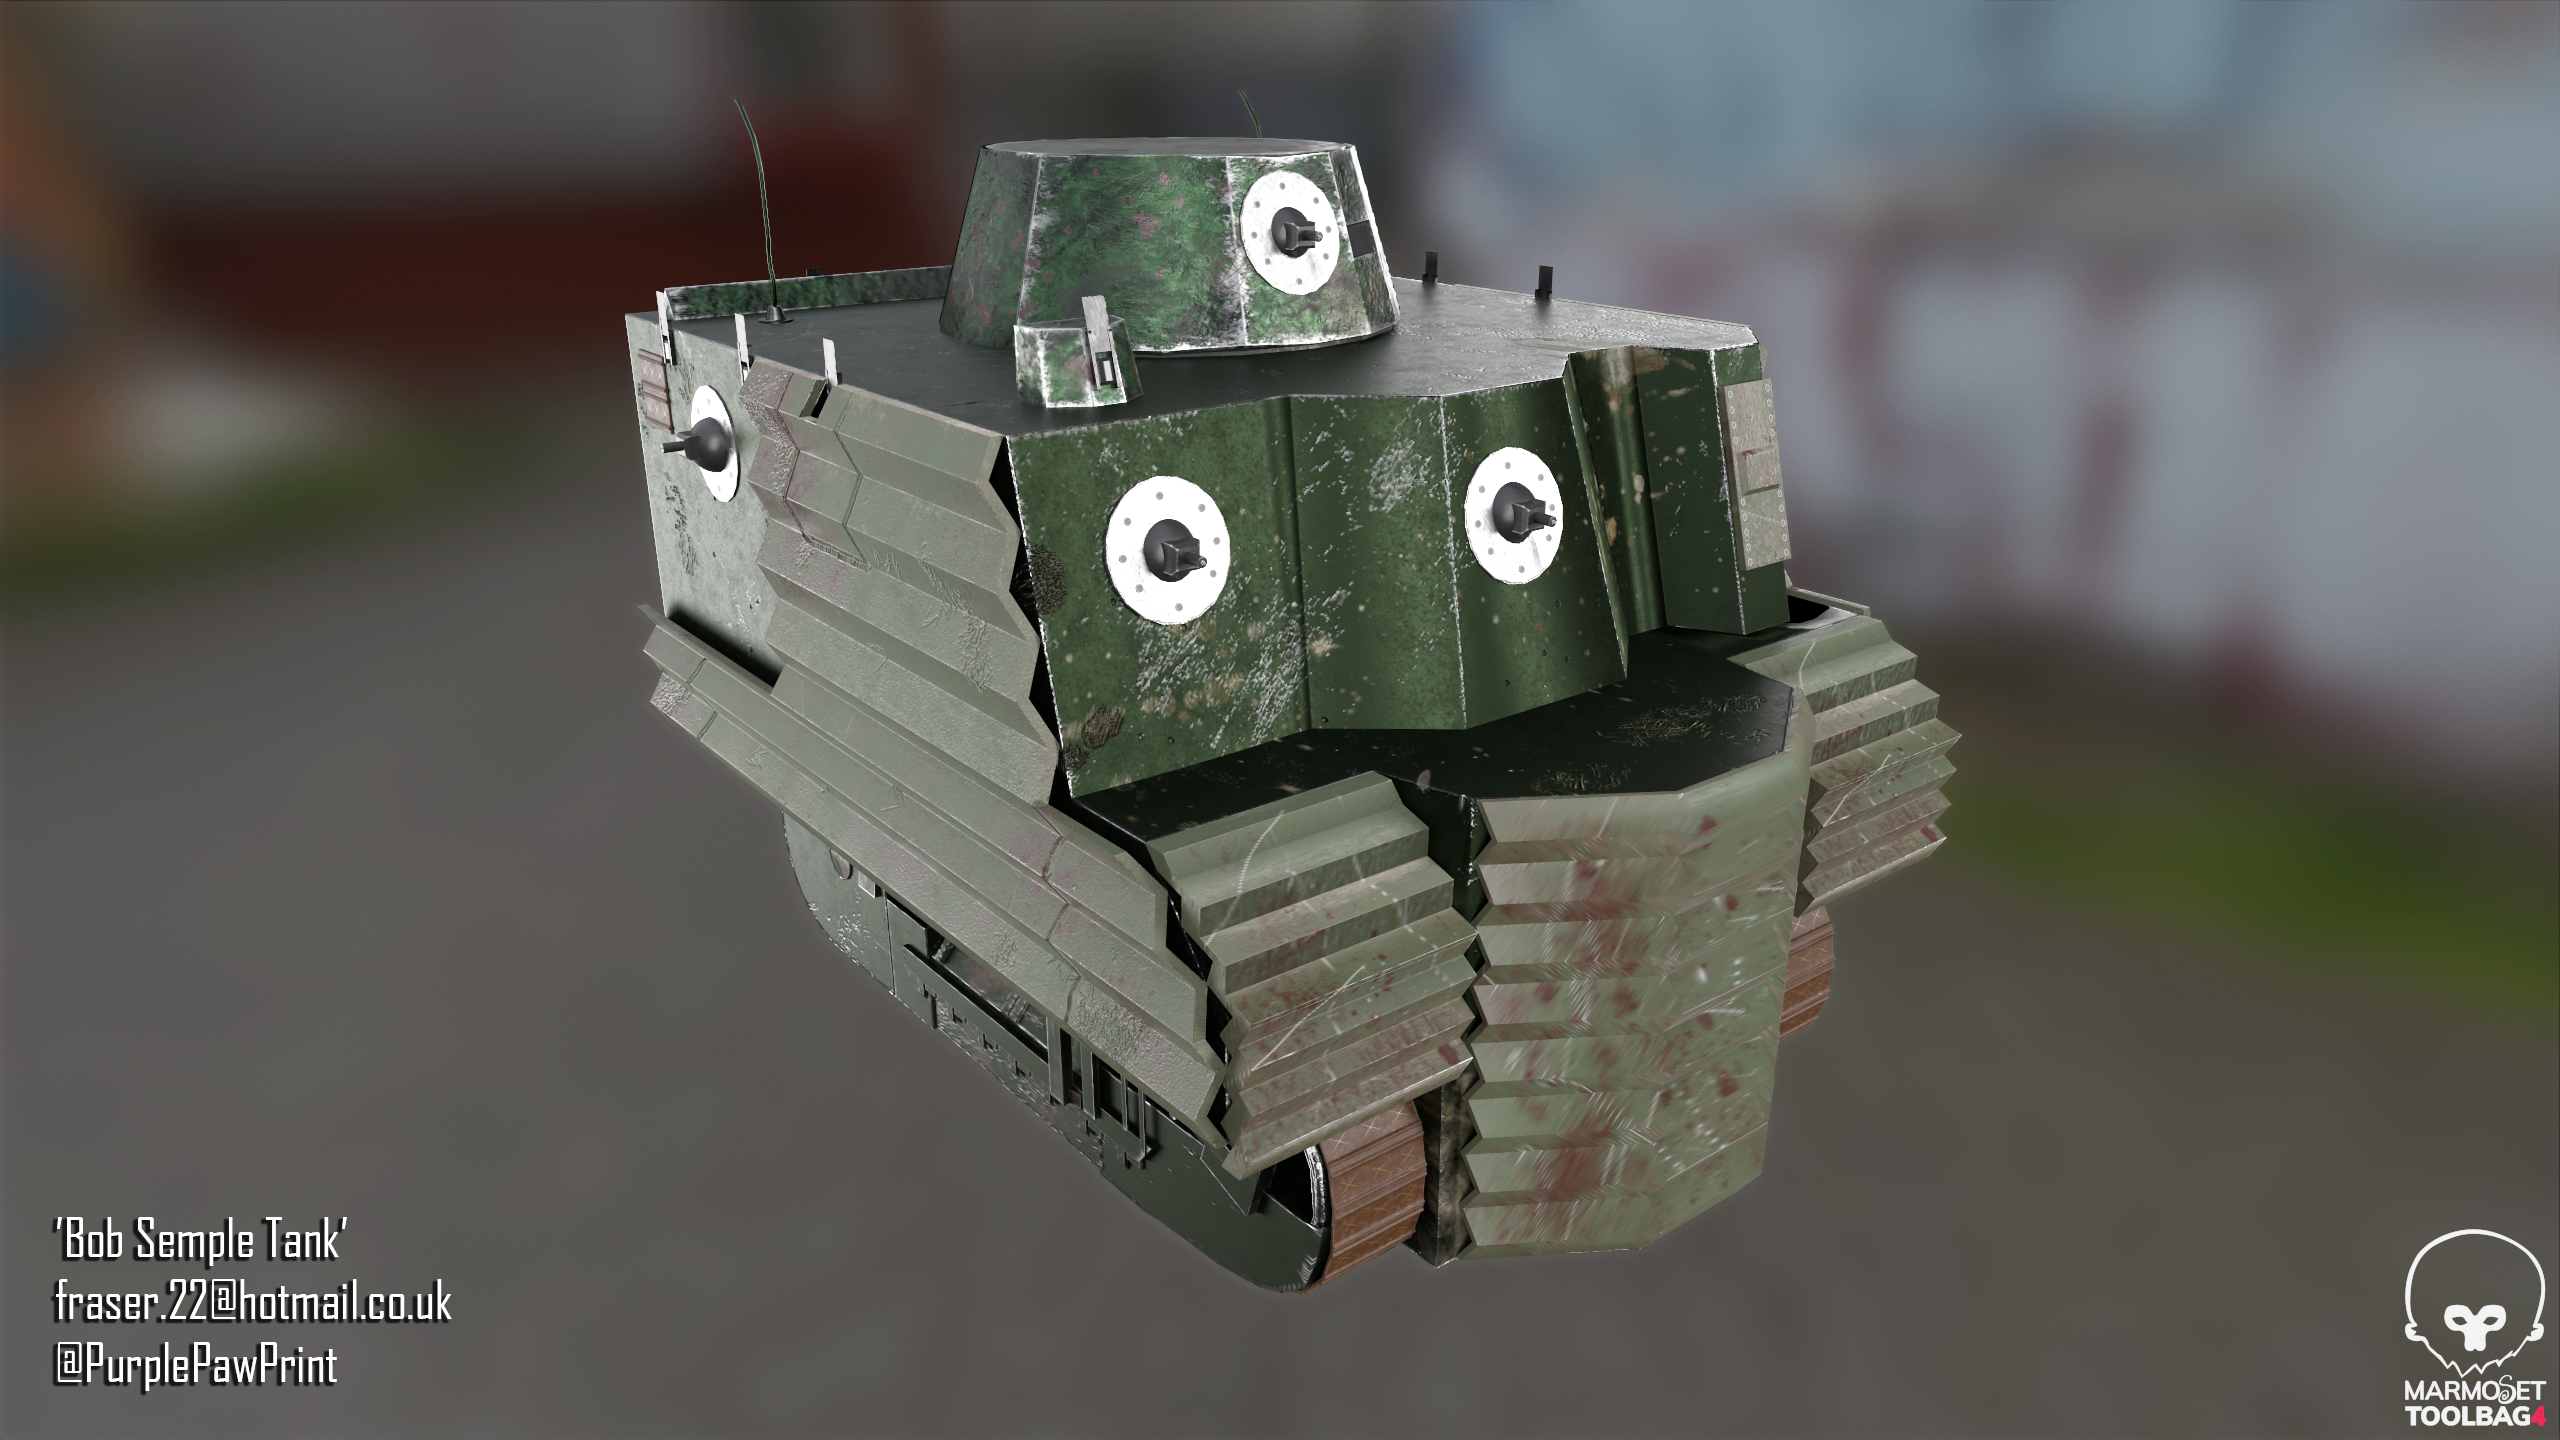
I have used MASH previously in my own projects last year where I used the method to create a tank tread without having to model and manually place every piece. You can see my renders of that project below.


It had been a long time since I had used MASH though, and I very much needed to remind myself how to use the technique. I used the below video which is the video I used to learn from last year as it discusses some of the common issues, I faced with trying to use MASH previously. Such as the process not working if you have frozen or reset transformations, something I do very often as I create a model.
I did have a problem at first, a very common issue with the orientation of the chain link which meant that they stuck to the curve the wrong way around (Fig.37). This just required me to simply undue to the point before I had assigned my curve to my MASH and rotate the chain link so it sat length ways along the curve (Fig.38). Afterward I just had to then separate the chain to I could duplicate and manually place the chain links where they connect to the curve (Fig.39).
Finally, I just had to repeat the steps I had done for the foot chain twice more for the two hands (Fig.40). I did wonder whether I should use one very long curve to connect the two hands together as I thought this would be a nice visual however would really make sense when thought of in terms of reasonable storytelling. What good would cuffs be if they left the prisoner able to use their arms to their fullest movement?
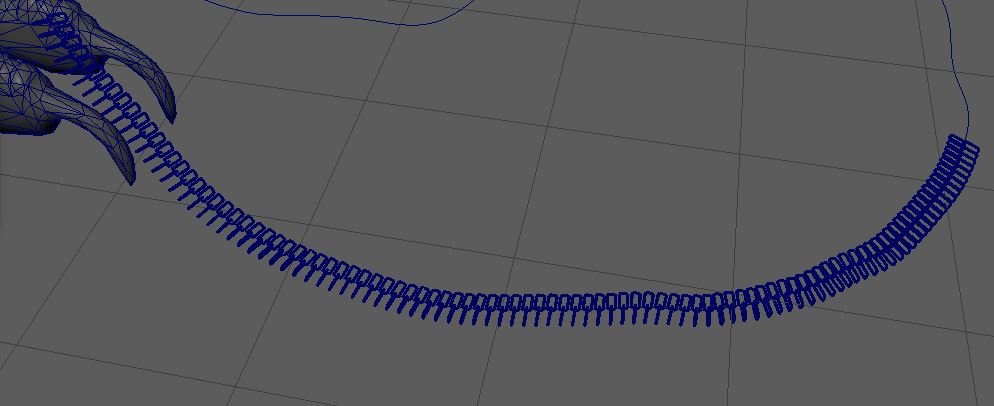
Fig. 37 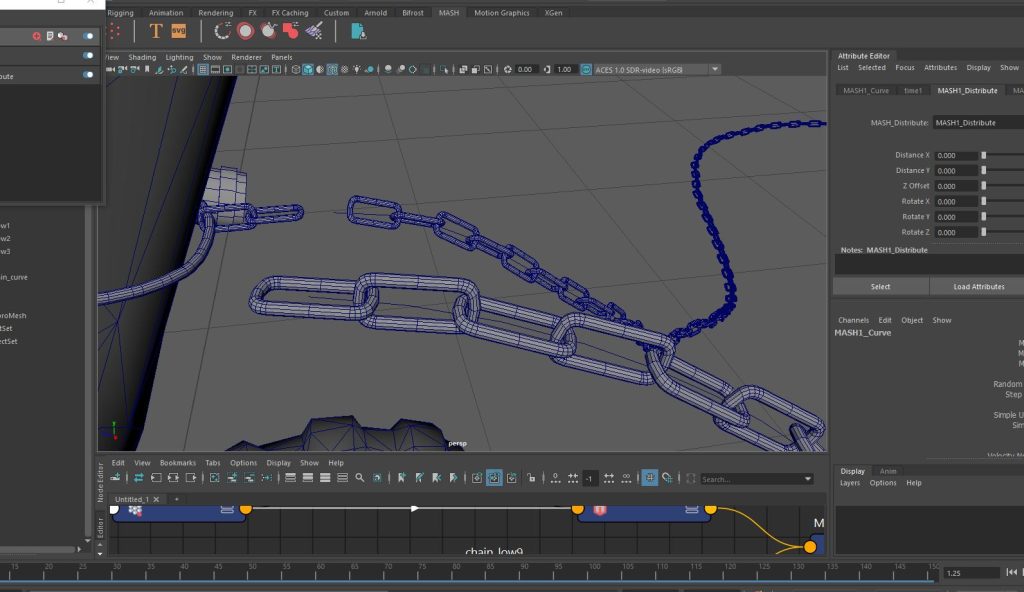
Fig. 38 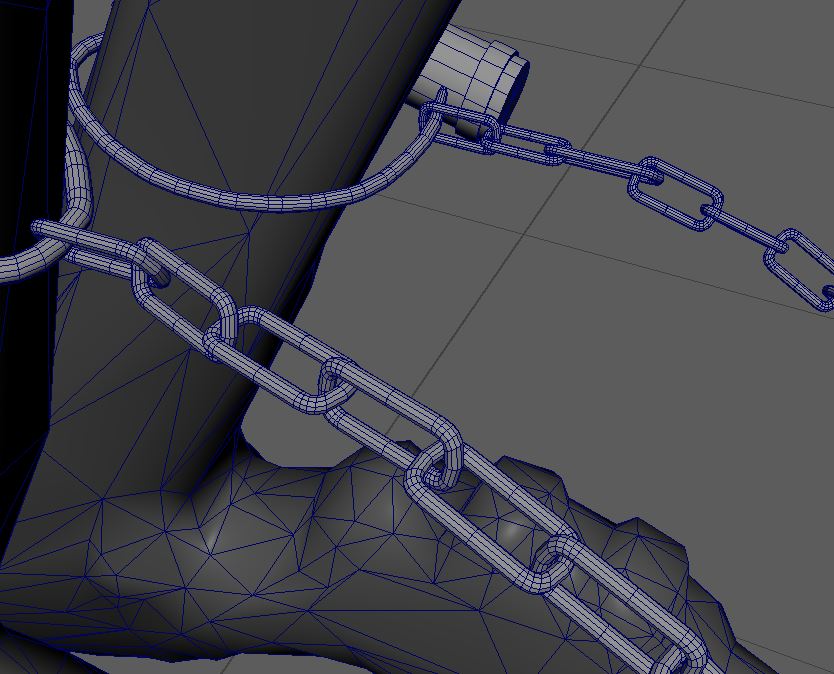
Fig. 39 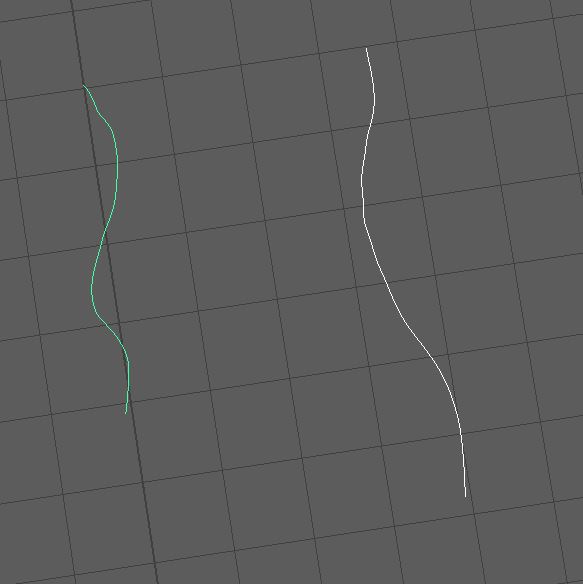
Fig. 40 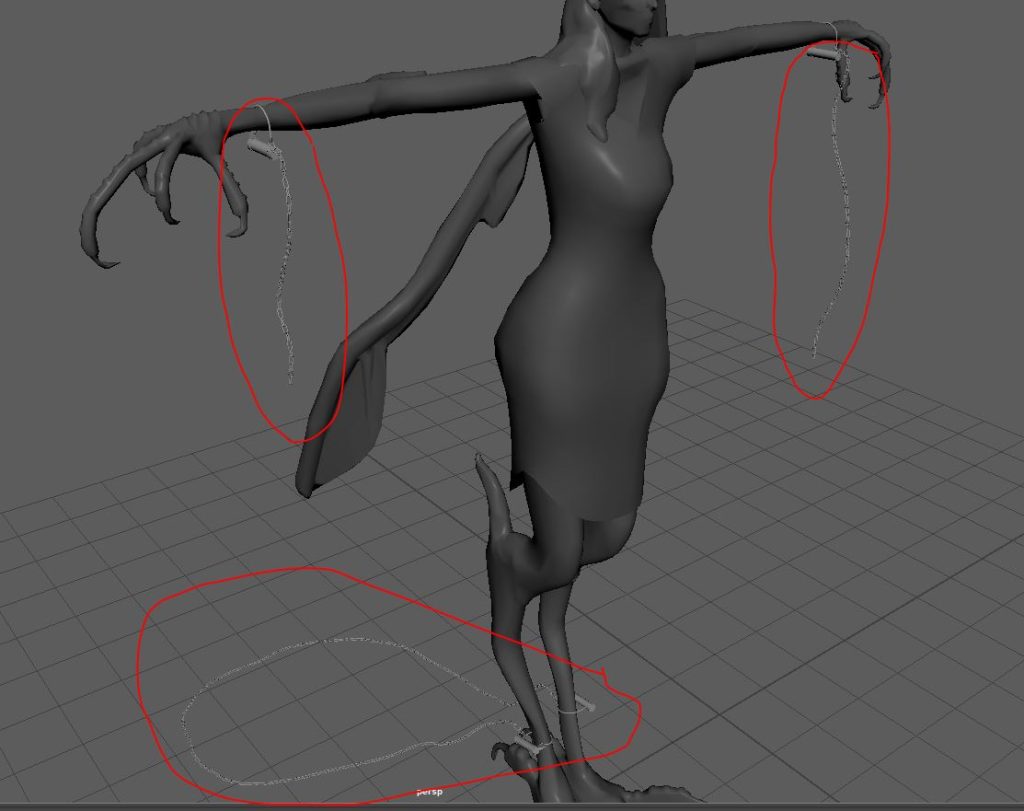
Fig. 41

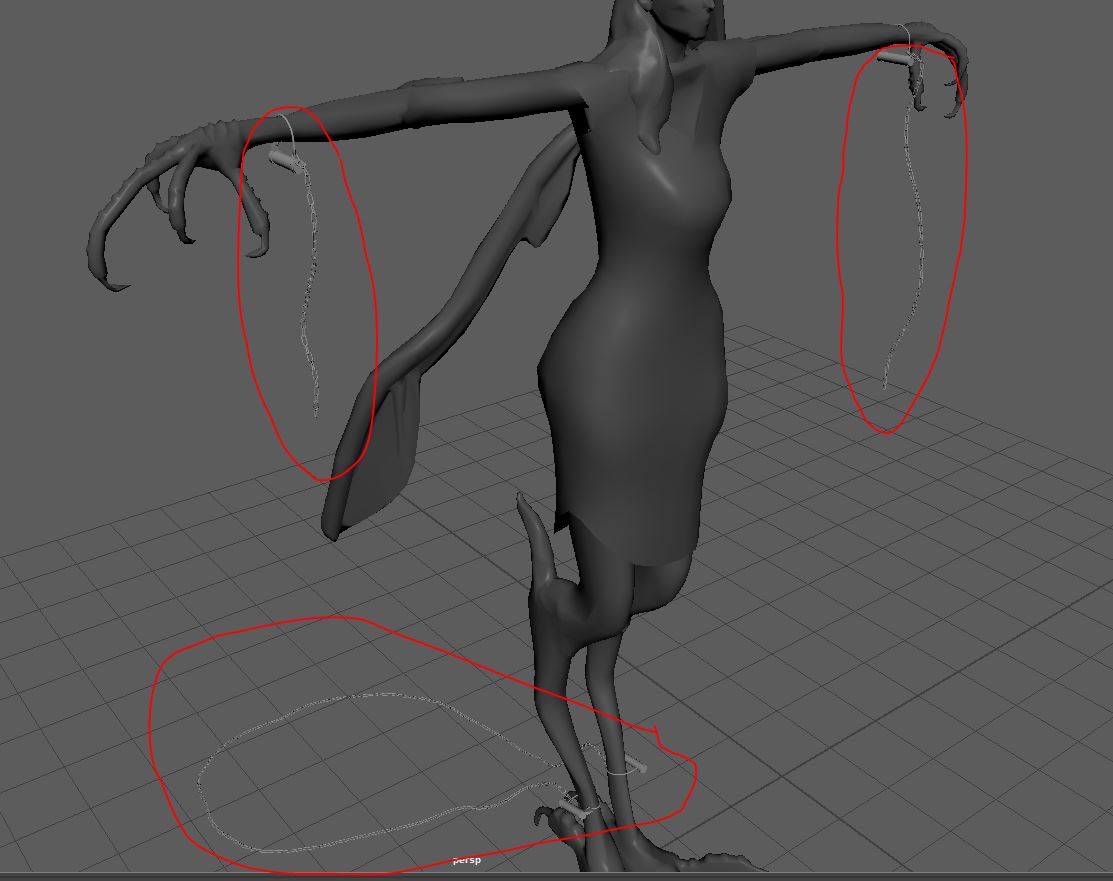
I decided to go with two different curves (Fig.40) which would let me have two different length chains that fell differently to each other (Fig.41). This would allow me to show visually that the character had broken free from their hand cuffs but not their foot cuffs. If I would wasn’t required to show the character in a static T pose I would have liked to have the long dragging chain, maybe even connected to the foot chain as I feel like that could have had the best visual but I am still happy with the result given the requirements of the assignment.
At this point the main bulk of the modelling work was done, and all that was left was to move the character into Marmoset for me to get the renders and turntable required. You can find the renders post here.
:: References ::
abc ict10 (n.d.). [Online Image]. (Pinterest.co.uk). Available online: https://www.pinterest.co.uk/pin/318418636125232373/ [Accessed 30/10/2021]
Americanhistory.si.edu (n.d.) [Online Item Page]. Available online: https://americanhistory.si.edu/collections/search/object/nmah_601251 [Accessed 30/10/2021]
CGI Tutorials (2020). ‘How to make a TANK TRACK in Maya quickly. Animated with MASH. 3 steps to get working IN YOUR SCENE’ [YouTube Video]. Available online: https://www.youtube.com/watch?v=R6WBrG1Pocw&ab_channel=CGITutorials [Accessed 08/01/2022]
Picryl (n.d.). [Online Image]. Available online: https://picryl.com/media/iron-collar-for-preventing-the-escape-of-slaves-6bff4c [Accessed 30/10/2021]
Reuters (2019). [Online Image]. Available online: https://www.reuters.com/news/picture/artifacts-of-slavery-idUSRTS2MHDA [Accessed 30/10/2021]