At Home in a House Subdivided 150-Present [Online Article]. [Accessed 09/12/2020]
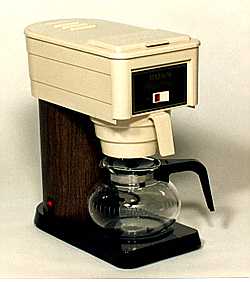
With the coffee machine I had to bend the criteria a little more than I originally intended. I used to work in a coffee shop, and I remember the giant red metal retro looking coffee maker. However I found when researching that these machines are a very modern invention, and in fact the coffee machines diners would use in the 50’s were more along the lines of this reference (REF.1).
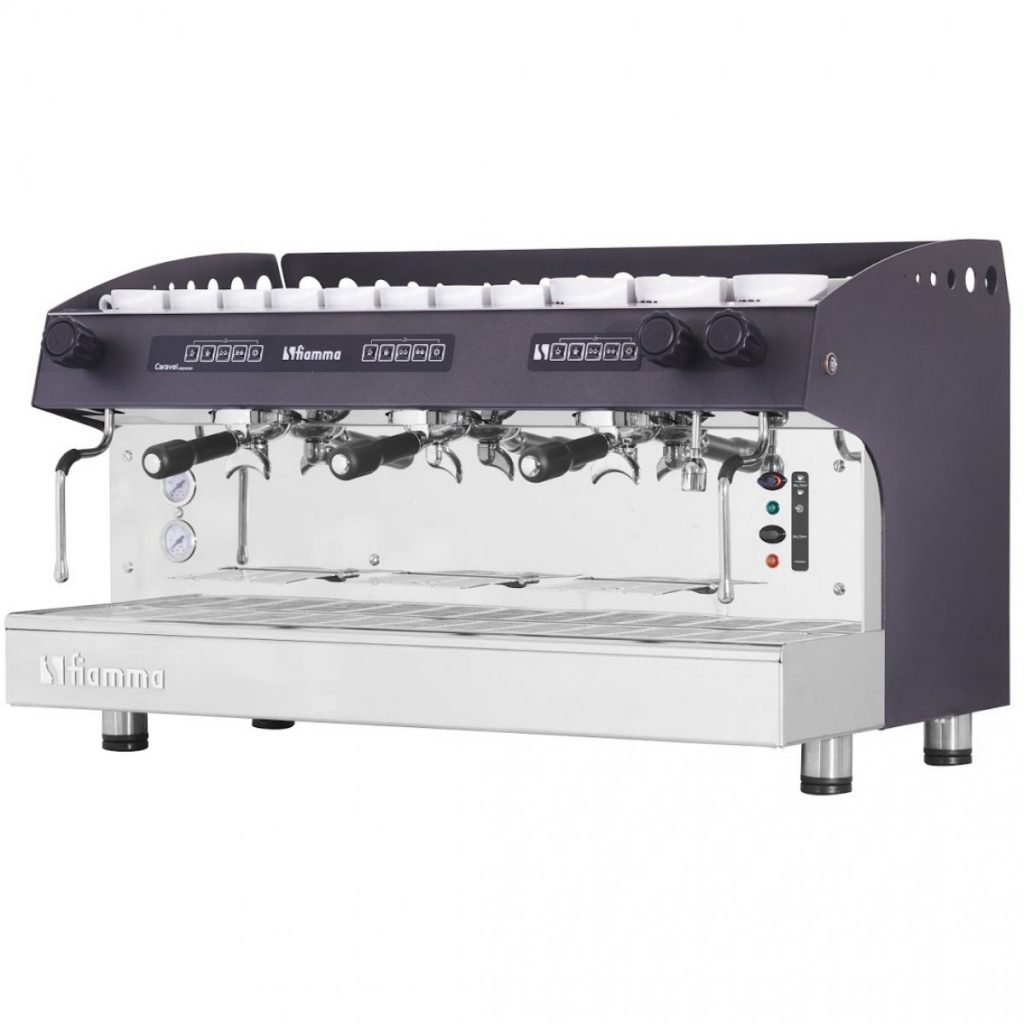
Adexa.co.uk. Professional Espresso Coffee Machine Automatic Tall Cups 3 groups 17 litres [Product]. [Accessed 03/12/2020}
I couldn’t find the exact coffee machine we used in the café where I worked, however it was very much like the reference above (REF.2). Just much more curvaceous in its design. This was the style of device I wanted to producer and so instead of my theme being ‘1950’s American diner’, I’ll instead do something more along the lines of a ‘Retro Diner pack’ theme.
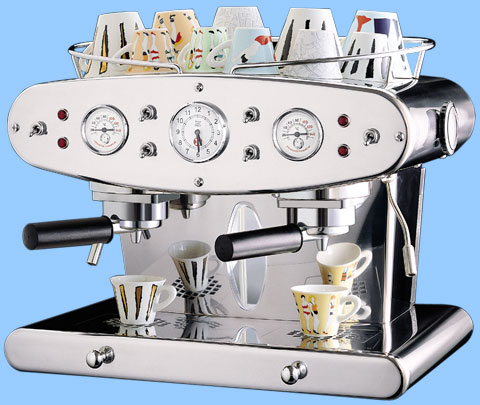
RedMonkeyCoffee.com. FrancisFrancis! X2 Twin Group Espresso Machine [Product]. [Accessed 03/12/2020]
While I was originally going to recreate my second reference (REF.2). while searching I found these home-based coffee machines, Which use the same filter system as the industrial on a smaller scale. I really liked the curvy approach taken in this reference and think it would fit in with the Americana styling more so than the more modern angular approach found in the second reference. I ended up using this reference for the majority of my design but taking the cup tray from the second reference, which I thought worked well together.
Production
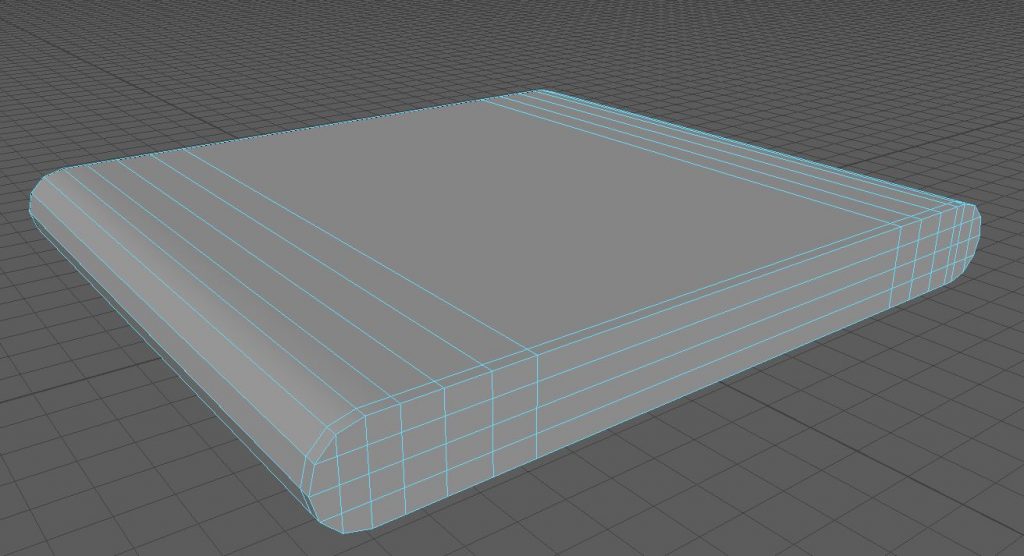
Fig.1 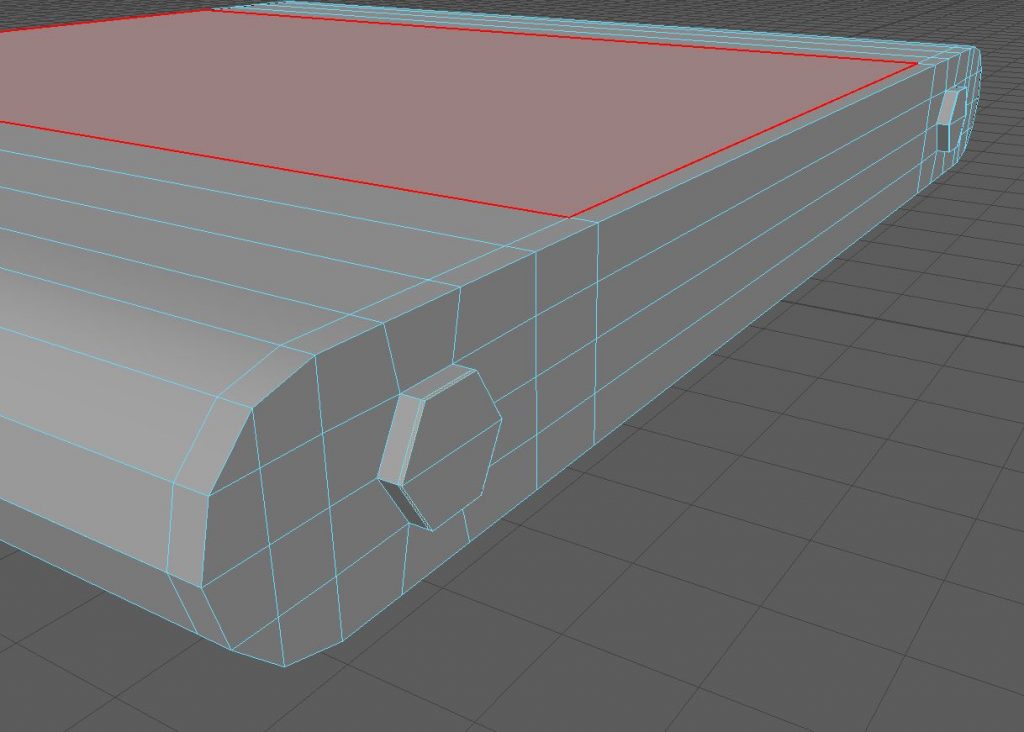
Fig.2
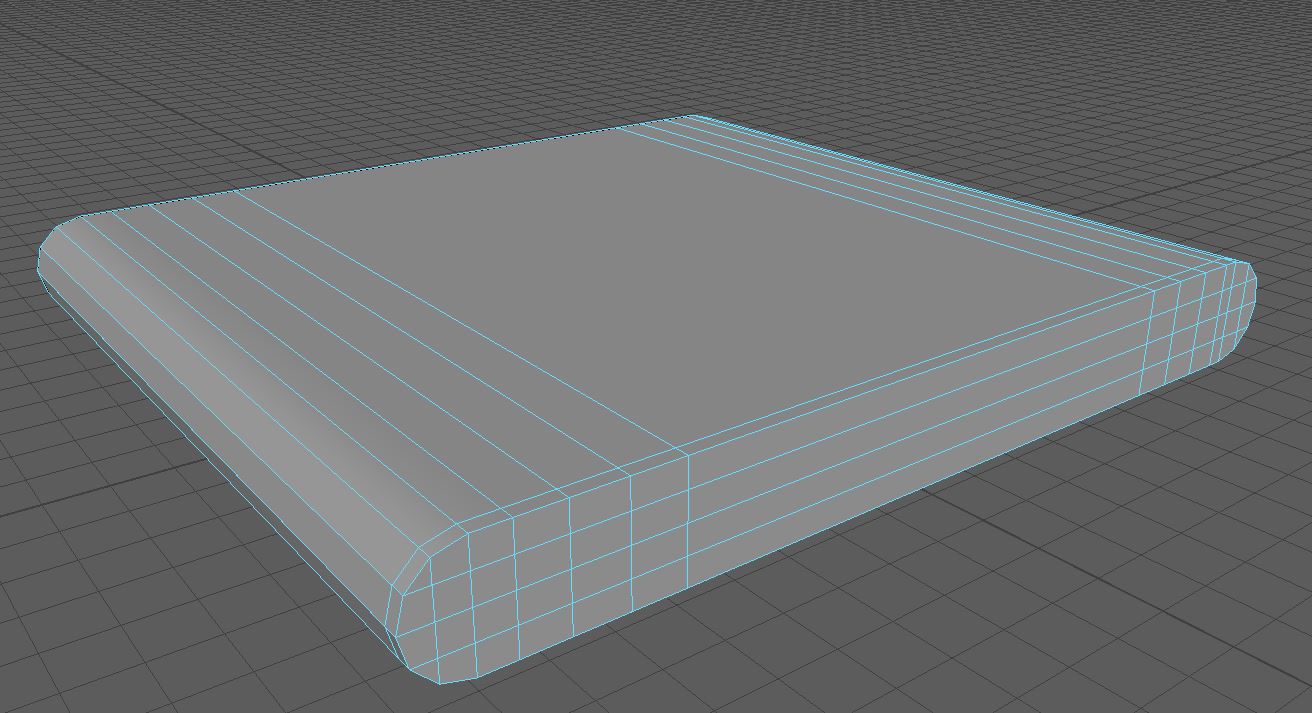

To start I created a basic poly cuvbe which I scaled to the size I wanted the base of the object. I bevelled the outside edges of this object to a value of 1 so as to give the circular look of the reference (Fig.1). I also added edge loops where I needed to make the front face of the object look like a tray which opens outward. I extruded the faces to make the tray front slightly larger than the body and used the circularise mesh tool to create the handles, just like I did with the TV asset I made previously (Fig.2)
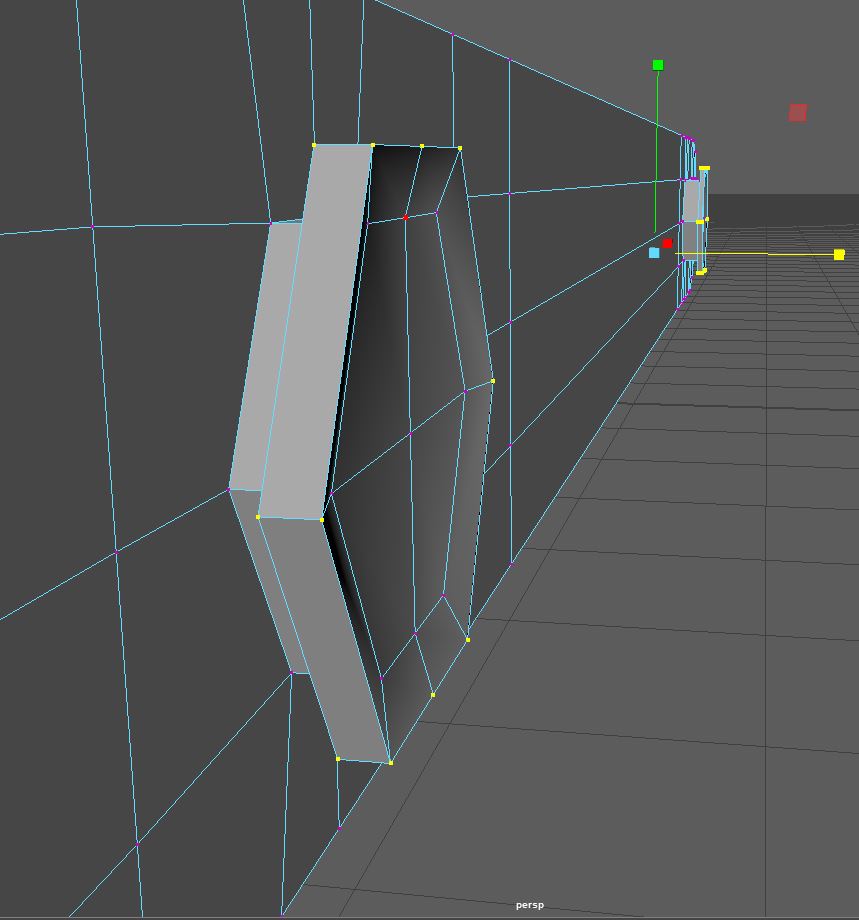
Fig.3 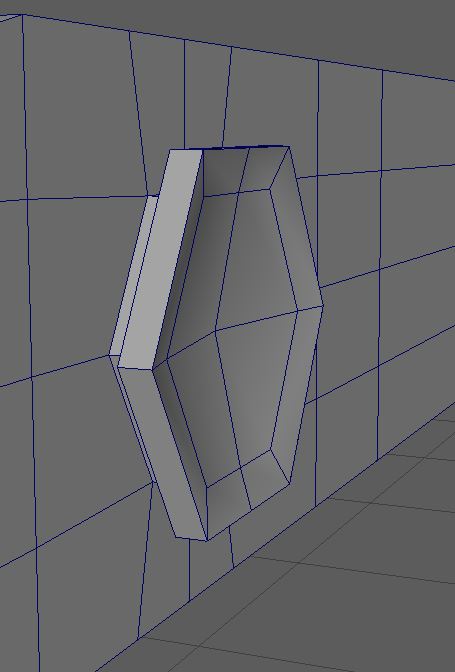
Fig.4 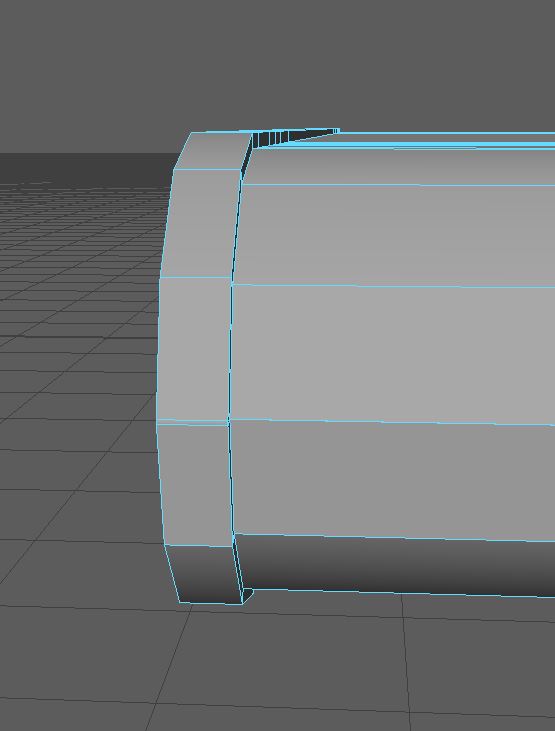
Fig.5
To make the handles I used the same method I did with my TV asset previously. I extruded the circularised faces outward, setting the new faces to contain 2 divisions. Then manipulated the vertex to give me the size and the shape I wanted (Fig.3). A small touch I like to add to these style of handles is to either push in or pull out the central vertex of the outside face. This is a small detail which I find really makes the handle look like something you would see in real life (Fig.4). Also here you can see how I extruded the faces along the outside edge of this front section of the object, giving the look of a closed tray (Fig.5).
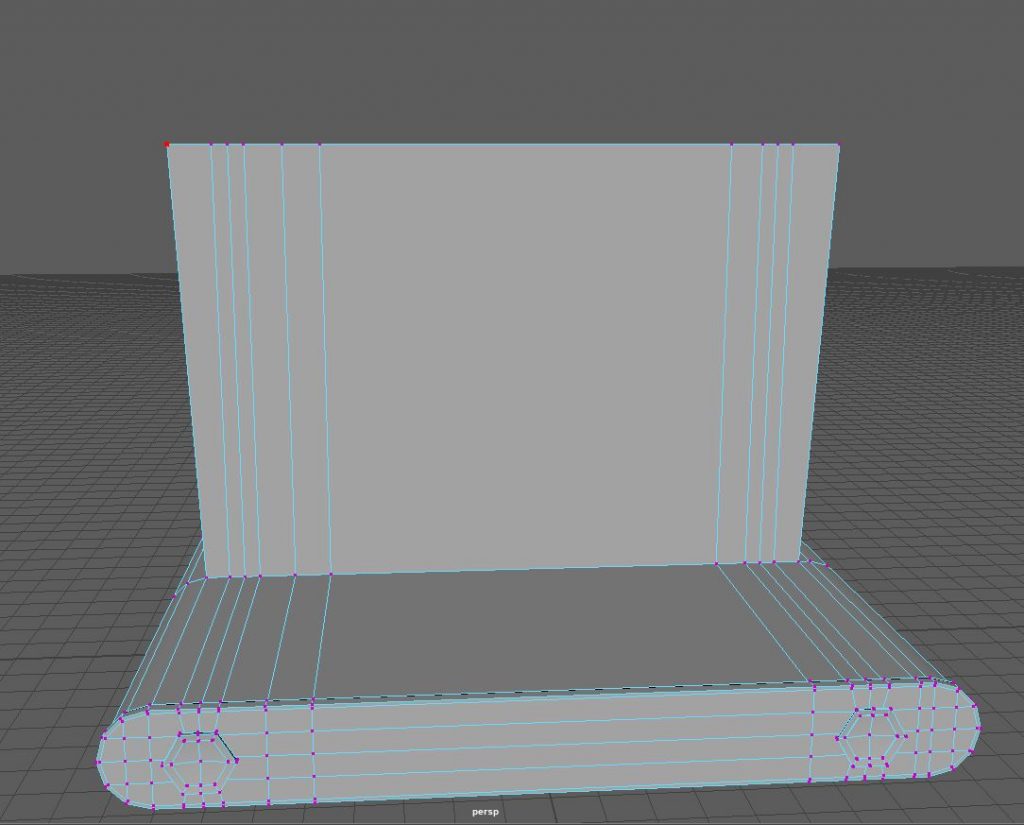
Fig.6 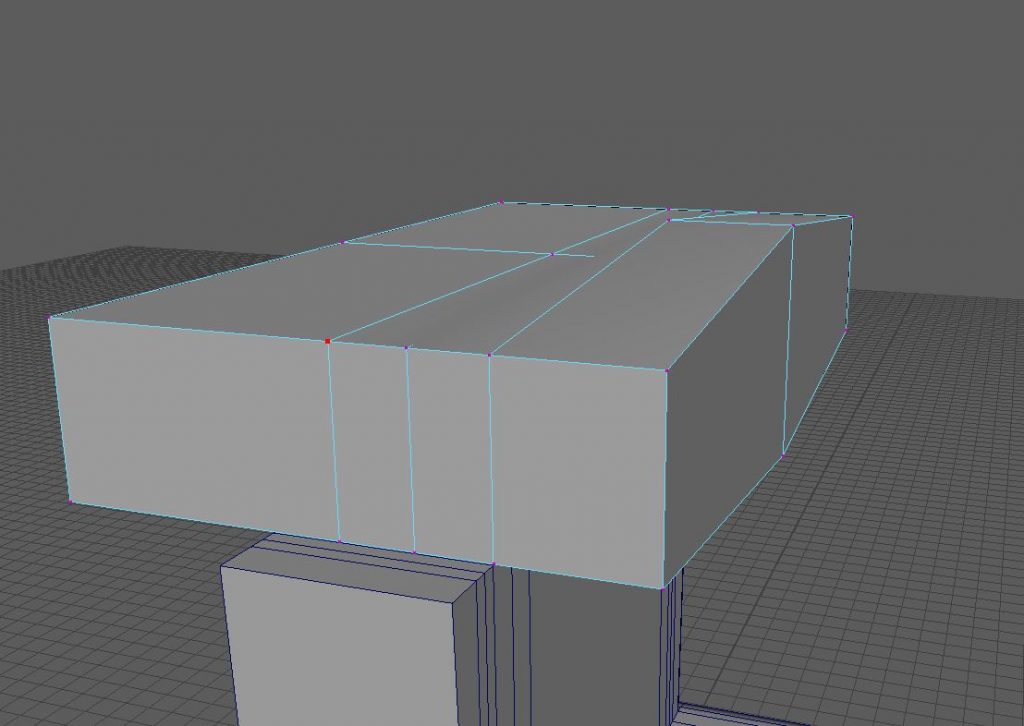
Fig.7

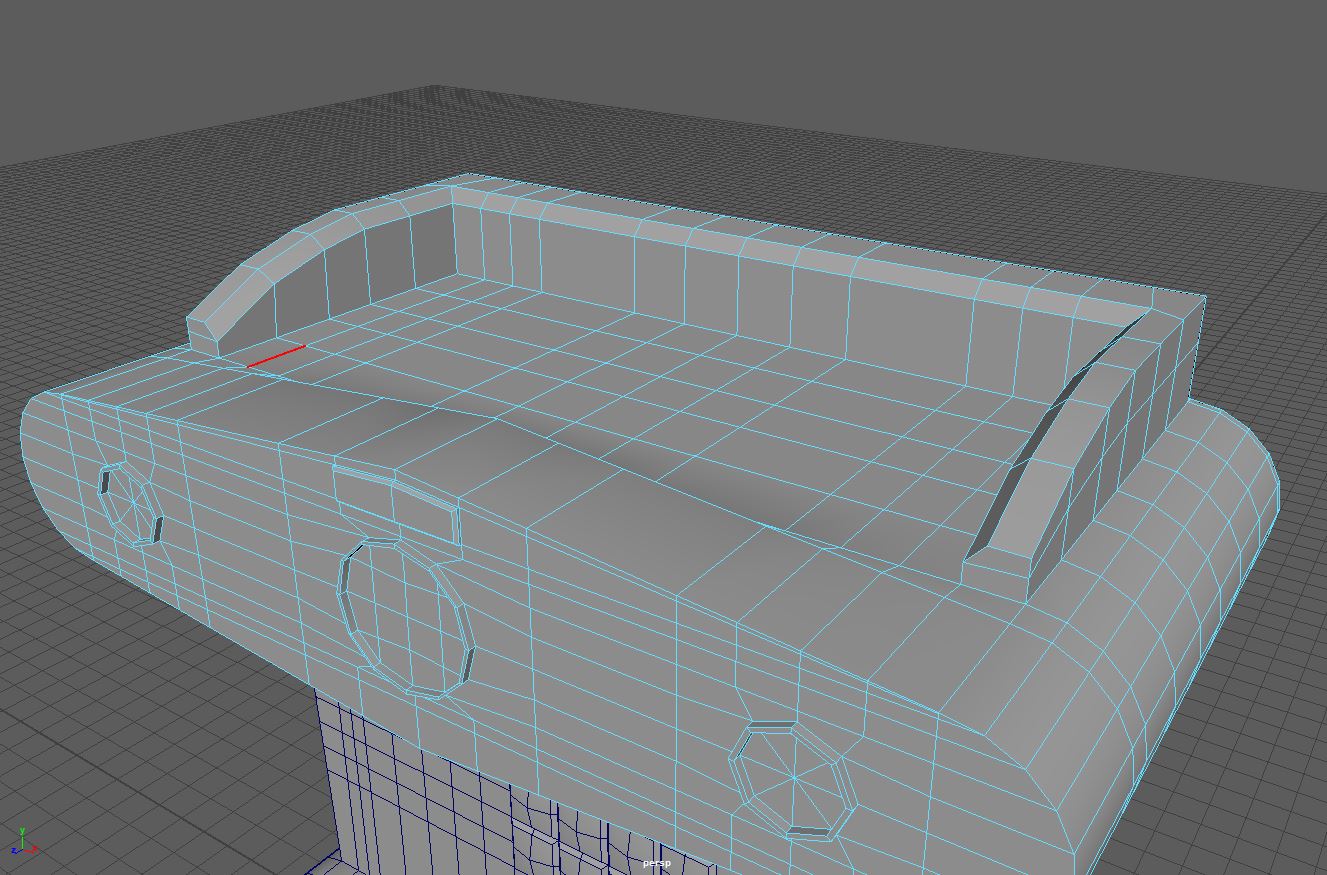
Next came the body of the asset, which was very straight forward. I wanted this piece to be formed from the bottom section as they are in the references, however didn’t want to Boolean two pieces together as I find I tend to have issues with my topology when I do so. Instead I simply added to edge loops which gave me the thickness I wanted and extruded outward. Once I had the height of the back piece I selected the top most vertex and moved them outward horizontally. A small detail I think adds to the overall look (Fig.6).
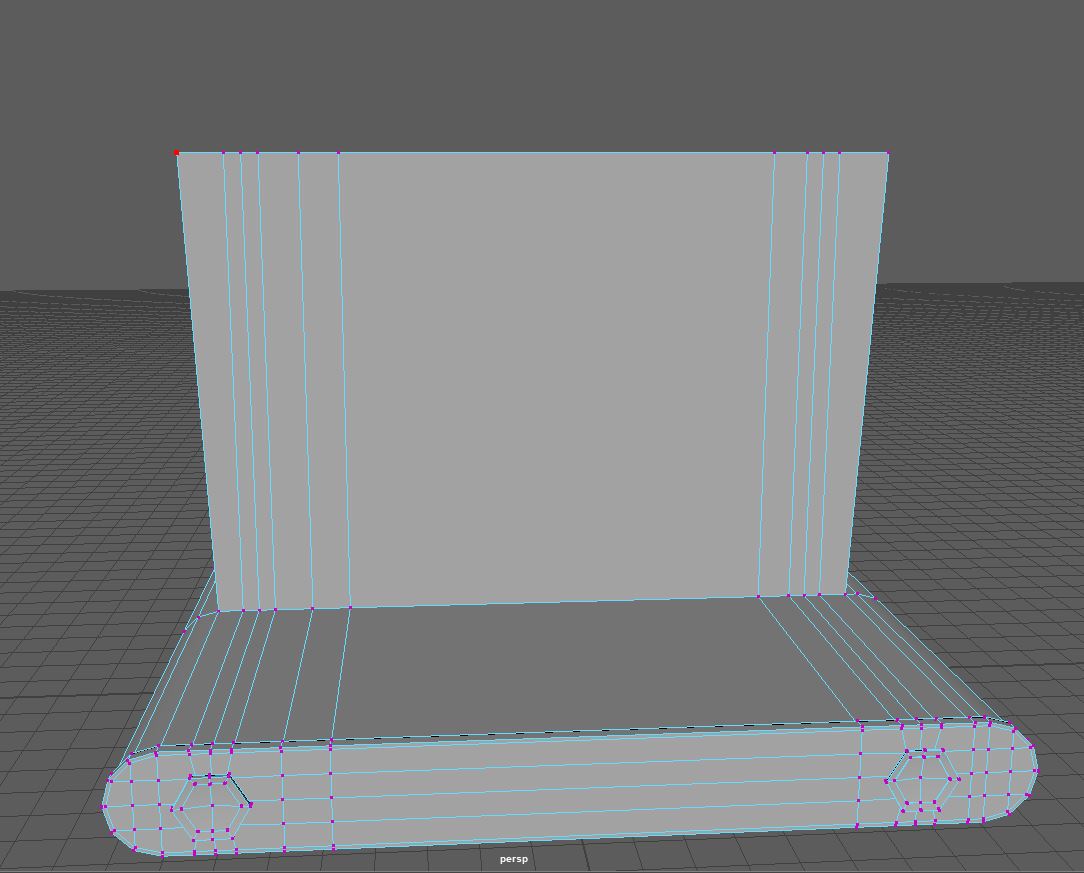
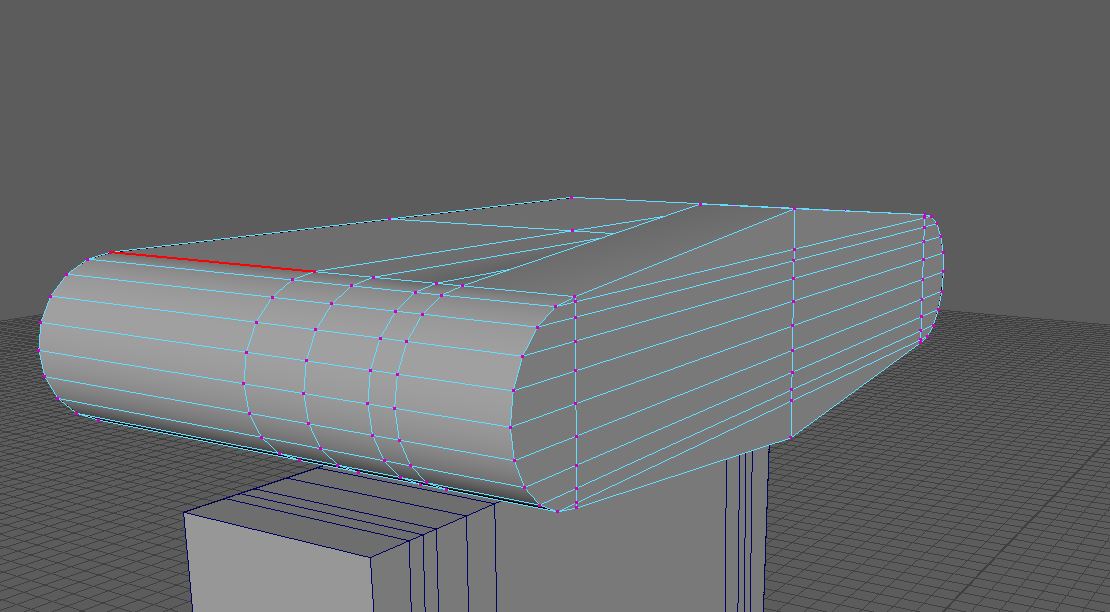
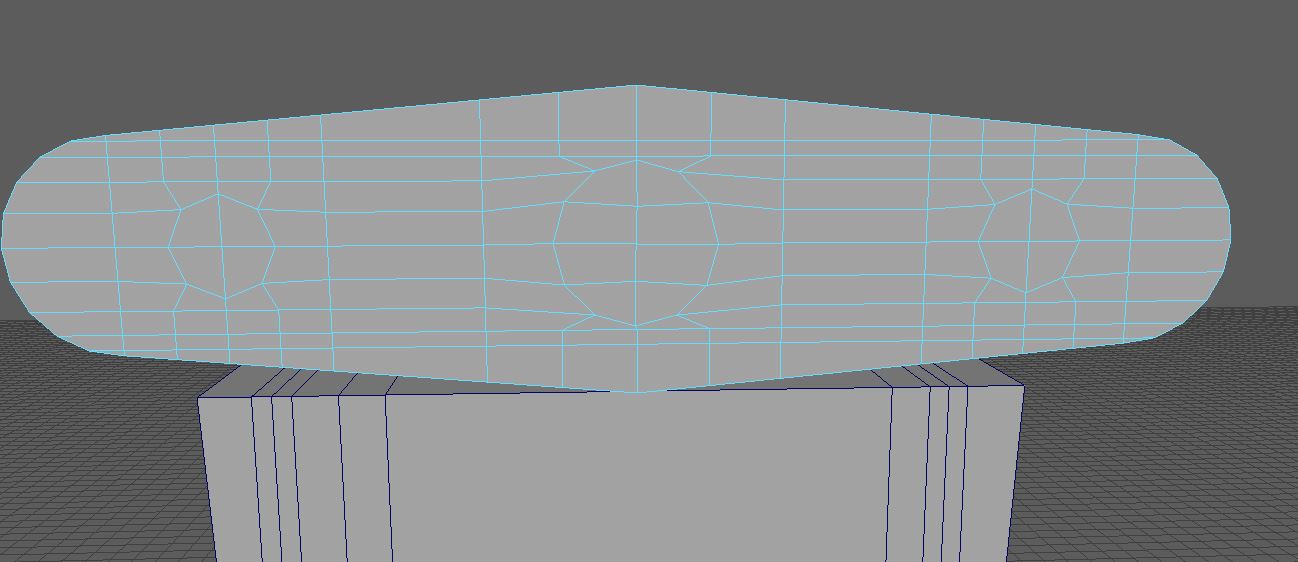
Also here I made the top section in the same way as how I made the bottom section. The only difference being I extended the middle vertex outward from each other, giving me this almost clock face look. Which gives me room to add the dials and switched I needed (Fig.7).

Fig.8 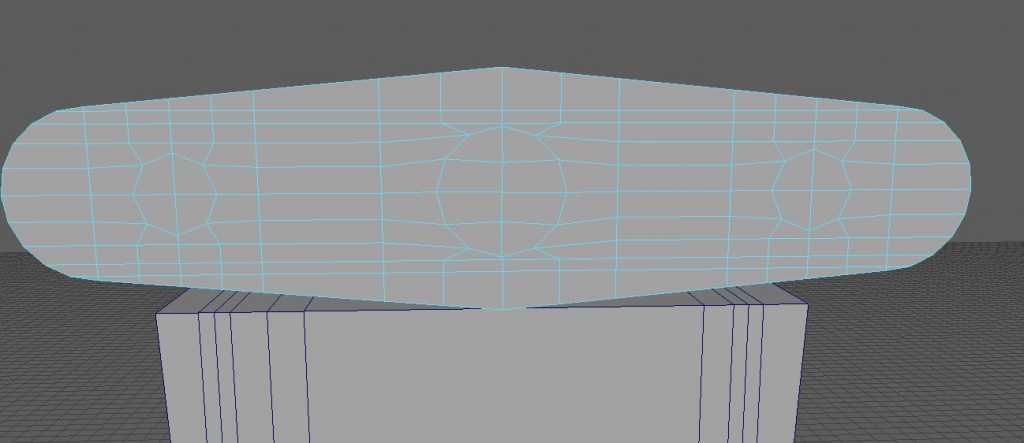
Fig.9 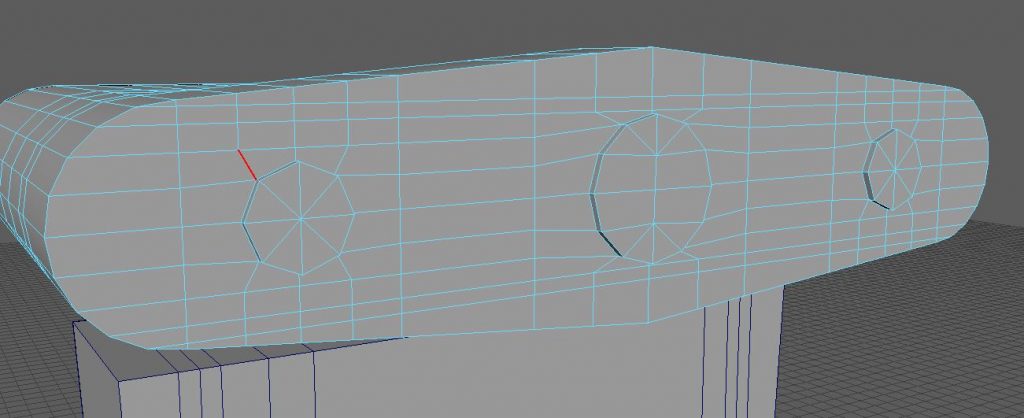
Fig.10
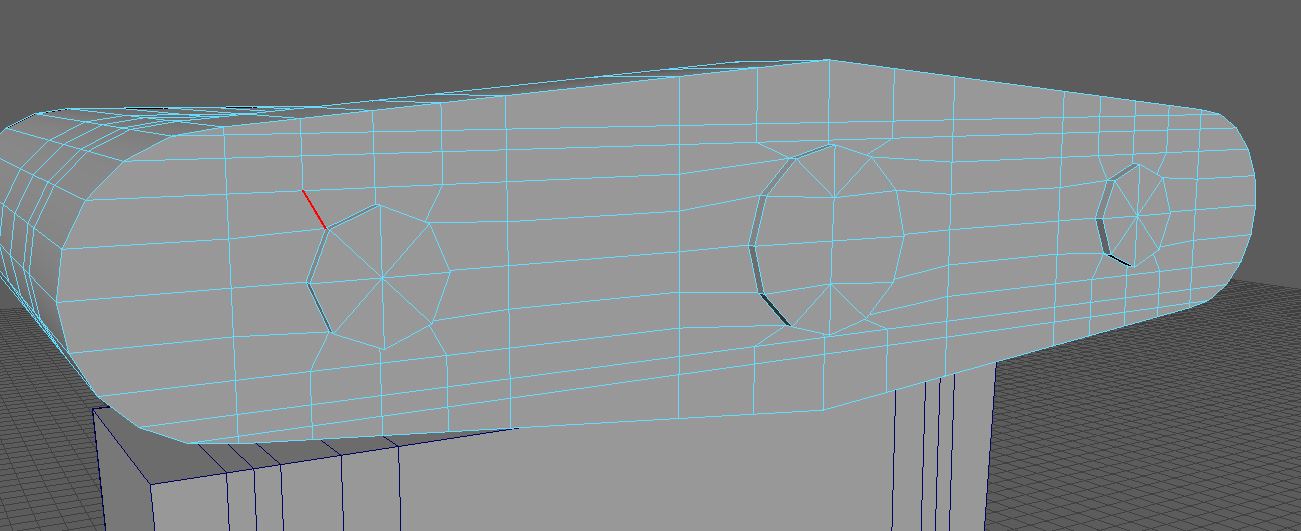
I made the dials for the top piece the same way I made the handles on the bottom piece. I added edge loops where I needed them (Fig.8) and circularised the faces where I wanted to form the dials from (Fig.9). Then I extruded the circularised faces and intruded and extruded the parts I needed to make a small ring where the glass would sit in a dial (Fig.10).
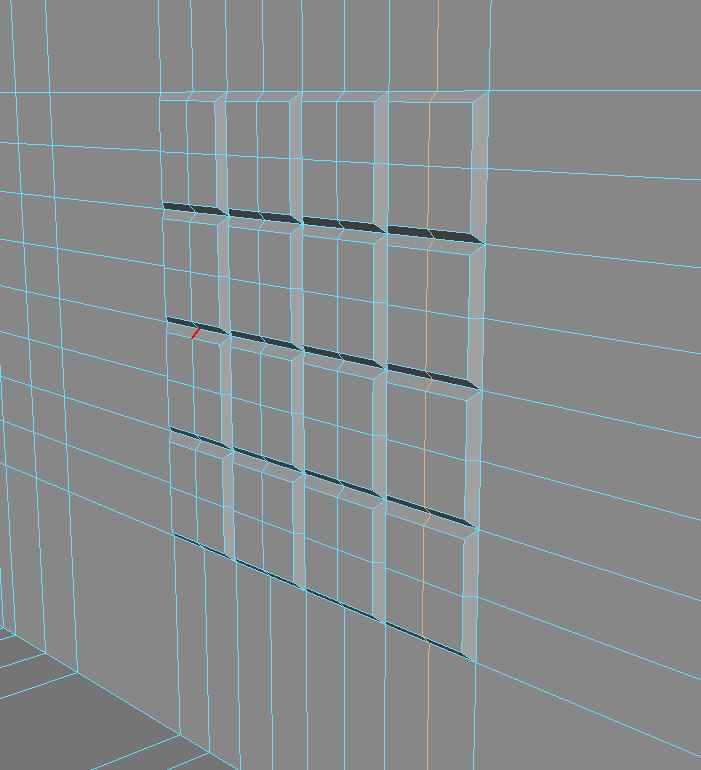
Fig.11 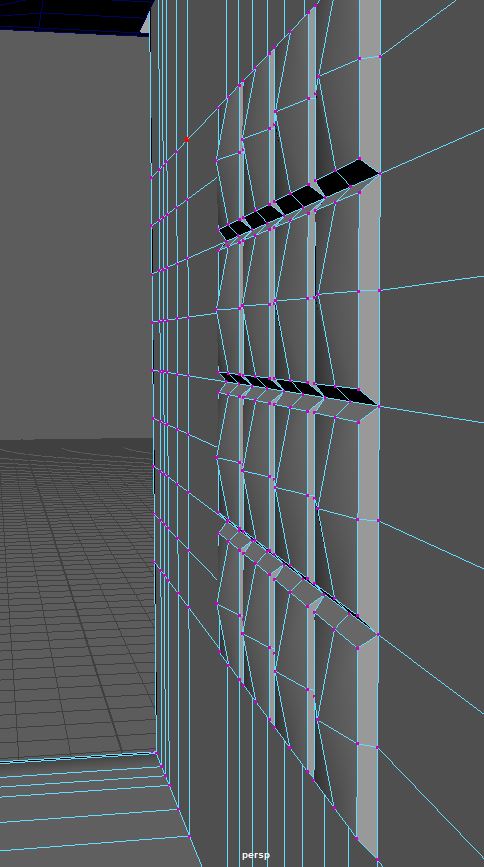
Fig.12 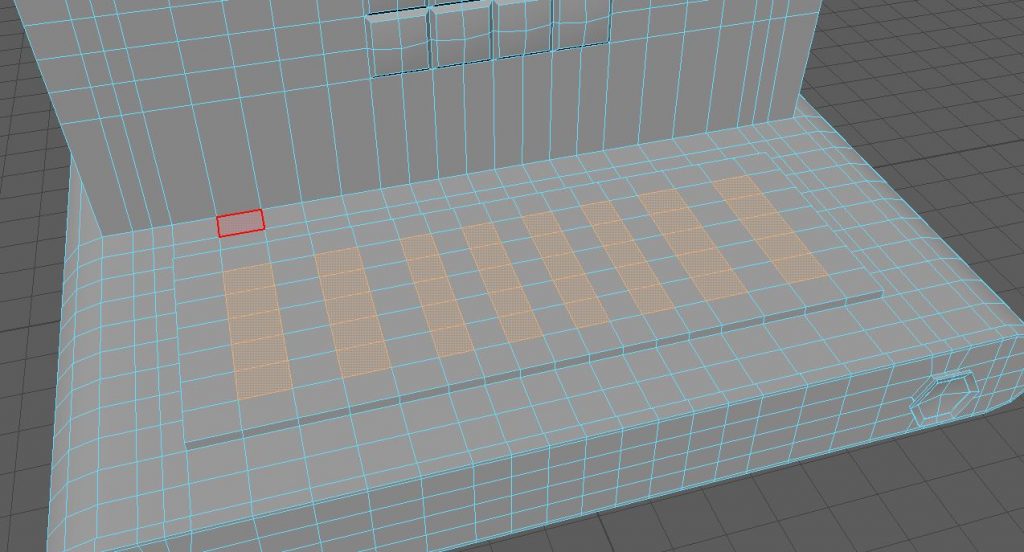
Fig.13 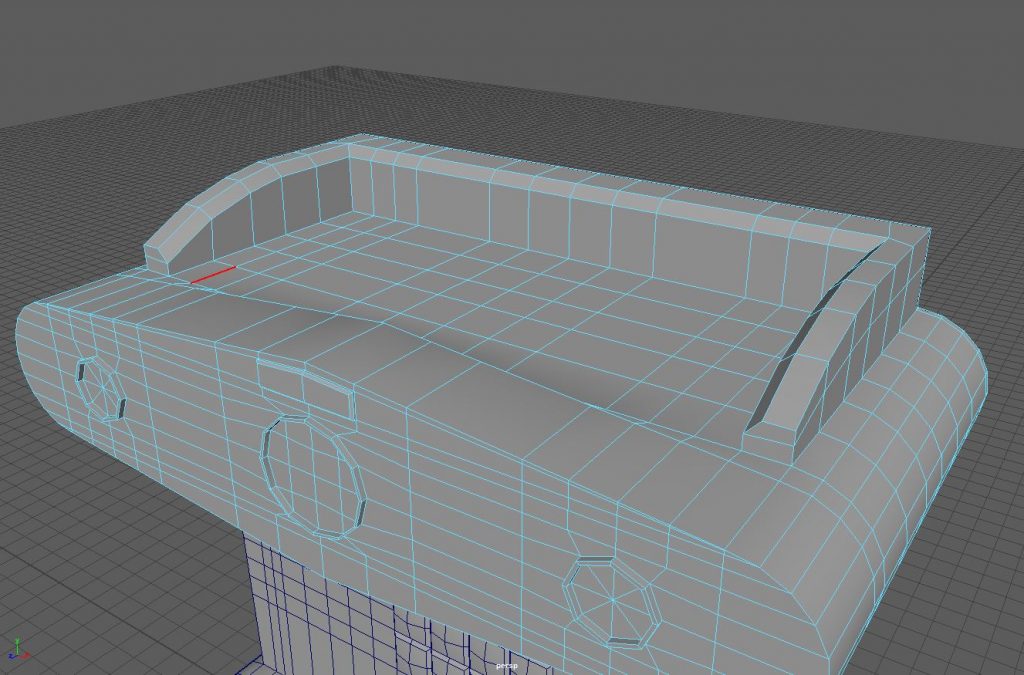
Fig.14
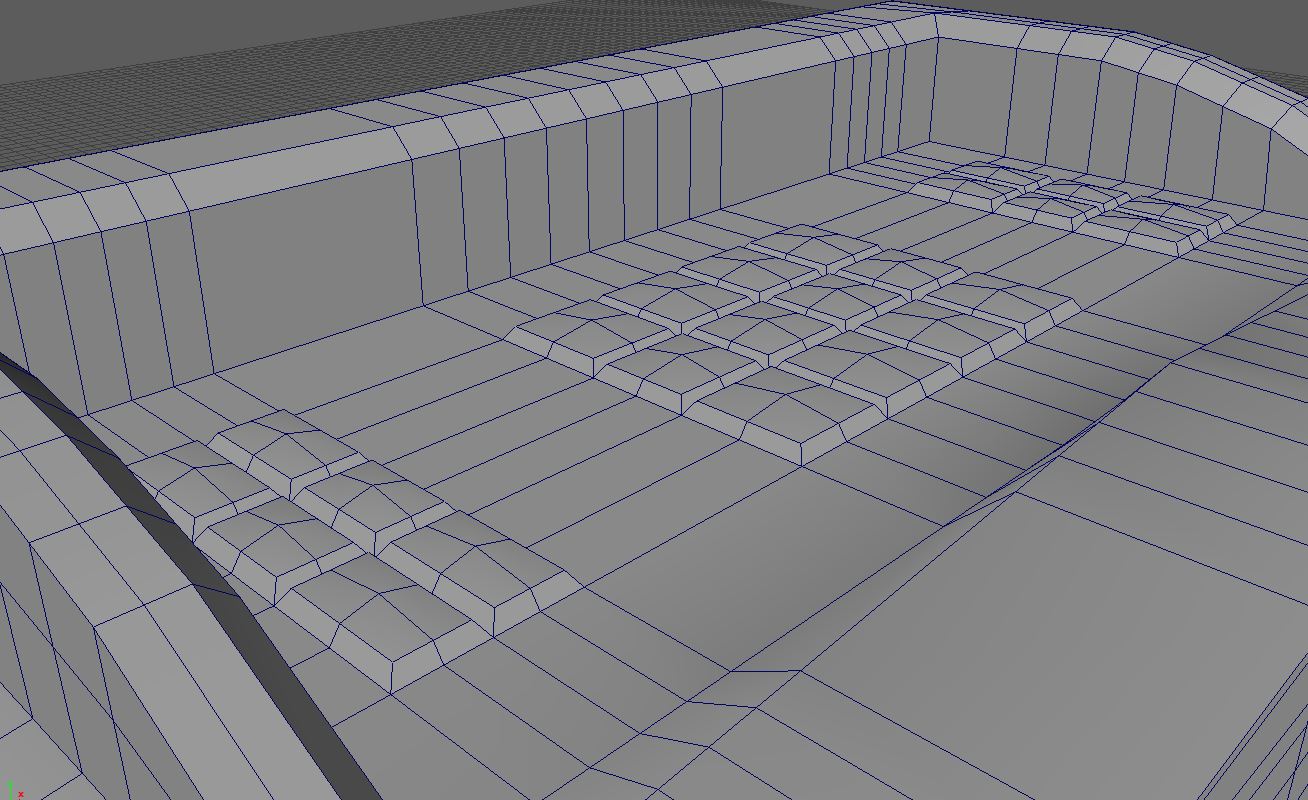
I had learnt not to use the poke mesh tool to make these tiles and so instead simply used edge loops and an extrude option, using and offset on faces which I had told maya not to keep connected (Fig.11). Then I added intersecting edge loops through the centre of these tiles to give me a vertex point in the middle of them, which I can then move outward, to give a nice texture (Fig.12).
Also to make the drinks tray I used the same edge loop and extrude inward method I had used in the drinks dispenser before. I would have liked to learn how to make a grate like that found in modern day coffee machines. However could find a suitable tutorial for this, I suspect this would be done in texturing the details onto a blank plane instead (Fig.13).
Next I made the tray holder for the design. This again was very simple, I just placed edge loops where I needed them and extruded to give the size and shape I needed, then bevelled the edge just to add a little more detail to the design (Fig.14)
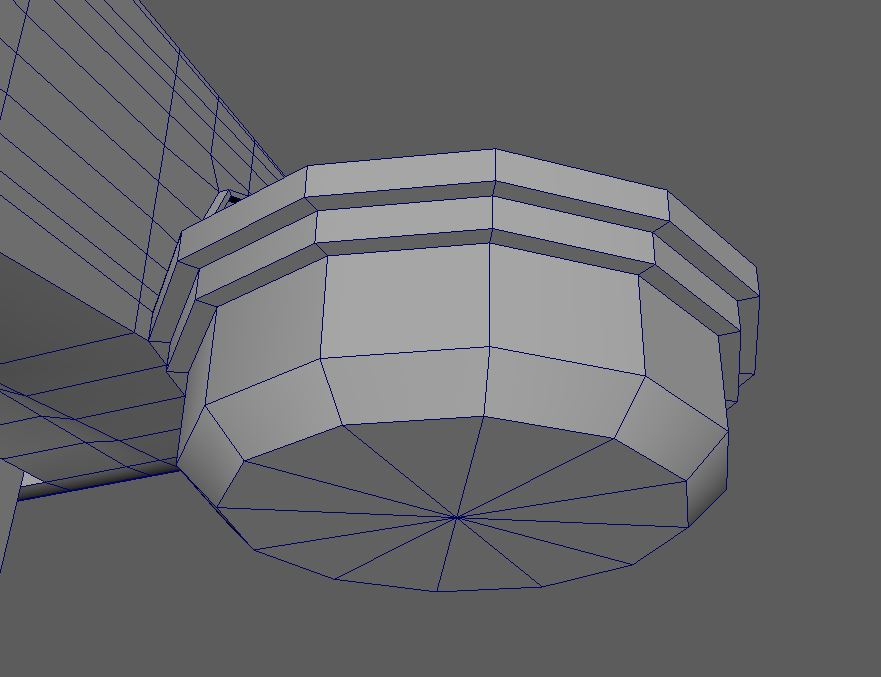
Fig.15 
Fig.16 
Fig.17
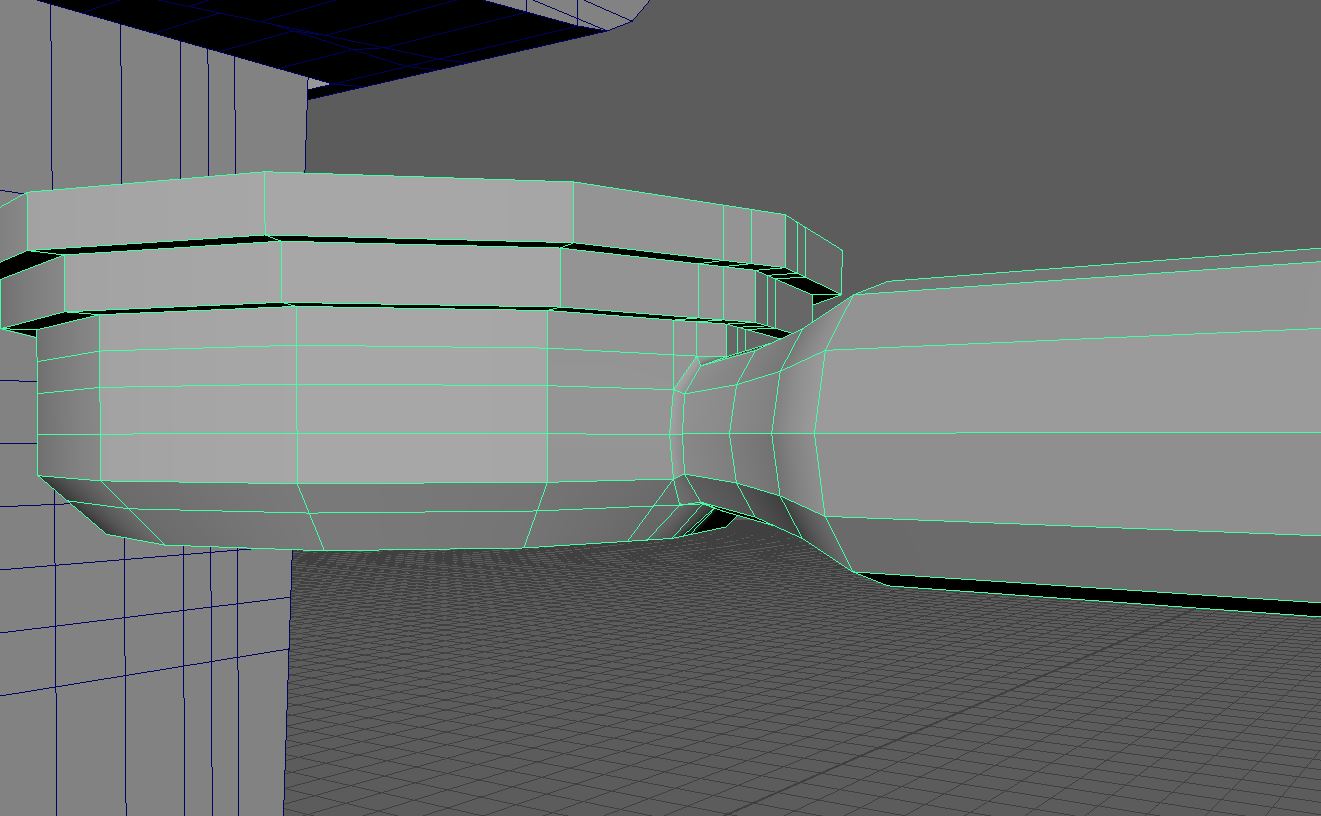
I had a few issues making the filters for the machine. It was easy enough to make the holder section and handle parts separately, using extrude and bevel for one (Fig.15). and vertex manipulation for the other (Fig.16). However, I didn’t know the best way to connect the handle and the cup together. As they are very different shapes it wasn’t as simple as connecting the handle and body of a mug. Ultimately, I booleaned the two pieces together (Fig.17). I know that this isn’t exactly how these filters are built in real life, the handle is supposed to merge under the cup as well, however I simply didn’t know how to do this and for such a small part I thought what I had was good enough.
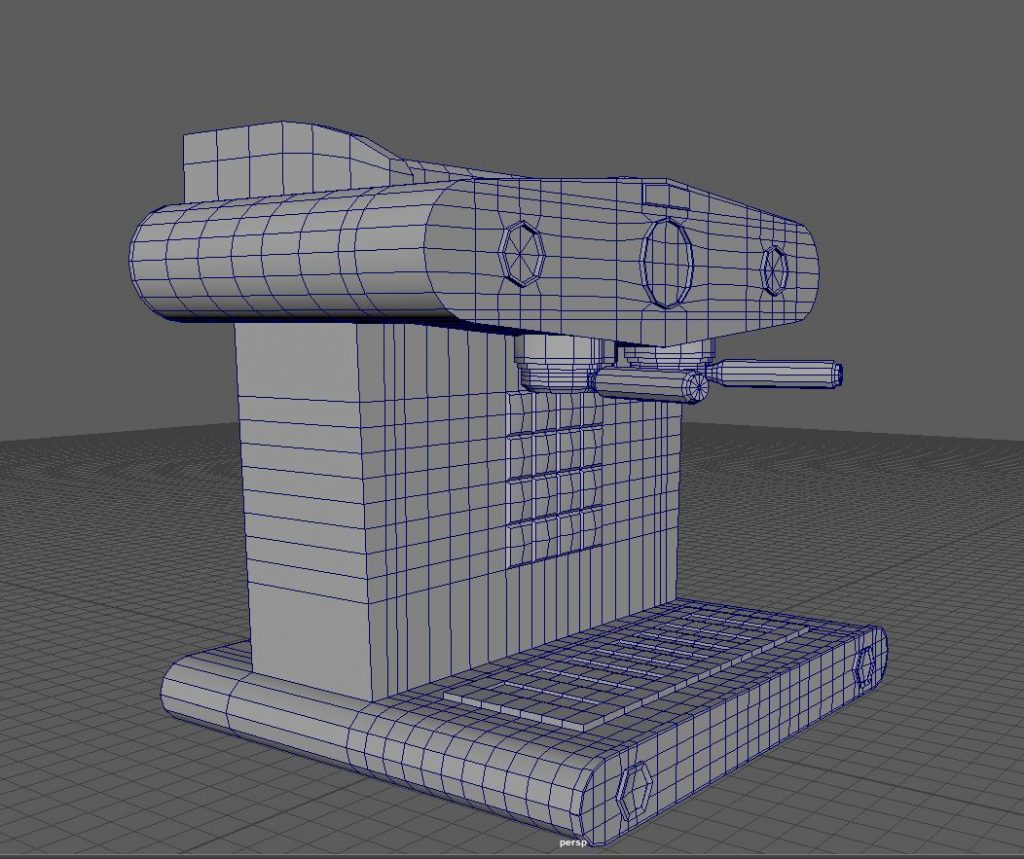
Fig.18 
Fig.19
At this point the design was really coming together well. I just wanted to add the final touches of the metal switches to the face. (Fig.18). The other final touch was just to add the same tile patters I had used on the back part of the design to the top tray (Fig.19). I did debate whether I should make a couple of different cup designs and place them upside down on this part of the design, however felt that if I had been commissioned to make this model I don’t think adding cups would have been appreciated. They would be different assets and as such should be treated as such.
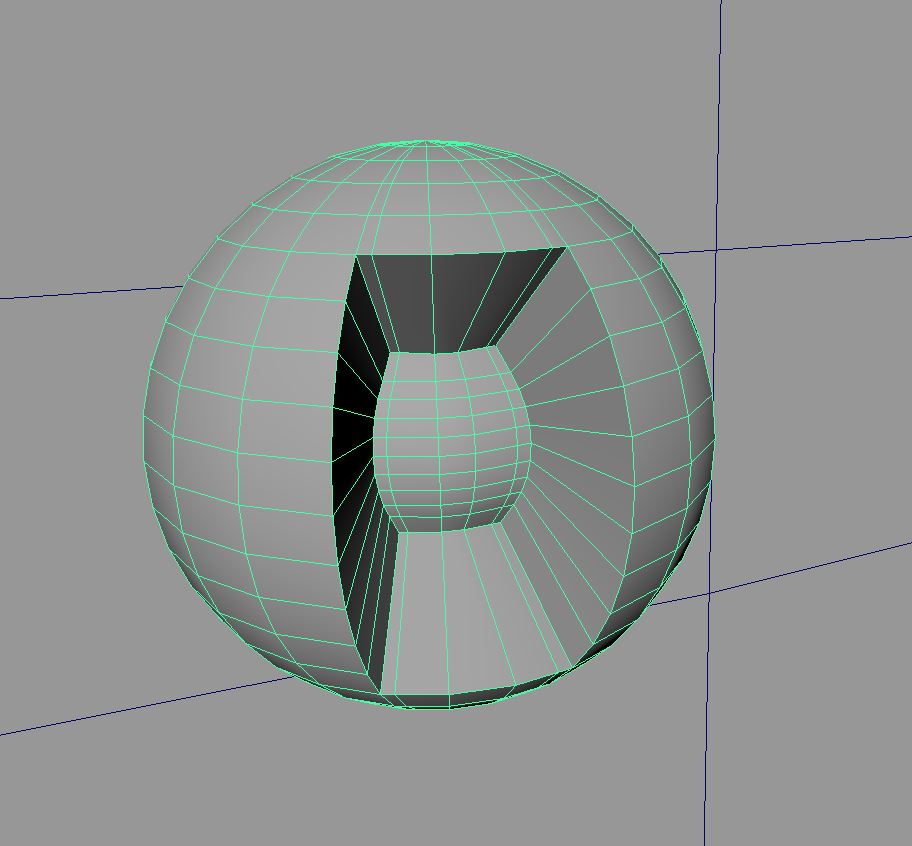
Fig.20 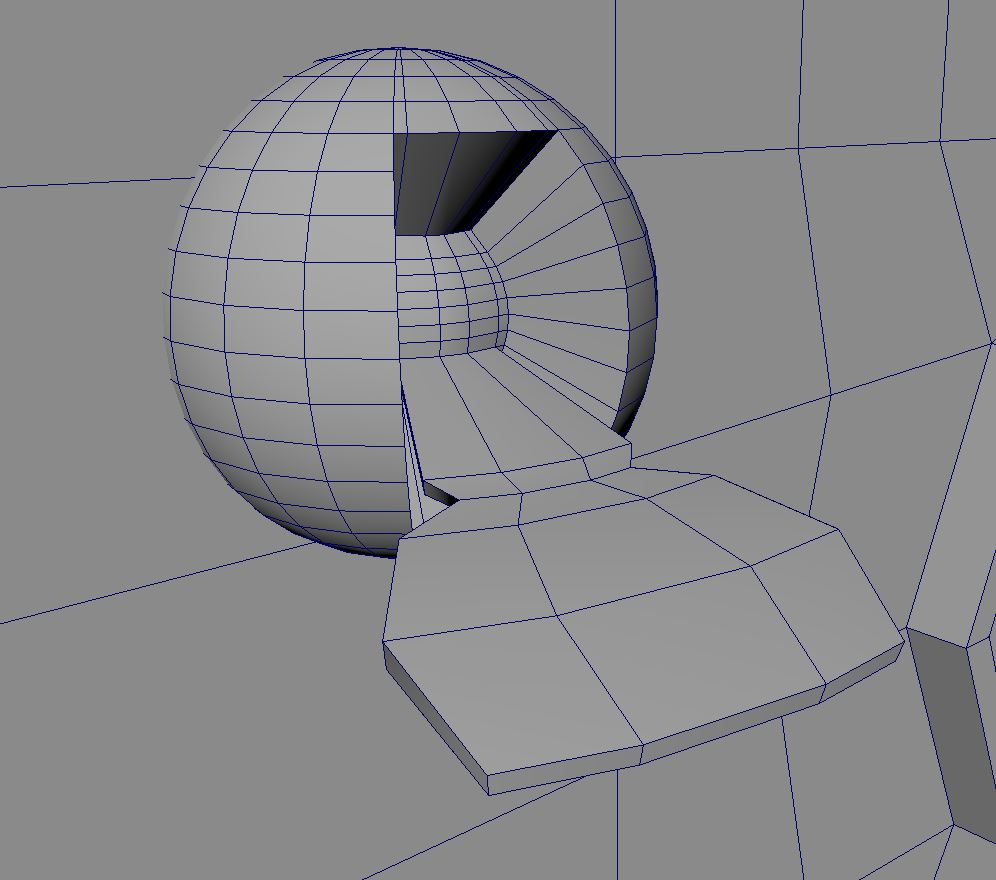
Fig.21
With the switches I began with a sphere, To which I intruded a few of the columns at the front (Fig.20). Next I selected the faces just below the middle line horizontally on the new smaller faces and extruded outward. I then added and manipulated the vertex to give the the shape of the switch handle (Fig.21).
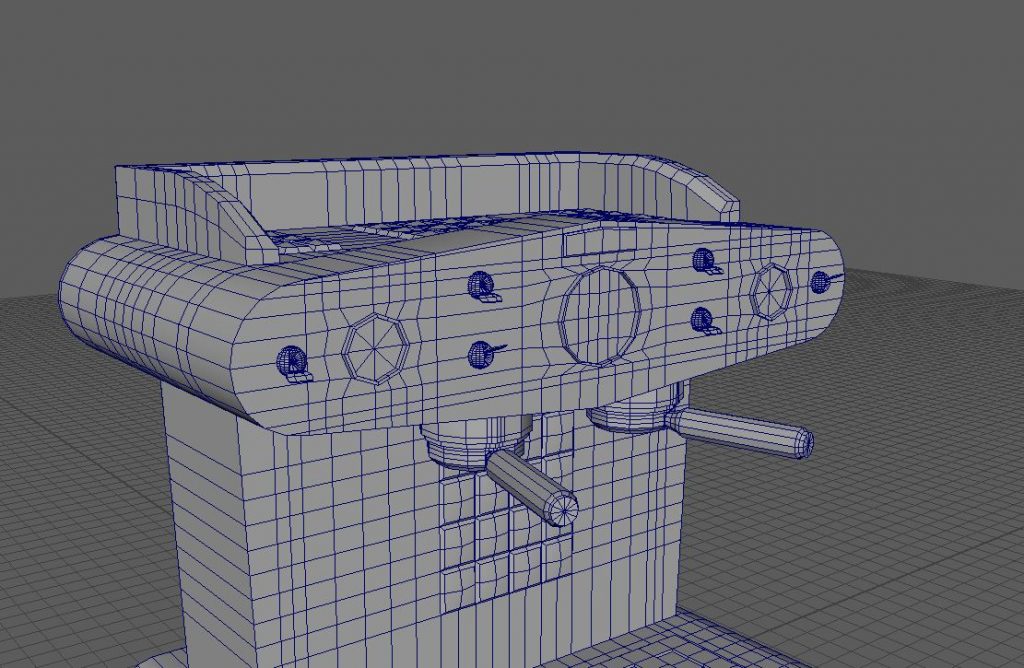
Fig.22
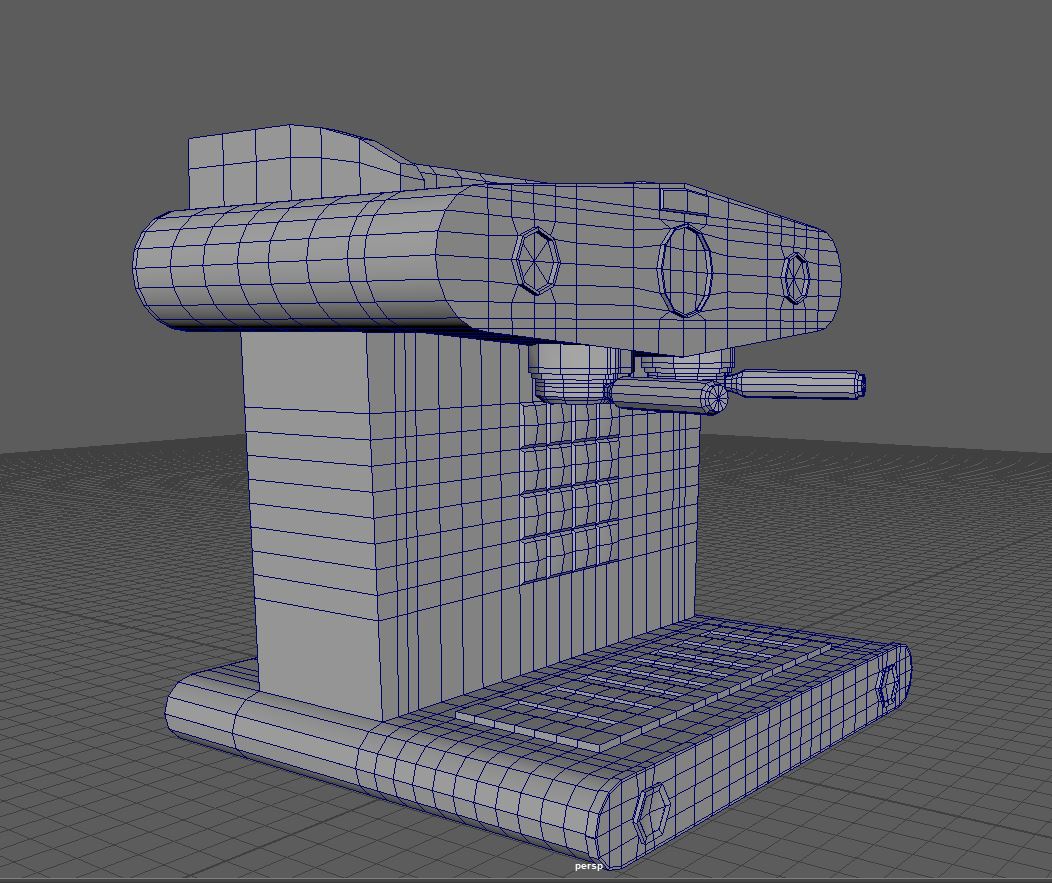
Finally, I duplicated this switch object and rotated 180 degree, giving me a switch that had been turned on and one that had been turned off. I then duplicated and placed these switches as I wanted them. With this the low poly model was done and I could duplicate it and add the supporting edges where needed for the high poly model (Fig.22).
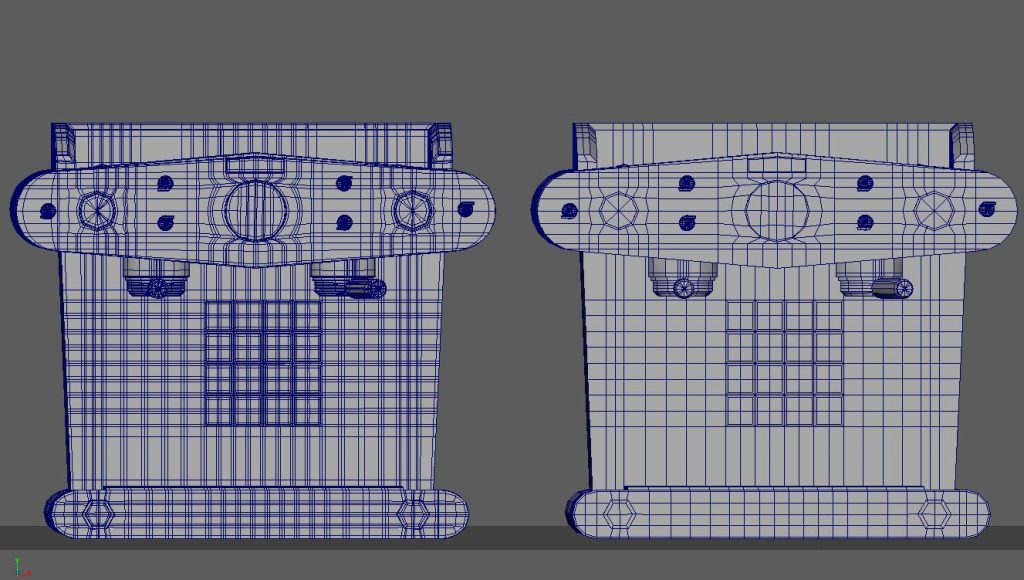
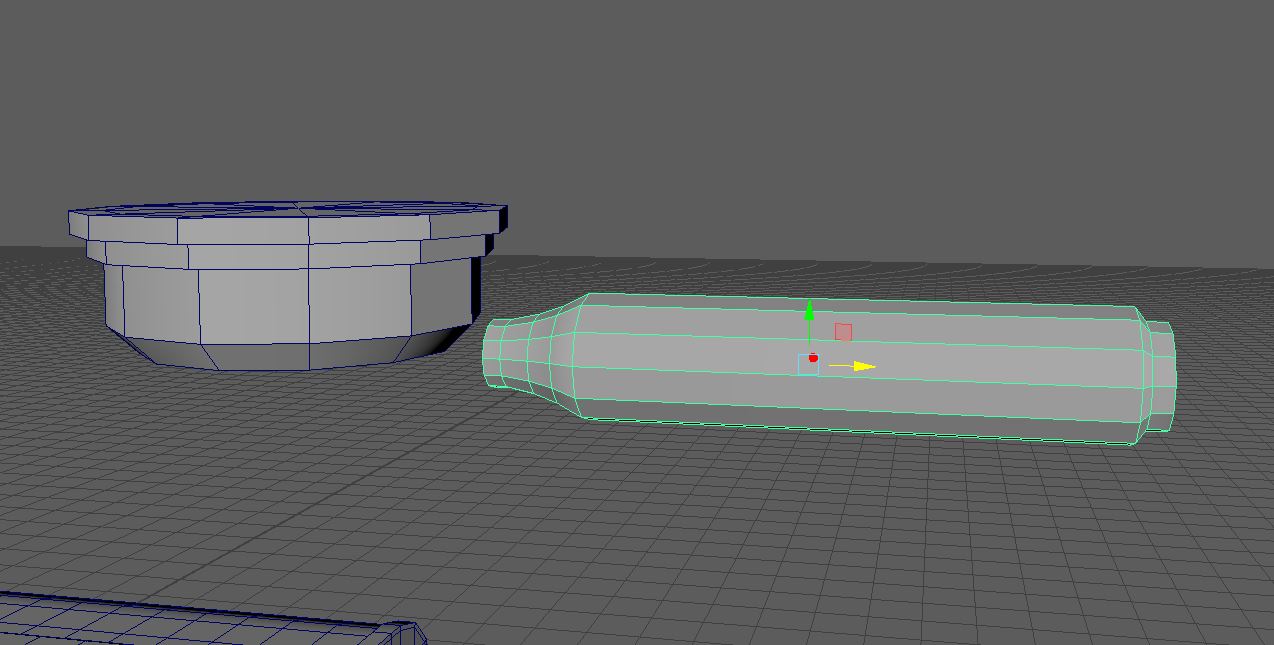
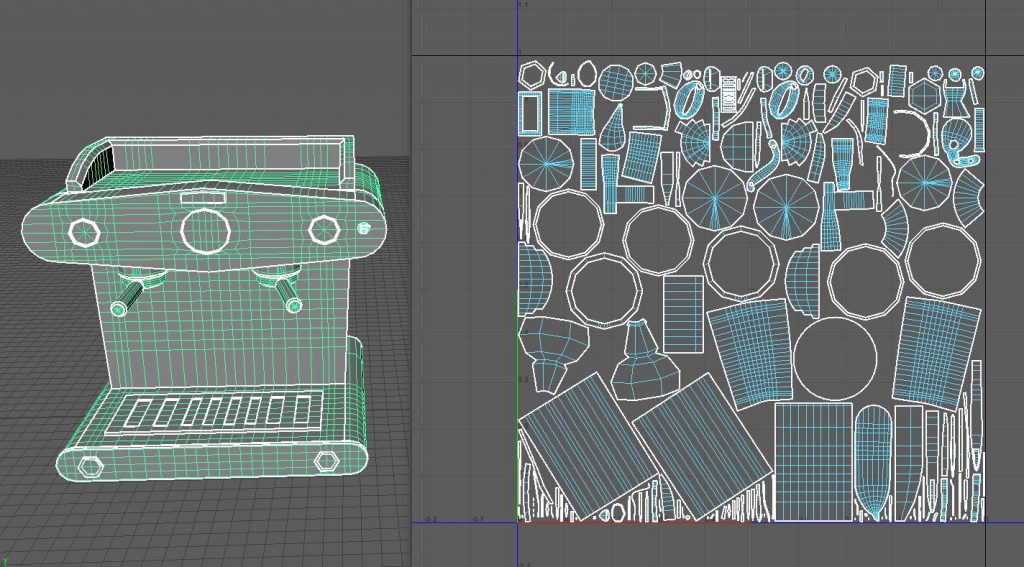
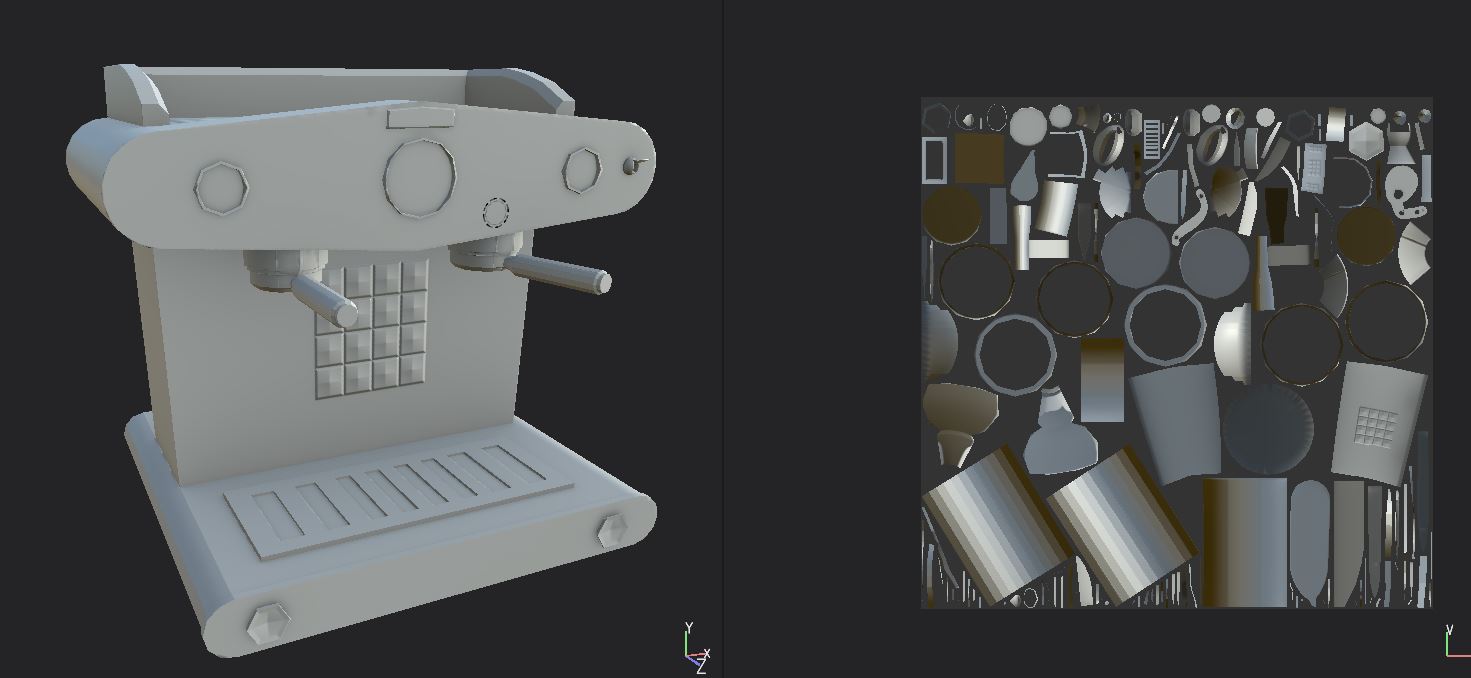
Here you can see the two finished models, the one on the left being the high poly and the one on the right being the low poly. I like the design however do feel like the low poly is quite complex. I would like to experiment with different methods to get this poly count down. One thing I was told after I had finished this model was that it is okay to have ngons in a low poly object. So for things such as making the tiles the poke mesh tool would work and result in a less complex mesh. Overall though I am happy with the design of the model.
UV
This is the UV that worked for my model, I got a little confused by this UV as I used a lot of smooth rise and falls to make the edges. That’s why this ended up being the final UV I did out of the models, by which time I was pretty sure what the 2D view should look like.
Texturing
With the bake there was some very slight artefacting around the dial faces (Fig.2) Also the handle looked a little rougher than I intended, I don’t actually hate this change, I just didn’t anticipate it (Fig.4). I imagine this is because of heavy usage of supporting edges in the high poly model that then translated to this in the baked model. Finally, and this is one thing I don’t like about this model, but the tiles are a very shallow mirage. As soon as you look at the model anything other than head on the façade falters and you can see that the tiles are flat. I do think the tiles in the drink dispenser worked better than they did here.
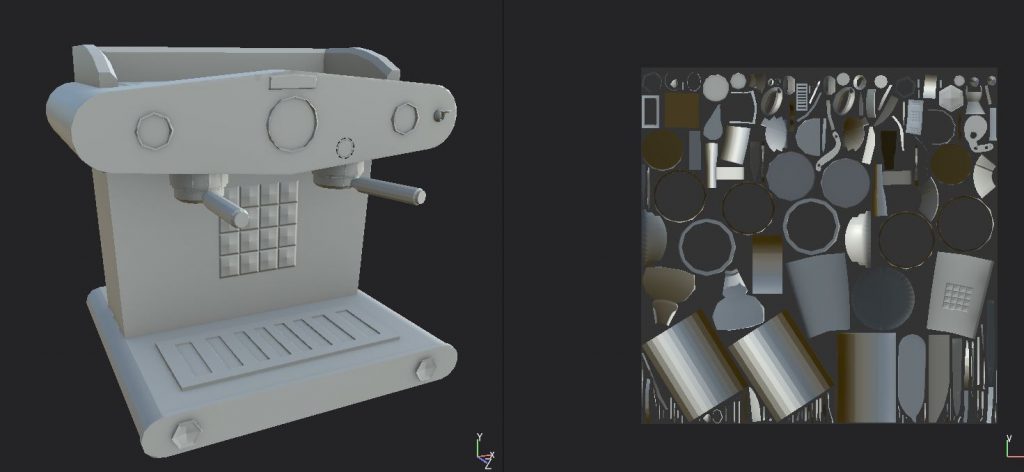
Fig.1 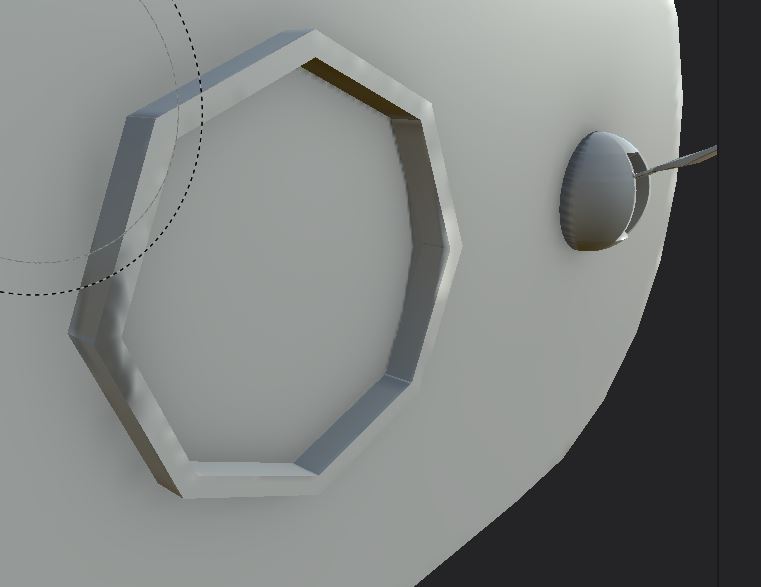
Fig.2 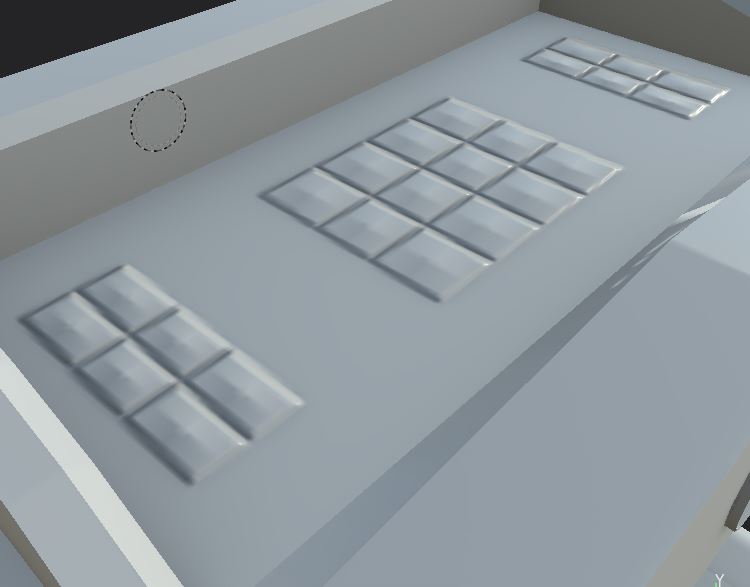
Fig.3 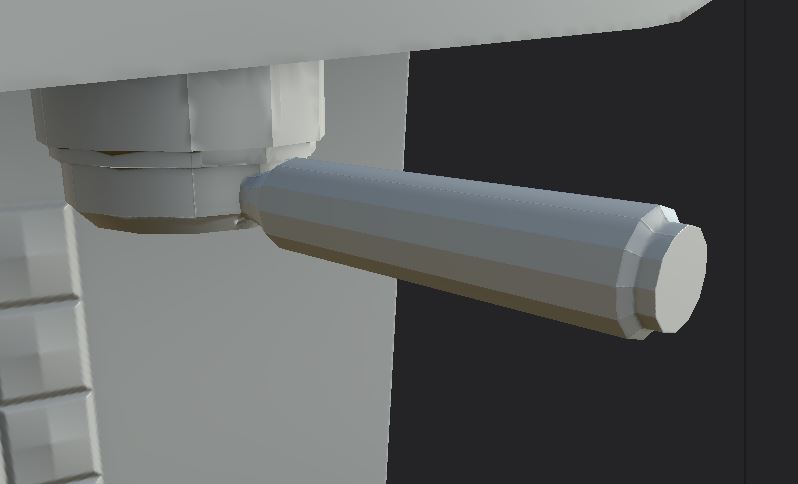
Fig.4
I started with the handles of the filters (Fig.5), then a steel texture I used the tile areas, the front of the drawer and the dial faces (Fig.6). Then I simply added a plastic layer and changed the base colour to a nice red that linked the model to the ceiling light, bar stool, and booth seat I made previously (Fig.6). At this point the base colours were in place and I just had to add the little touches to make the model appear like a well used coffee machine, rather than a flat shiny new one.
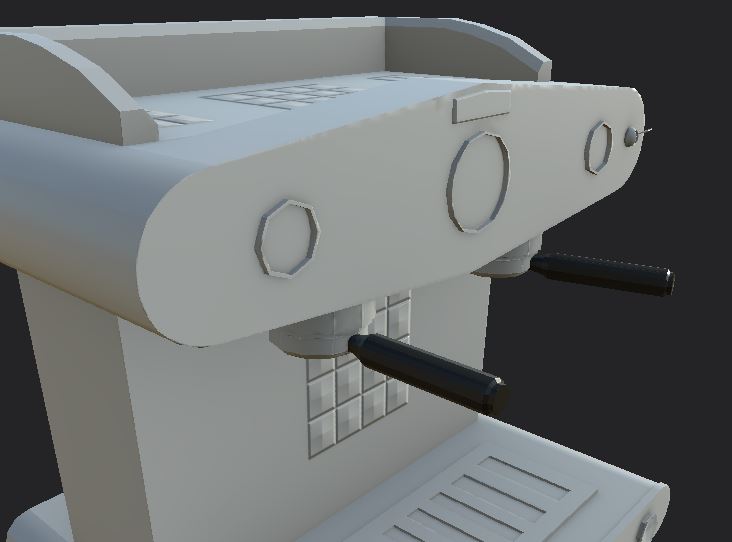
Fig.5 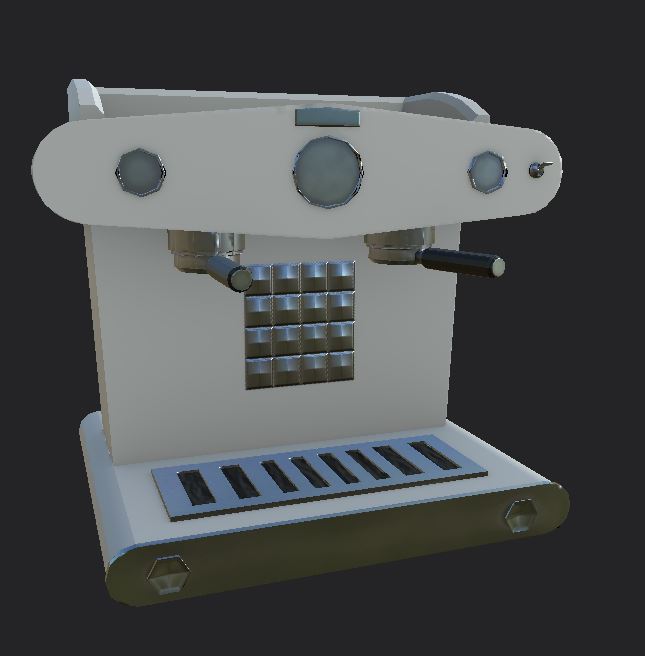
Fig.6 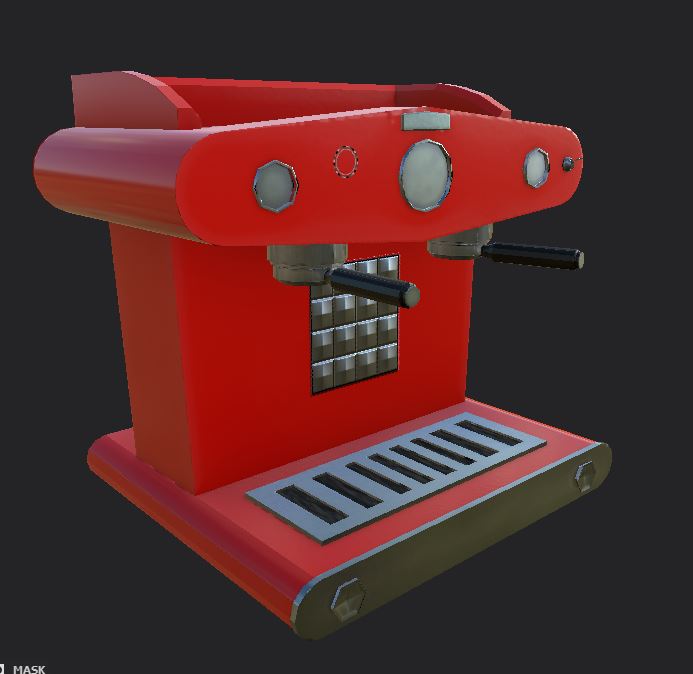
Fig.7 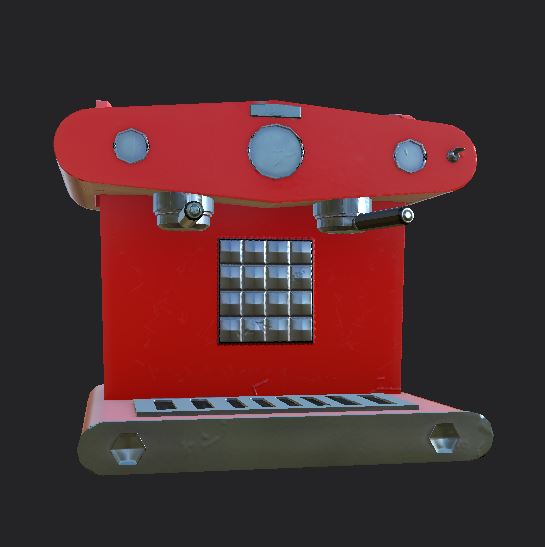
Fig.8 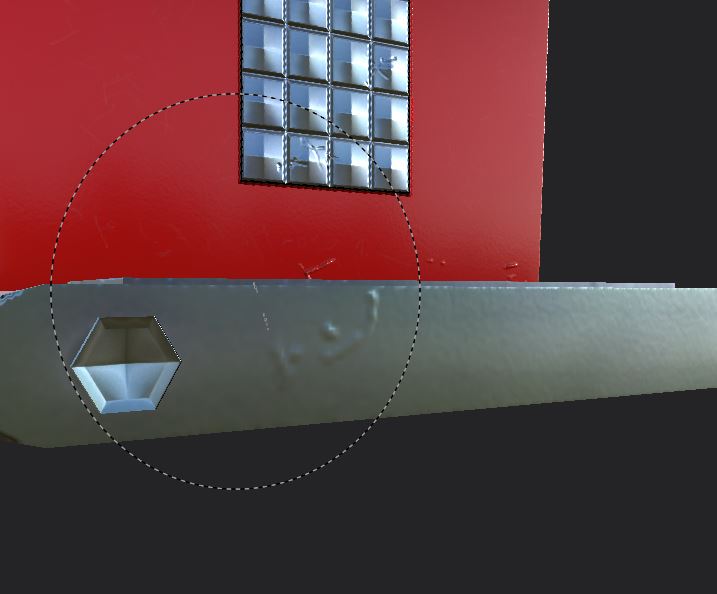
Fig.9 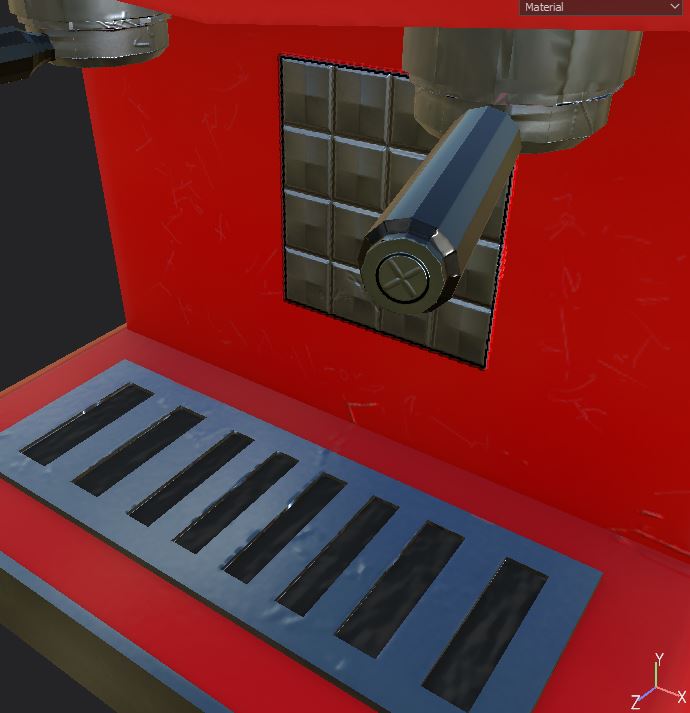
Fig.10
To do this I used different tools to give a little wear in realistic places (Fig.9) and as a final touch added the screw head to the end of the filter handles, which I thought would make them look a little more finished than they would otherwise (Fig.10).
Final renders can be found here
Referencing
Adexa.co.uk. Professional Espresso Coffee Machine Automatic Tall Cups 3 groups 17 litres [Product]. Available online: https://adexa.co.uk/Professional-Espresso-Coffee-Machine-Automatic-Tall-Cups-3-groups-18-litres-Fiamma-III-CV-TC-ECC?language=en¤cy=GBP&gclid=CjwKCAiAiML-BRAAEiwAuWVggkJqe6RBO8UGeGgyr_NuH-F0hY56NIkxiUkYg0MKYrd_sCivRlw7RxoCnwkQAvD_BwE [Accessed 03/12/2020}
At Home in a House Subdivided 150-Present [Online Article]. Coffee Maker 1972-1992. Available online: http://exhibits.museum.state.il.us/exhibits/athome/1950/objects/coffee.htm [Accessed 09/12/2020]
RedMonkeyCoffee.com. FrancisFrancis! X2 Twin Group Espresso Machine [Product]. Available online:http://www.redmonkeycoffee.co.uk/cart/indexframe.html?http://www.redmonkeycoffee.co.uk/cart/X2.html [Accessed 03/12/2020]
Pingback: 3D Art for Games – Wireframes – Post 5 – Coffee Machine & Car Front End – Fraser Ibbotson – 647603