Making this model ended up being much more complicated that I thought it would be. I had many issues with my topology that took a long time to fix and I had to remake part of the model. On the bright side I learnt to keep checking my topology as I modelled and I got to experiment with some new techniques.
Pinterest (Unknown Artist((a). [Accessed 03/12/2020]
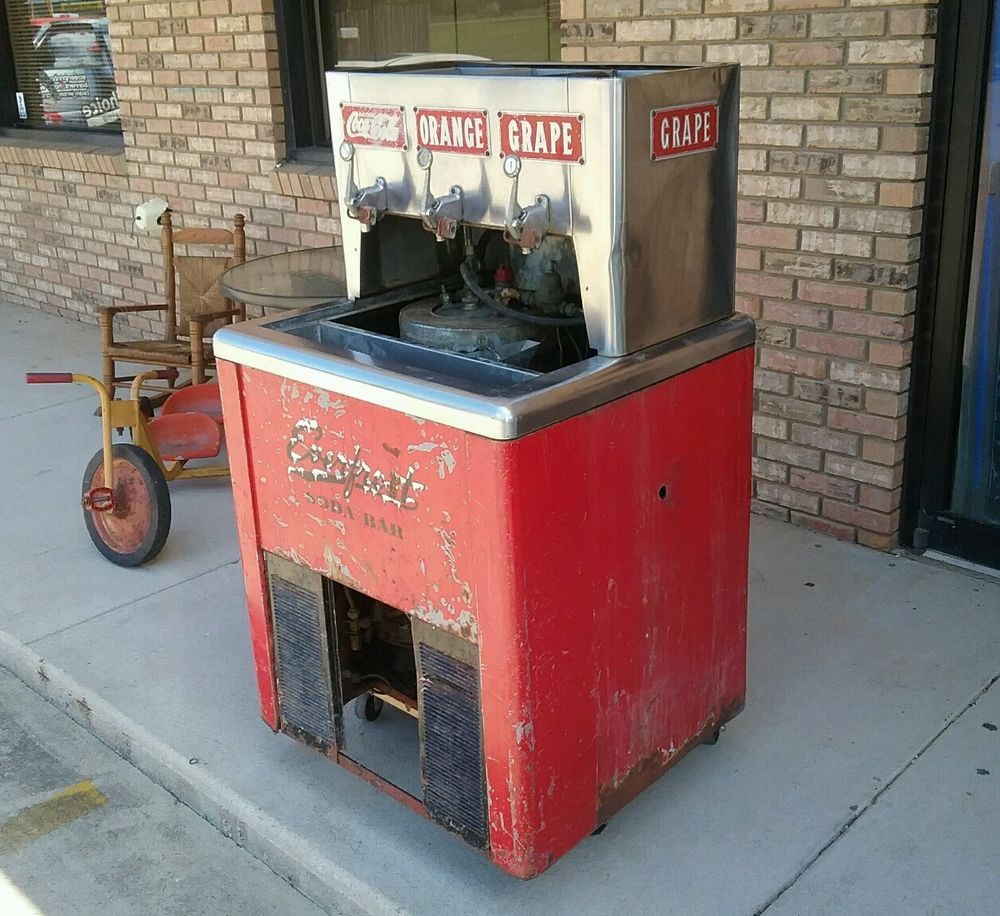
This is the reference I used for most of my design. I love the industrial appearance but as my scene is a shiny diner the worn down patina is something I would have to change. I’ll also be using this same colour scheme as it works well with the other assets I have created.
Pinterest (Unknown Artist((b). [Accessed 03/12/2020]
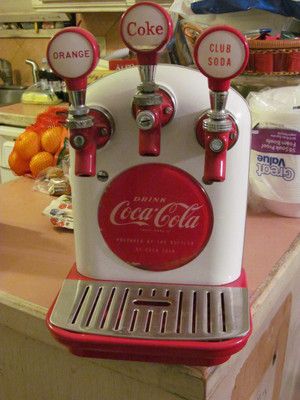
This reference was used for the drainage tray design as well as the handle pumps as I think these look a little nicer than the ones found in the first reference. I will however have to make my handles look like they are made out of steel, as I don’t like the plastic look of this item.
Production
This object was always going to be boxy, so naturally I began by creating a poly cube, I then scaled the cube and intruded a small section at the bottom, to pay homage to the space found in my reference (Fig.1). Next, I created another cube and scaled it to make a shoulder piece for the base of the model similar to what I did with my vintage fuel pump previously. To this I added a bevel to the value of 1 on top, so as to give a nice, smoothed effect (Fig.2).
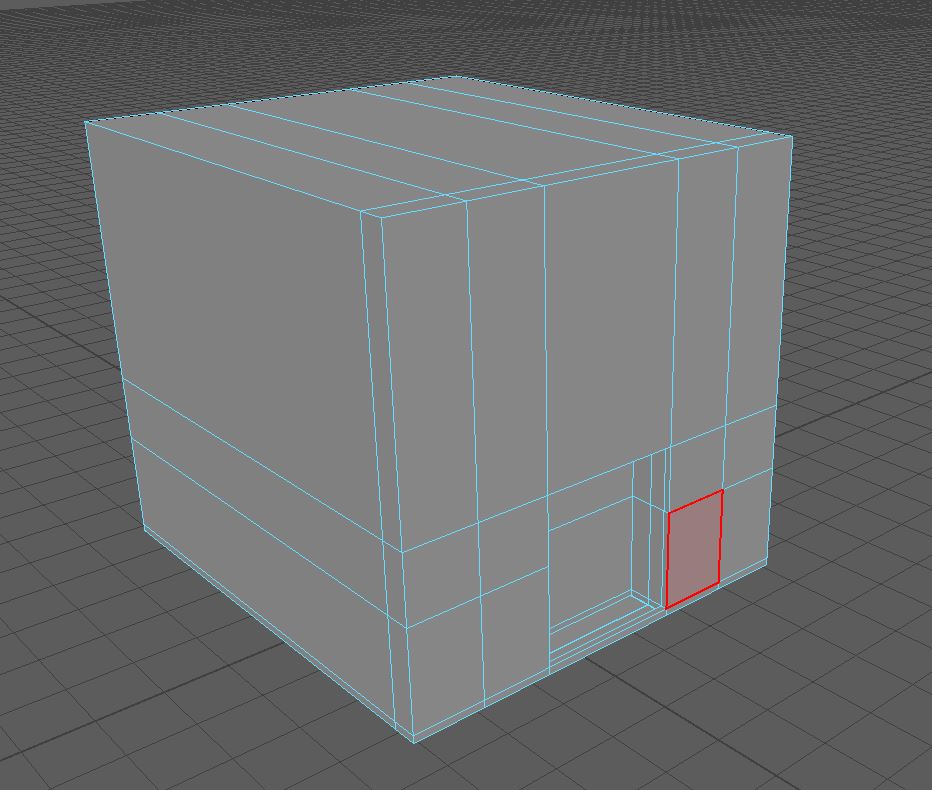
Fig.1 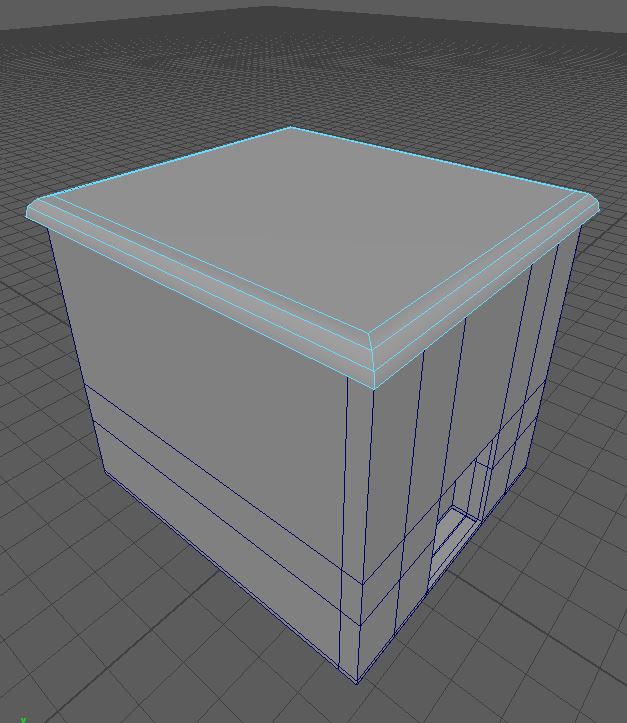
Fig.2 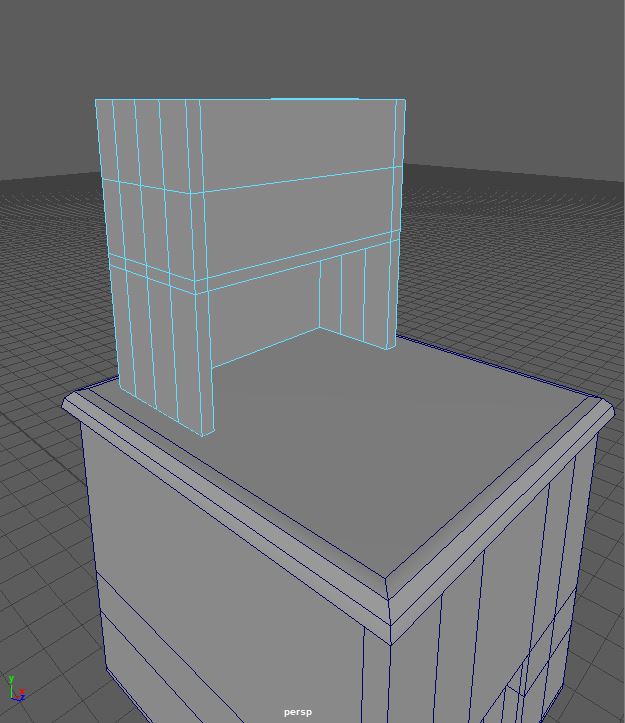
Fig.3
This is the first design for the top piece of this model. I ended up having strange topology with this design and so had to later remake it. To start with I created a cube, which I then shaped into the solid top piece of the shape. Then I added edge loops where I needed them and extruded downward to give me the rough shape I needed (Fig.4).
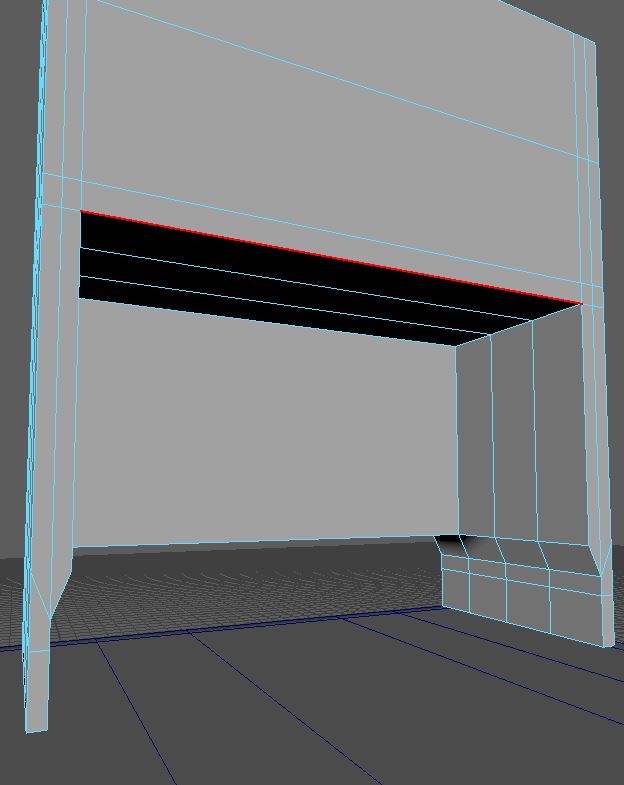
Fig.4 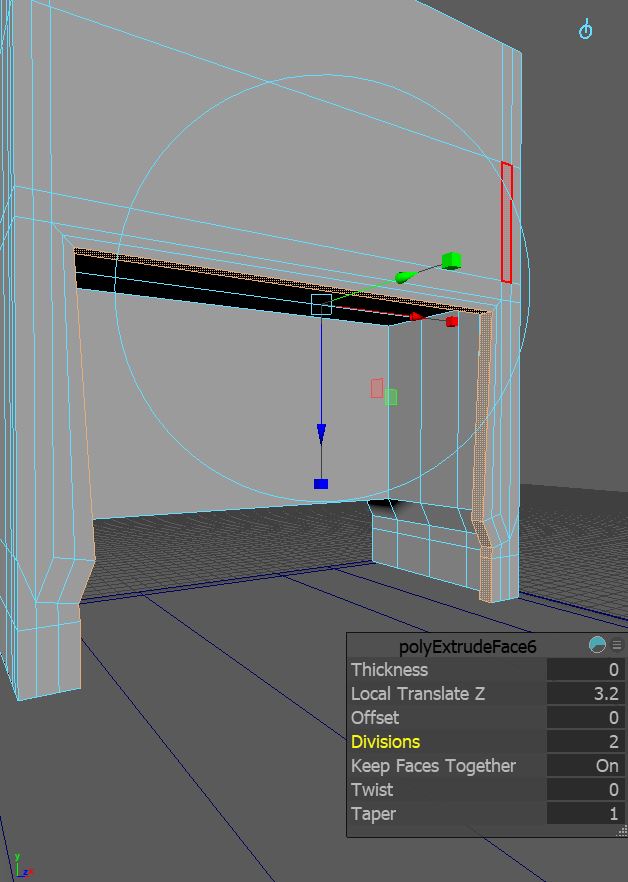
Fig.5 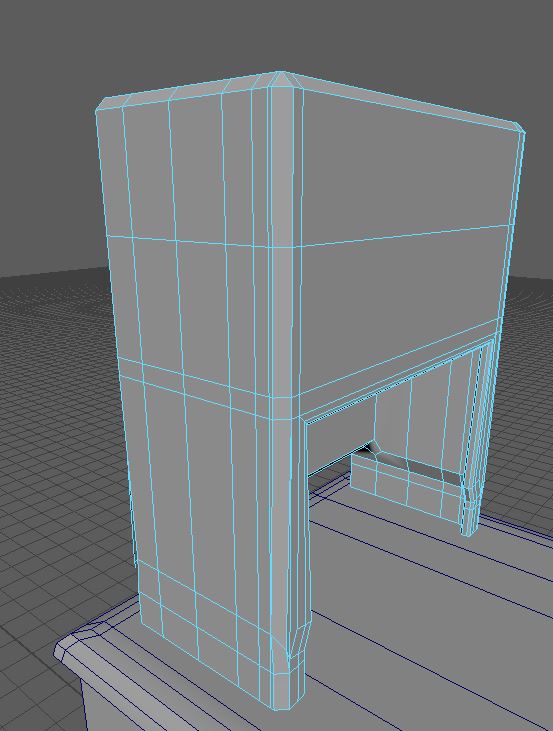
Fig.6
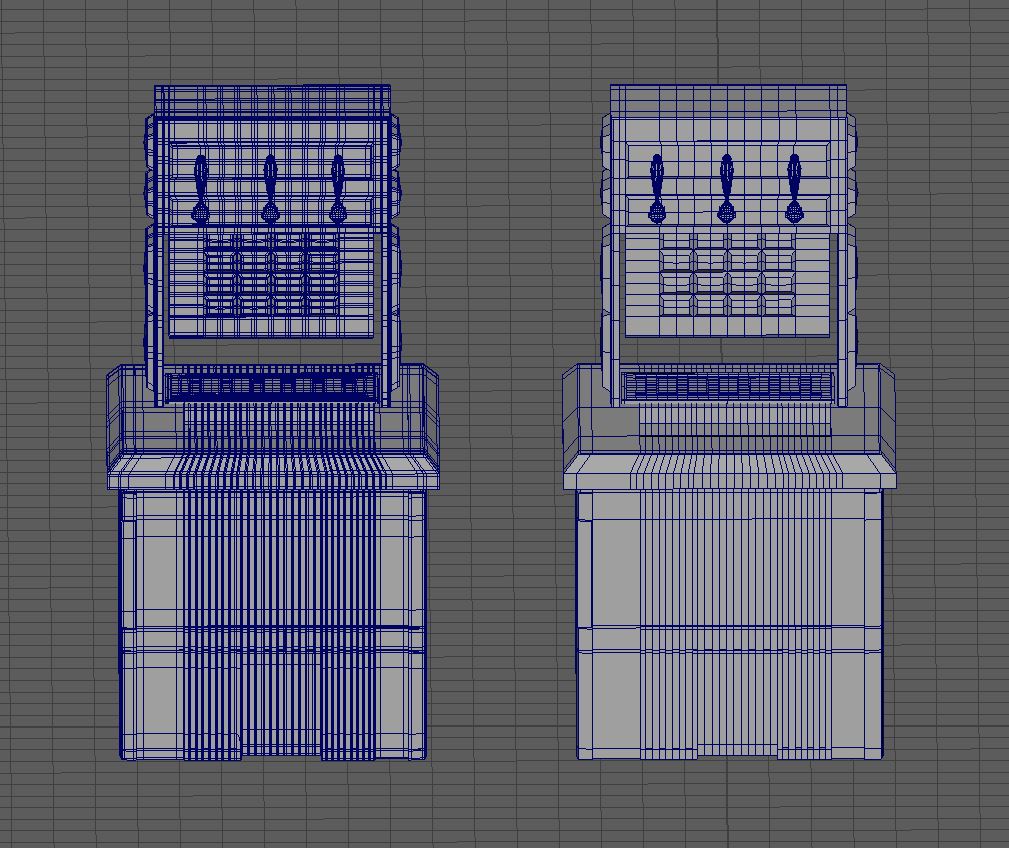
Next I extended the outside faces until they were of a size I was happy with, (Fig.5). Now this design wasn’t quite what was in the reference I was using. But I thought this design looked a little more interesting to the viewer than the original (Fig.6).
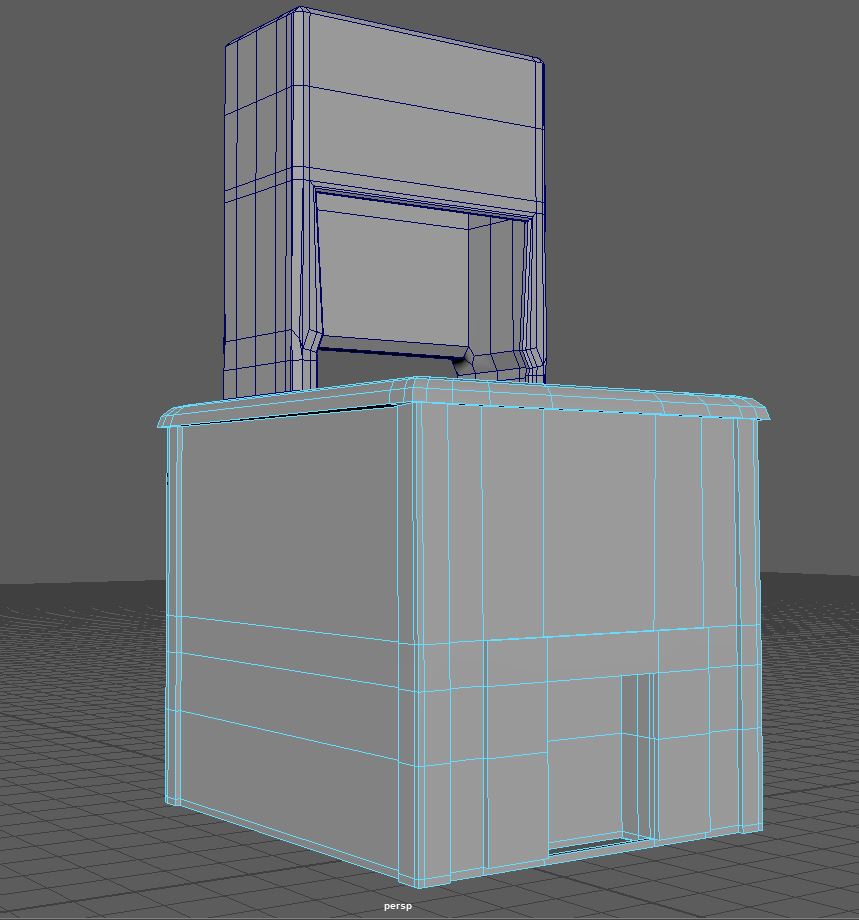
Fig.7 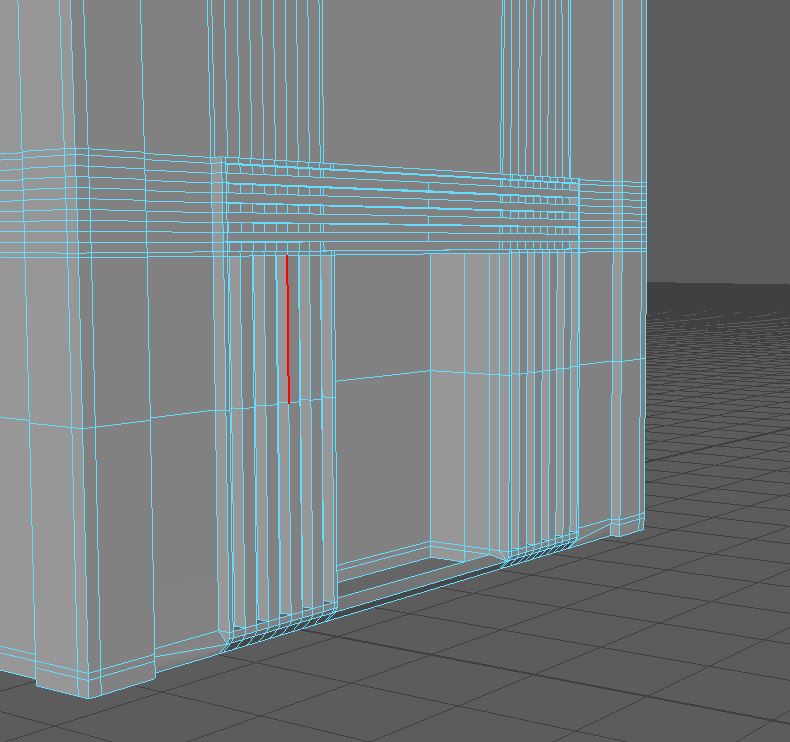
Fig.8 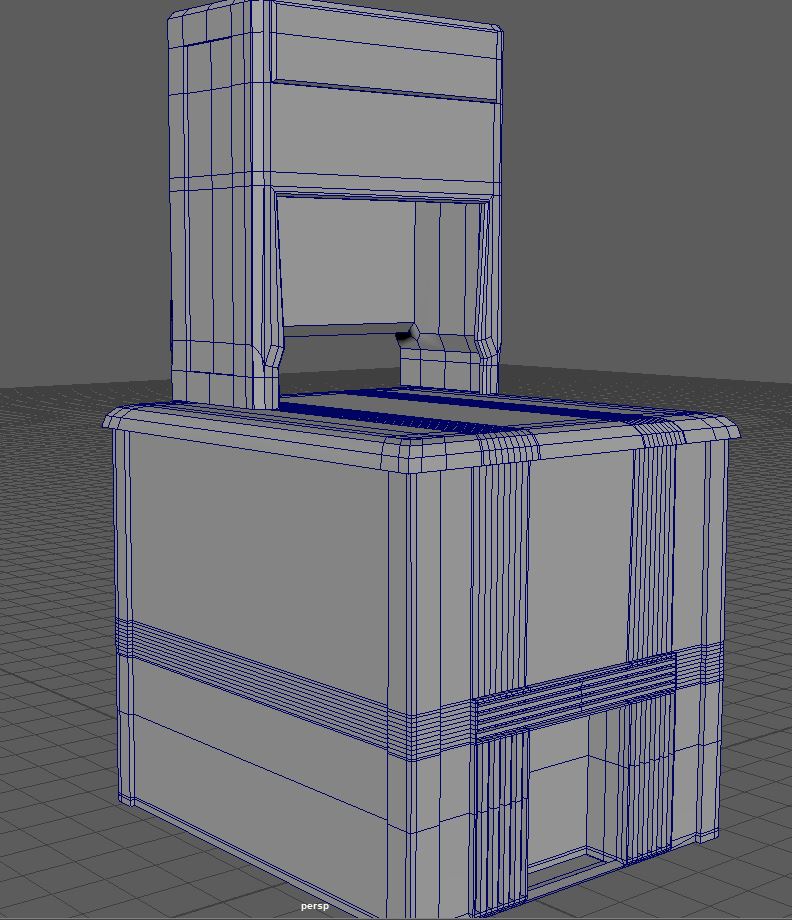
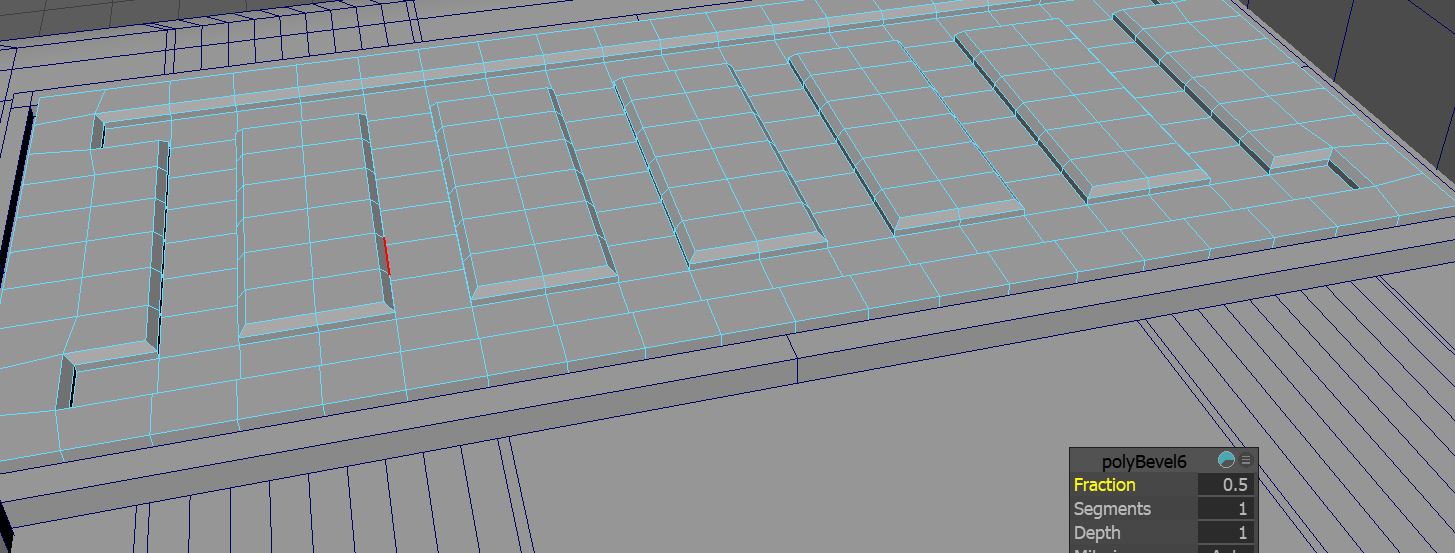
Fig.9
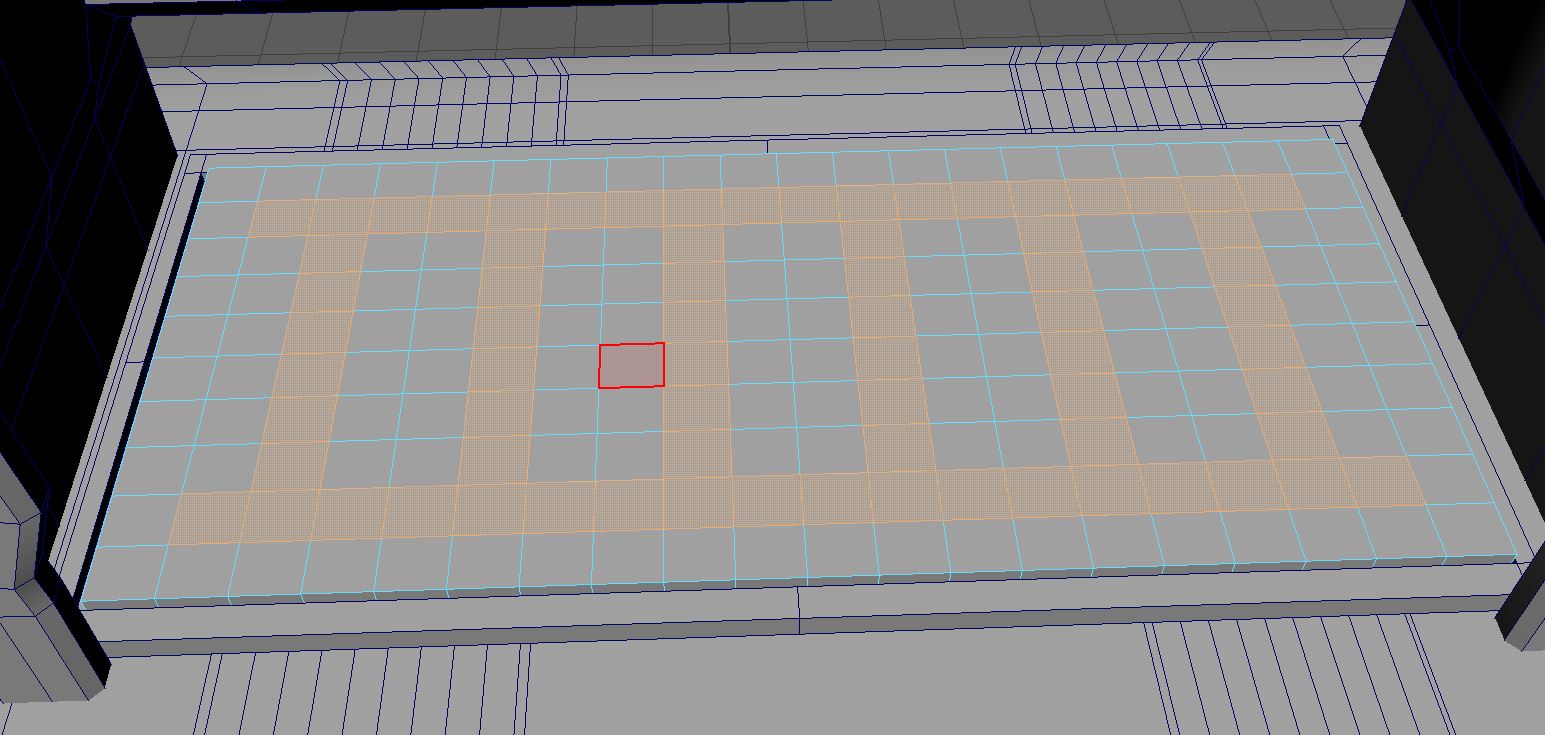
My next objective was to make the grill to go around the whole previously made on the front of the model. To begin with I used the edge loop tool to make eight even edge loops throughout the shape I needed (Fig.7). Then I extruded every other face in this newly created grid to give me the basic grill shape (Fig.8). Finally, I had to strategically delete the faces which now overlapped to make sure that my topology worked fine (Fig.9)
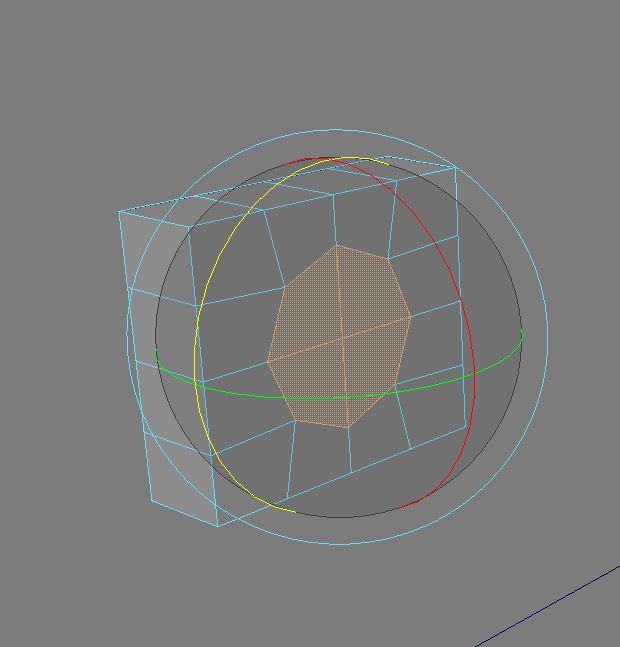
Fig.10 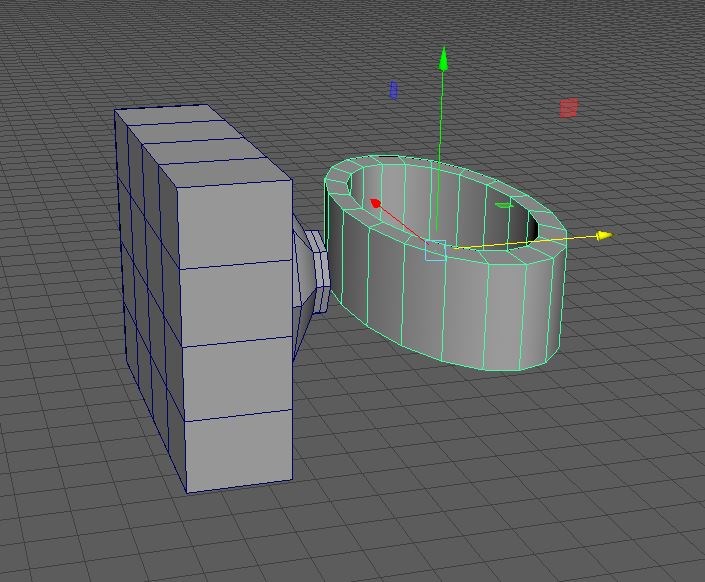
Fig.11 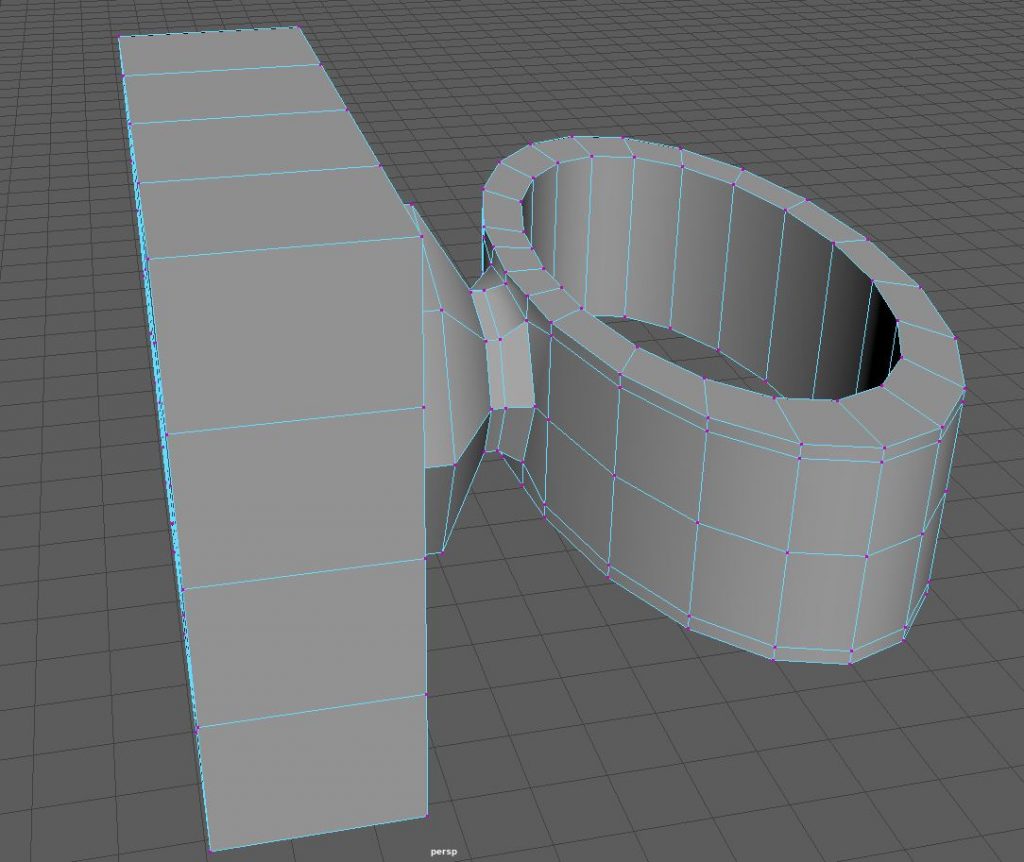
Fig.12 
Fig.13
The third aspect of my design is the drink pumps. Obviously, I don’t need to make three unique pumps here, but that does make my one all the more important. I used the circularised mesh tool to begin with after creating a poly cube, just like I had with the tv asset I made previously (Fig.10).
When I extended these circularized faces I set the new shape to having 2 divisions, to which I could then shrink the outside edge vertex. Then, I created a poly pipe and shaped it to make the figure you can see above (Fig.11), I had to add enough divisions to this shape that I could circularised where the ring and the box met. This allowed me to connect the two pieces together using the target weld tool (Fig.12).
I didn’t know how I wanted my pump handles to look. I knew I wanted to make them out of wood instead of plastic and I wanted to add a little extra detail to them in the form of a grip. I imagined a pub’s taps for my design and wanted some kind of top piece for them.
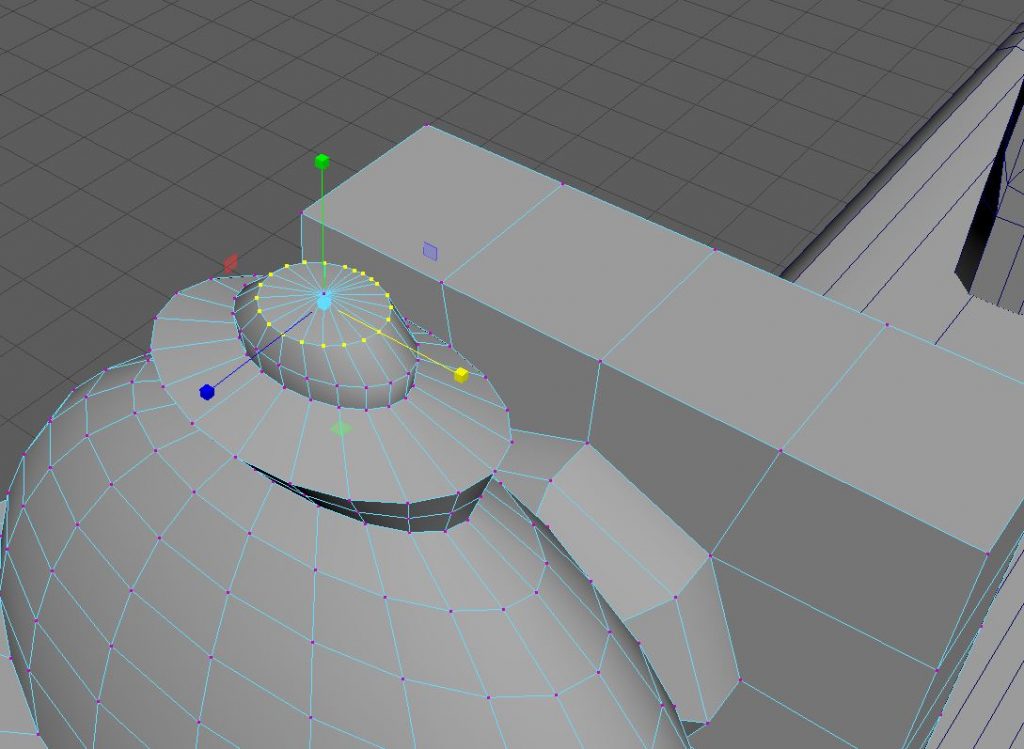
Fig.14 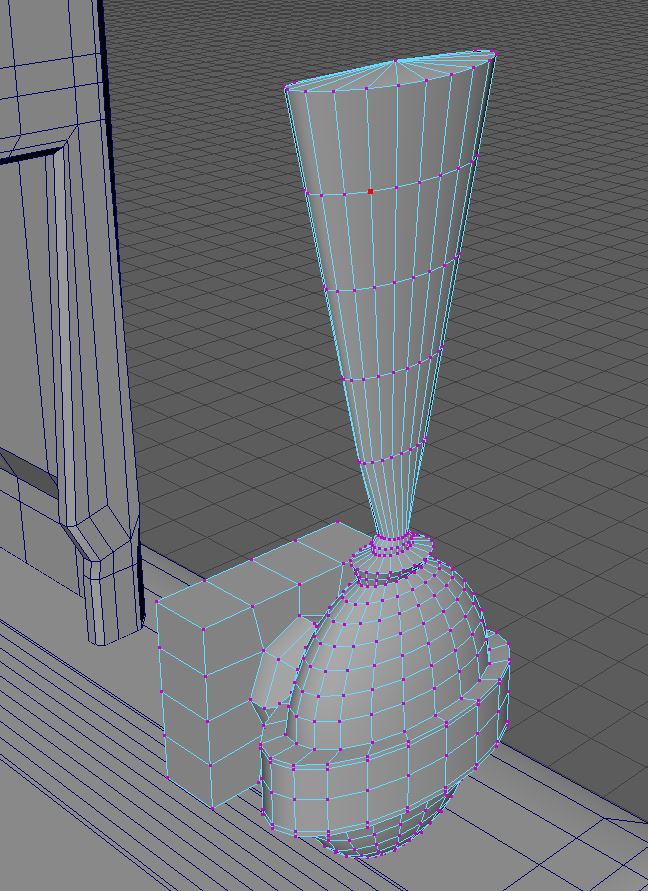
Fig.15 
Fig.16 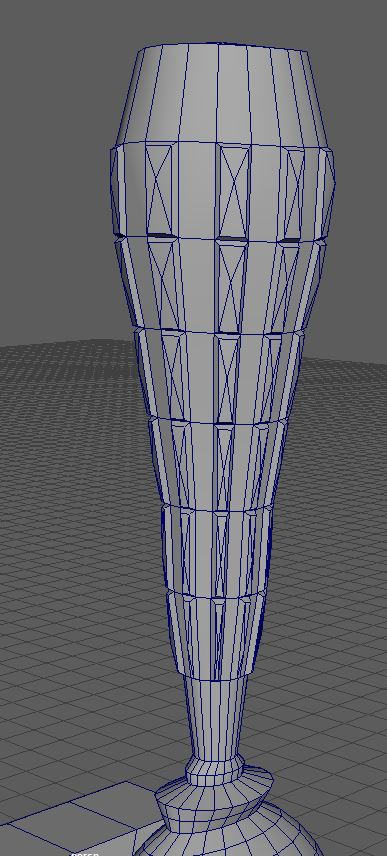
Fig.17

I began by extending the top edge of the vertex to be more circular (Fig.14). Then, I extended the faces to give me the height of the handle (Fig.15). Now for the top piece, I planned to have a circularized tag like that found in the second reference, I didn’t know quite how to do this. After I created the surface for the tags to sit in (Fig.16). I decided it was better for me to just have a flat top and texture the signages on the body of the design.
For the grip of the taps I used the same poke mesh method I used on the body design, this was to help link the different pieces together so that the final piece looks like something that would have actually be produced. (Fig.17)
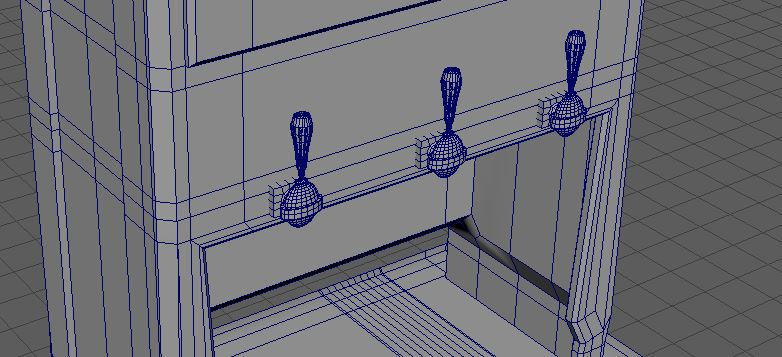
Fig.18 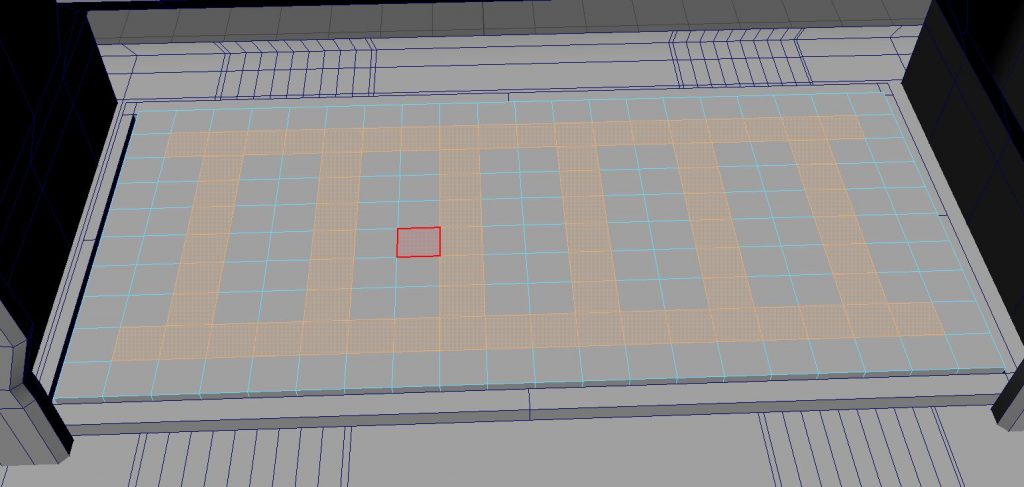
Fig.19 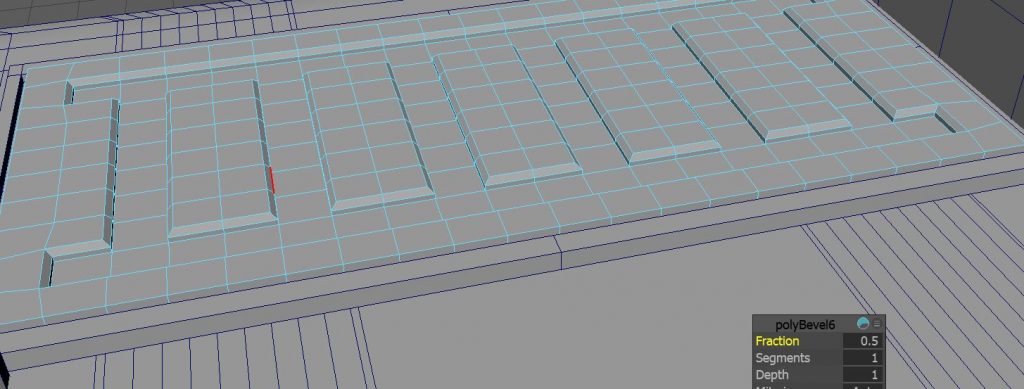
Fig.20 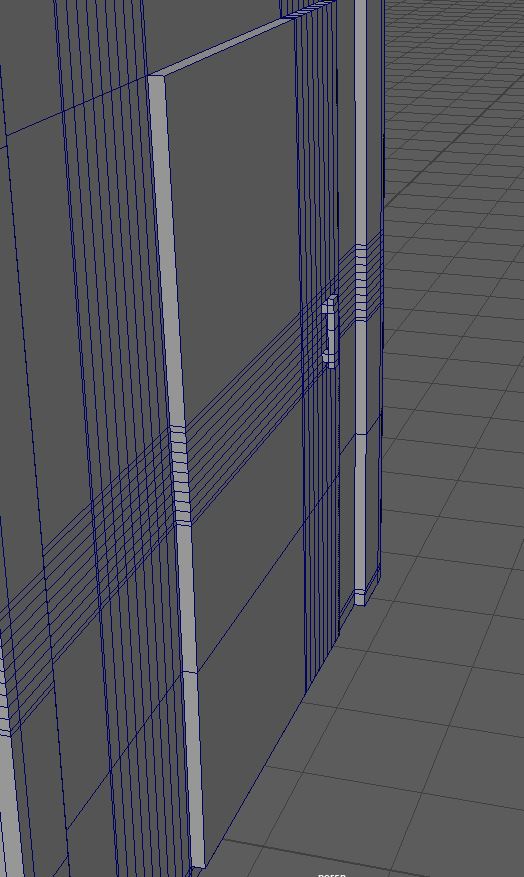
Fig.21
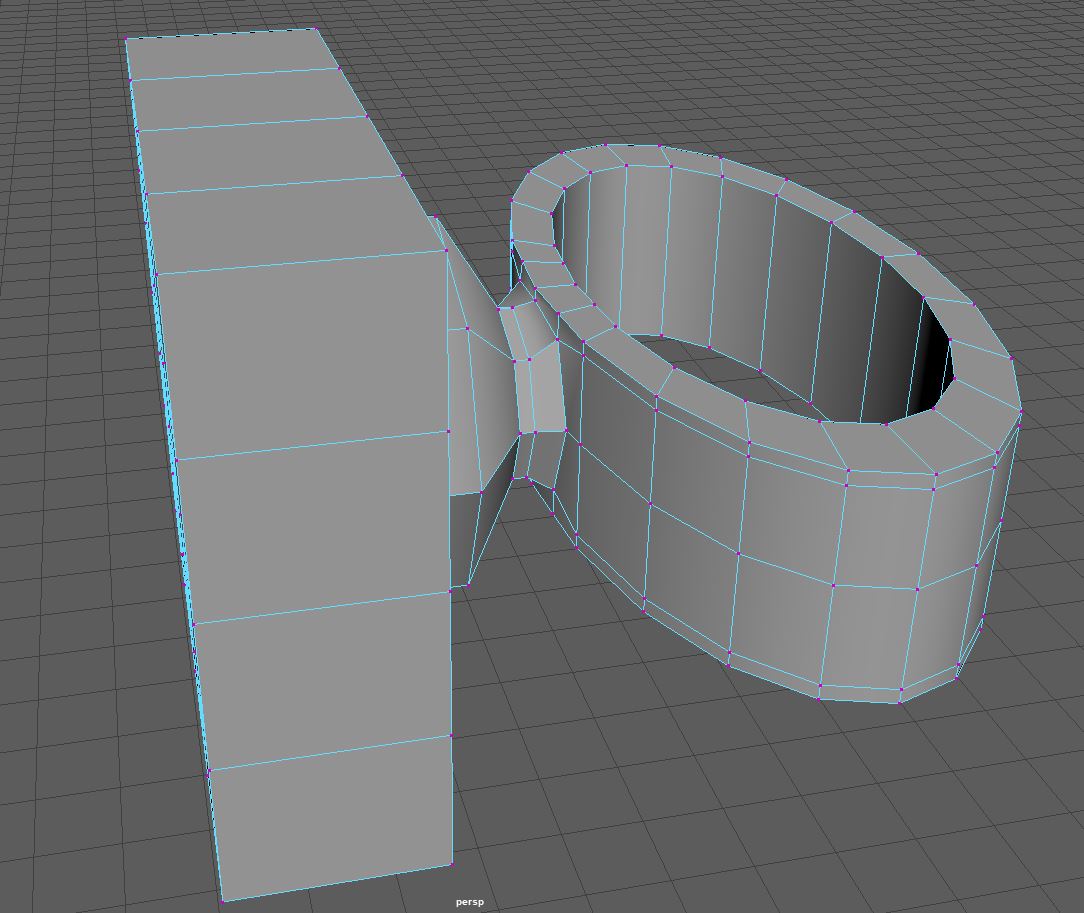
Once I supplicated and placed the handles where I wanted them (Fig.18), I made the tray. I made this part out of two poly cubed, which I shaped so that one fit inside the other and added edge loops where needed. Once I had the edge loops in place I selected the faces I wanted and intruded them to give me the raised design you can see (Fig.19). Finally I bevelled the edges created to make it look a little more detailed (Fig.20).
At this point I thought to myself that the overall asset looked a little bland, So I decided I would add a little something to the back, which would make the object as a whole look more realistic. I have worked in a café before, and know that standalone drinks dispensers tend to have one or more kegs inside them which hold the drinks. These kegs are then replaced when empty through a small door at the back of the casing. I thought it would be nice to add this detail, and didn’t involve anything more than just selecting faces and extruding outward (Fig.21).
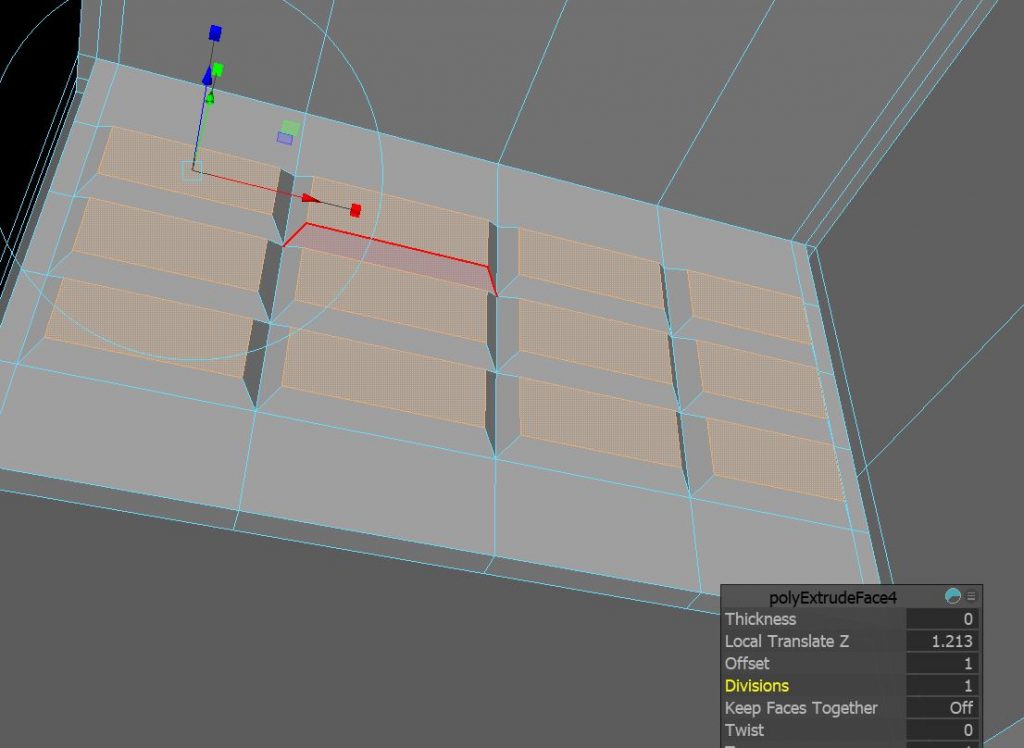
Fig.22 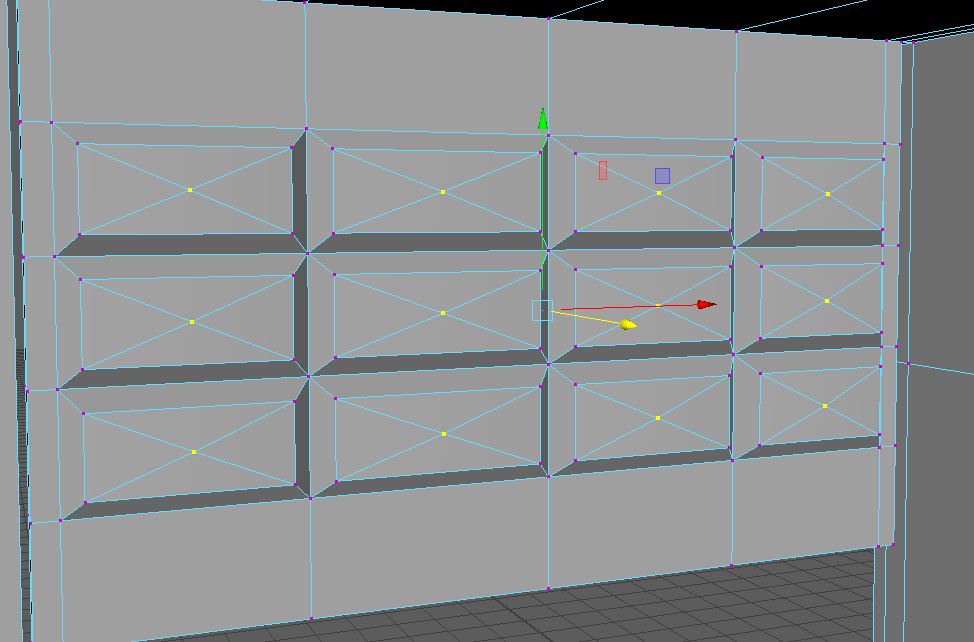
Fig.23 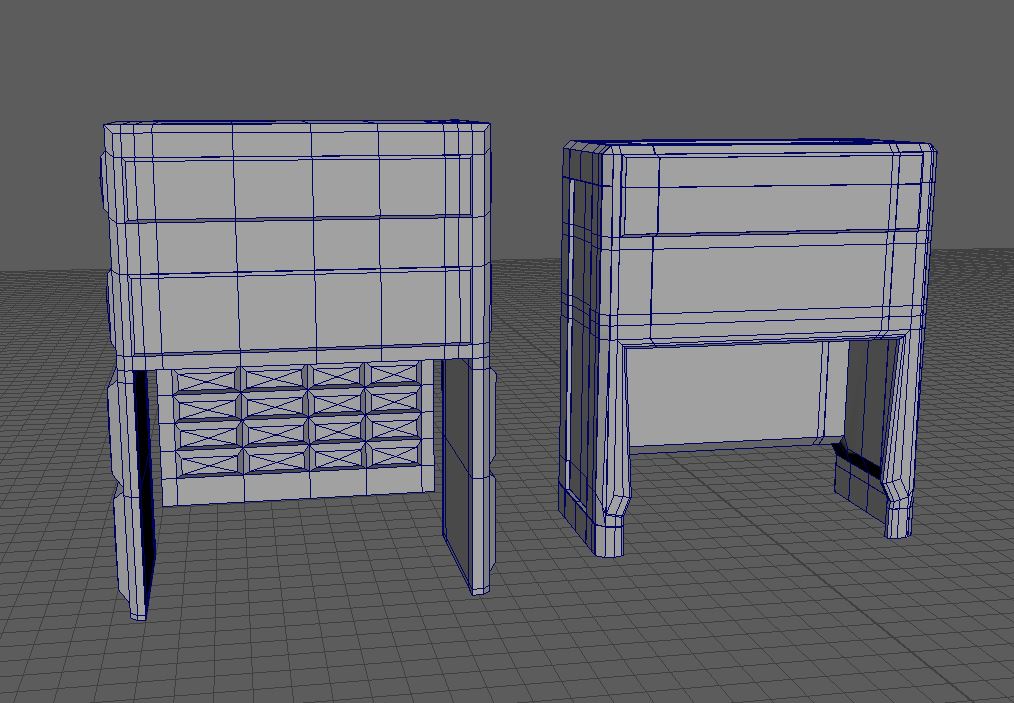
Fig.24

Next I added the same grip details to the sides and back of the designs top piece. I did this originally with the poke mesh tool just as I did with the handle. This method involves extruding selected faces and adding an offset. Then selecting the new, smaller faces and using the poke mesh tool. This tool gives a new vertex point in the centre of these highlighted faces. To which I can then select these vertex and extrude outward slightly.
At this point I ran into an issue which had me remaking the pump and the top piece of the body. While the poke mesh tool does give you a suitable low poly model, it results in each face containing four triangular faces. Which results in you not being able to add supporting edge loops to the edges of the object, which is needed to make the high poly version of the asset. I had a chat with Tom about this issue, and while we were talking it occurred to me that the poke mesh tool only results in giving you a vertex point in the centre of a face. So If I just add two intersecting edge loops to these faces I end with the same result but can add the supporting edge loops.
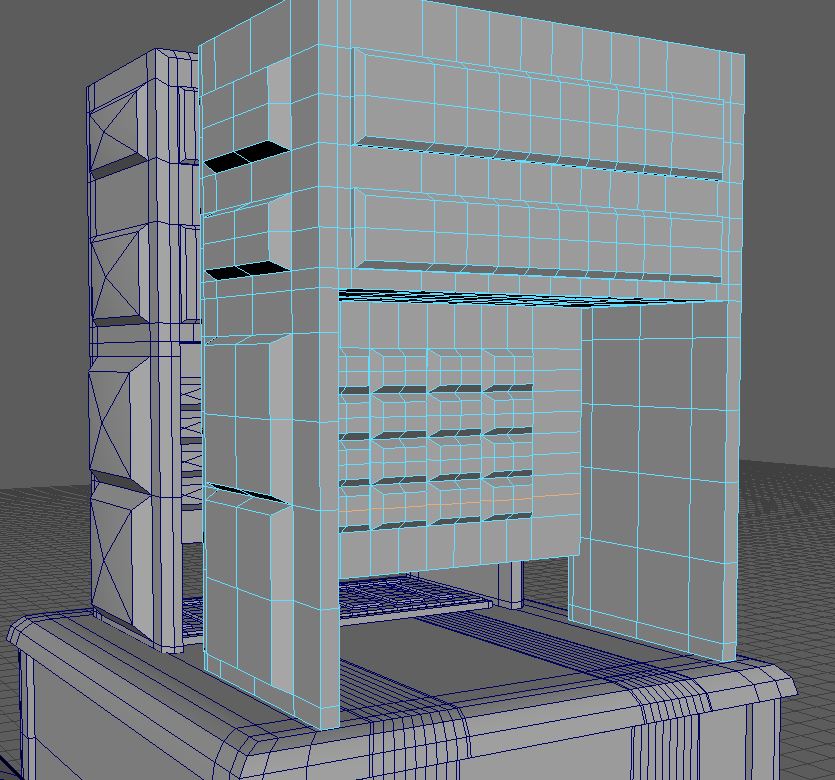
Fig.25 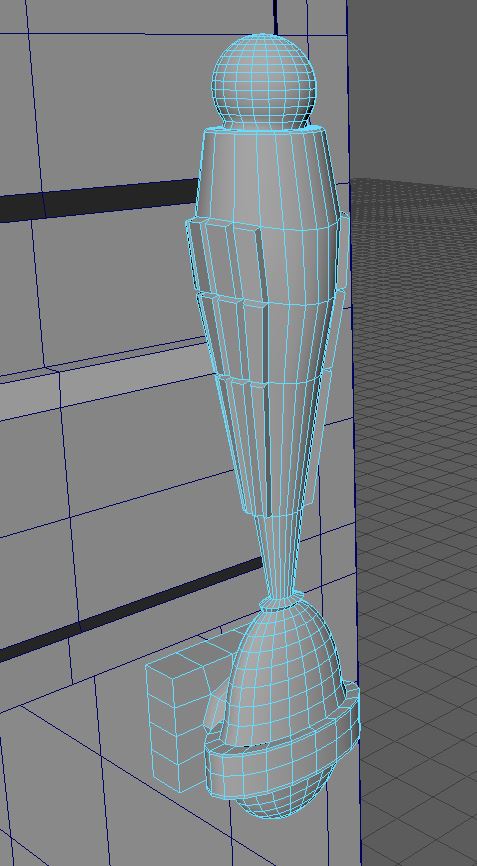
Fig.26 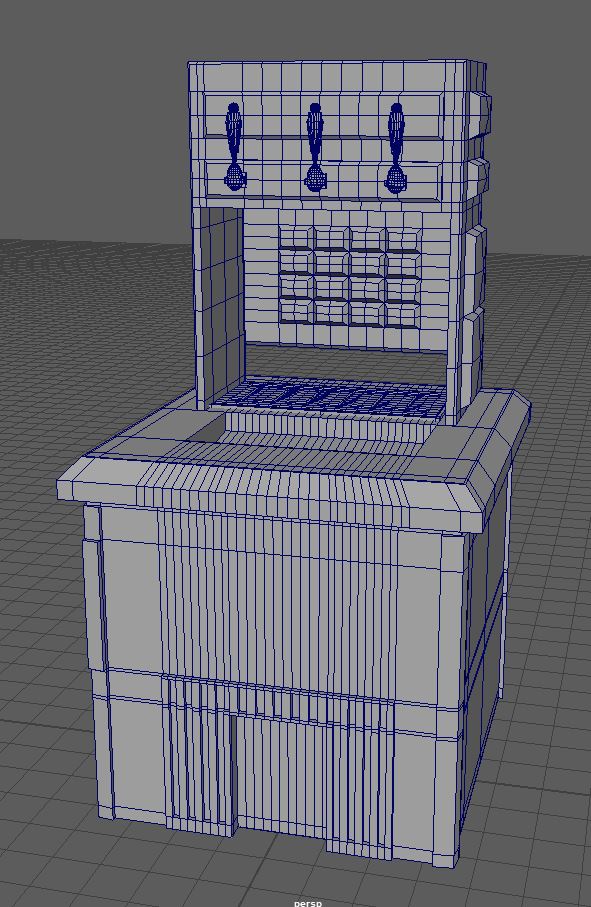
Fig.27
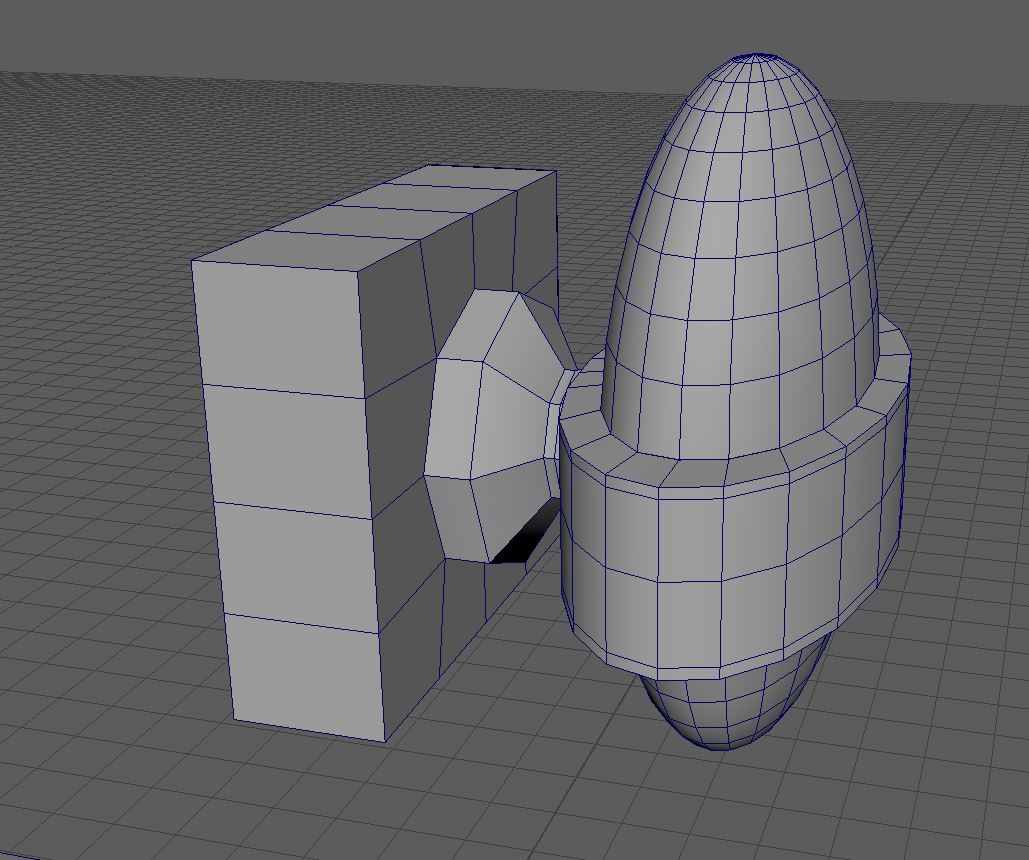
You can see here how the wireframe works using these edge loops instead of the poke mesh tool (Fig.25.). I also had to redo the pump as I had used the same method as I had on the body piece. While redoing this part I added a sphere to the top of the handle, just to give a little more detail (Fig.26). By doing this redesign I ended with a final low poly asset which I could duplicate and add the supporting loops in order to turn it into a high poly model for baking (Fig.27).
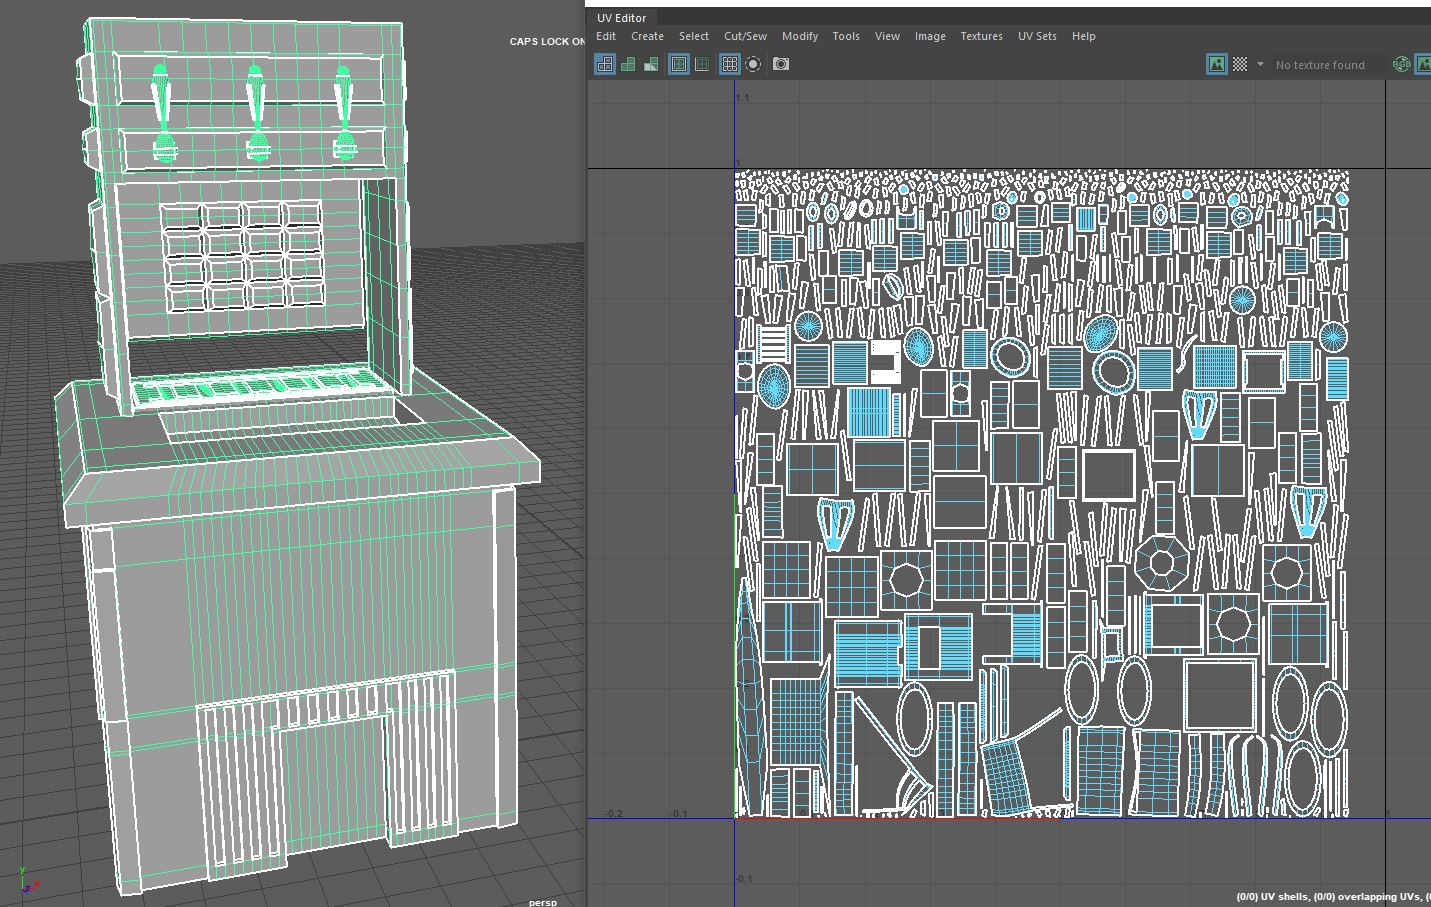
UV
The UV for this model was a little cluttered, however it baked nicely and the texturing process went okay. The automatic UV did a good job with this model, however struggled with knowing where and how to cut the tiles so I had to do them manually.
Texturing
There weren’t many errors with the bake to speak of with this model, really only some artefacting in the top corner, which once textured you couldn’t really see. I’m not sure what caused this ghosting as the UV for that panel seems perfectly logical and the high poly lines up with it more than where the ghosting appears.

Fig.1 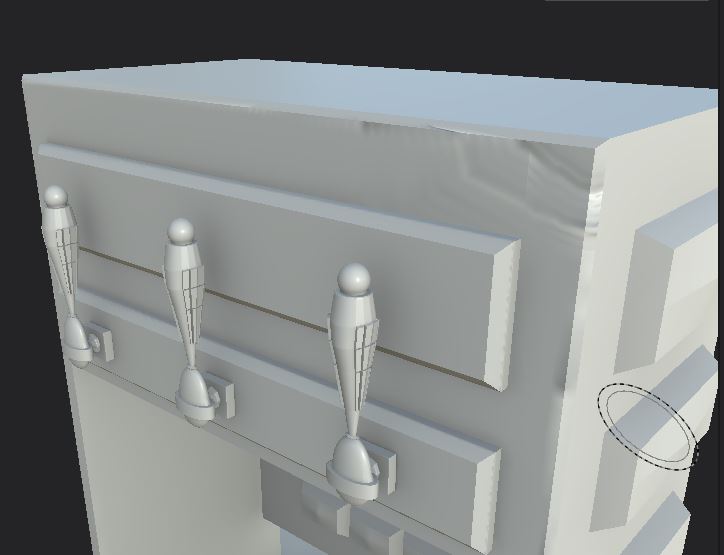
Fig.2
I started with my base layer, which I felt had nice wear already on it, in line with the model being used outside (Fig.3). I then textured the handles, using wood for the stem but with the smooth gold for the top balls. I think this resulted in a nice design, which help the final image really pop (Fig.4). One issue I do have with this model, which I’m not sure how to fix is one part of one of my tiles being the wrong texture, for some reason I cant remove the red texture from this section, nor can I add the steel texture I want it to be (Fig.5). Ultimately I ended up just hiding this one tiny section in my final renders.
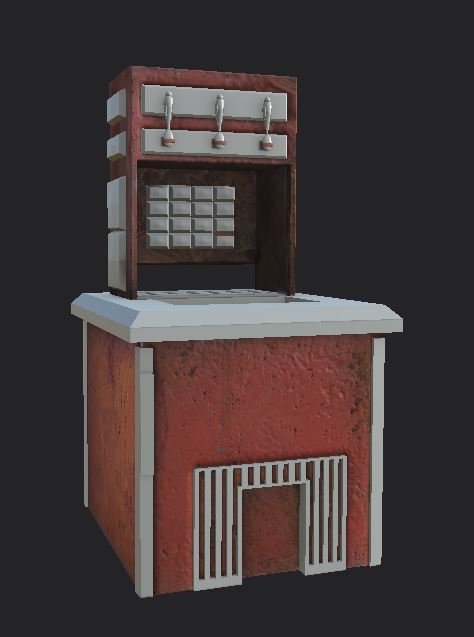
Fig.3 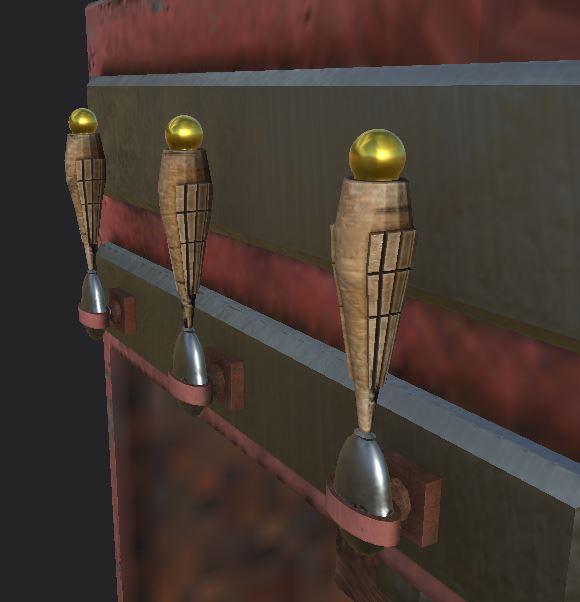
Fig.4 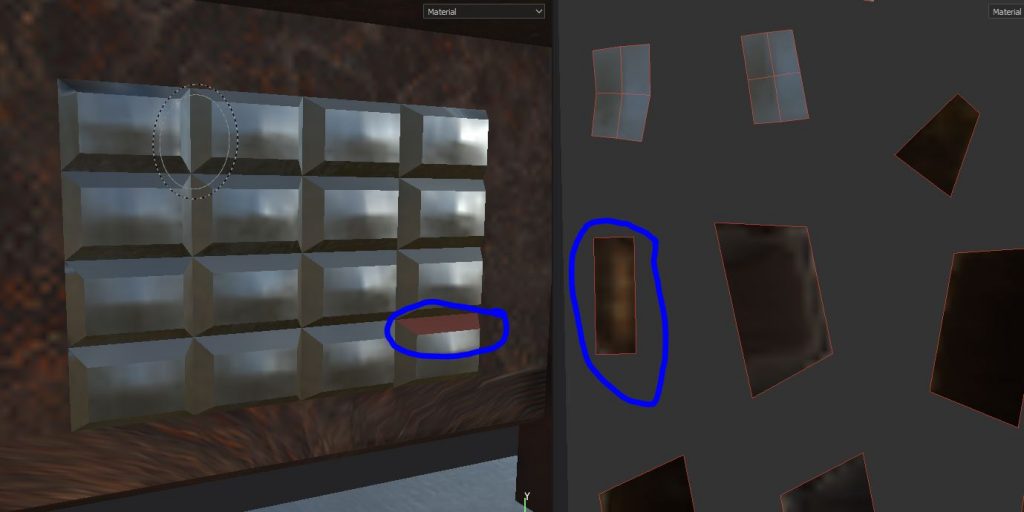
Fig.5 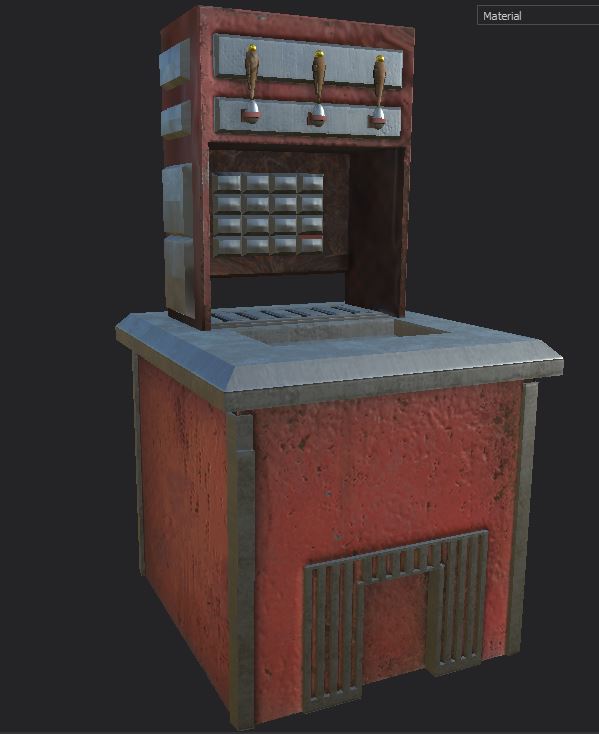
Fig.6
Other than that strangeness with the tile I think the final design is good. I think the colours work well, actually I think they work better in the renders than they do in the substance painter view (Fig.6).
Final renders can be found here
References
Hermes,Mike (2016). [Youtube Video] How to model patterns in Maya 2017. Availible online: https://www.youtube.com/watch?v=eZs8TFoHKG8&t=331s&ab_channel=MikeHermes [Accessed 03/12/2020]
Pinterest (Unknown Artist ((a). Available online: https://www.pinterest.co.uk/pin/320881542189439625/ [Accessed 03/12/2020]
Pinterest (Unknown Artist((b). Available online: https://www.pinterest.co.uk/pin/75857574944595953/ [Accessed 03/12/2020]
Pingback: 3D Art for Games – Wireframes – Post 4 – Drinks Machine & Jukebox – Fraser Ibbotson – 647603