I found that most of the different vintage wall phones designs followed the same patter, even to the point where they had the same text plate beneath the dial. I used this reference for the placement of the different elements of the model.


I found it interesting that this design used buttons instead of holes for the dial ring, I did experiment with his idea but found I preferred the look of indents instead of buttons.

Shpock [Sales Listing]. Louise W. (Seller). Wild & Wolf Retro 1950’s Phone. [Accessed 14/11/2020]
While not using the body of this reference, I thought it showed the rotary dial section well.

Alexander Robert. NEW YORK, NY – SEPTEMBER 23, 2017: A vintage rotary dial telephone for sale at a flea market in the Chelsea district of New York City. (Photo by Robert Alexander/Getty Images) Taken from Time.com article. 2019. [Accessed 14/11/2020]
I followed this video, and it gave me some understanding of what I had to do to create a coiled cable, however did need to find another video to get the result exactly how I wanted.
Production
Making this asset ended up being much more complicated than I thought it would be, and so far out of all my assets this one has taken me the longest to do. Its good then, that I also think this is one of my best looking assets.
I started with a basic cube that I stretched to the size I wanted (Fig.1), again where the references were much squarer, I felt like a more rectangular design looked nicer. I bevelled the edge of this cube and then extruded from the offset face, to which I added another bevel only with added subdivisions. This gave me one straight bevelled edge and one rounded edge (Fig.2). I then extruded the top face of this shape to give me the body of the asset (Fig.3).

Fig.1 
Fig.2 
Fig.3 
Fig.4 
Fig.5 
Fig.6 
Fig.7


After I had the body of the shape, I created the different extruded surfaces shown in the reference images (Fig.4). I did make a mistake here and used the shift key when using the multi cut. This gave me a shape that was covered in ngons, which would have ruined my model later once I tried to smooth it (Fig.7). I also had ngons in the top piece, which I had made through extruding out of the same object, (Fig.6). This mistake is basically the same as the mistake I had made with the fuel pump. Thankfully, I caught this mistake early here and so remaking the model took only a couple of minutes.

Fig.8 
Fig.9 
Fig.10 
Fig.11


Once I had remade my model using the multi cut tool to make full edge loops this time instead of ngon cuts (Fig.8). I turned my attention to the small details that went onto the body of the asset. Firstly I produced a lock face, I did this using a cylinder to which I bevelled the outside edge and set the divisions to 3, so as to give a nice smoothed curve (Fig.9). After this, I selected the faces that make the far circle and two of the faces above it, once I intruded these faces I was left with a nice slot for a key to fit.
I used the same sort of method to create the piece that will function as a connector for the cord and the phone body. Only instead of intruding to a shallow hole I intruded far enough that where the cord will join is obscured from the viewers eye.

Fig.12 
Fig.13 
Fig.14 
Fig.15 
Fig.16

To fix this I created the headpiece out of a different poly cube, to which I bevelled the edges to give a look of finish (Fig.13). Then I added edge loops to this shape, to make sure I didn’t encounter any ngons (Fig.14). Here I could Boolean fine, however, I found a different issue. When I Boolean the opening to these newly made holes, nothing would happen (Fig.15). This took me a very long time to wrap my head around until I eventually figured out that I had two vertex on top of each other for a few of the points of the circle, once I had merged these vertex together I could bevel the openings, which allowed me to use the mutli cut tool to keep my topology nice and organized (Fig.16)

Fig.17
With the phone holder the shape really looks a lot more complicated than it is. I started with a basic cube which I shaped and extruded until I had this design. I was careful not to end with any ngons as I knew they would hurt me when I came to UV and texturing the design. I did consider turning the teeth shown (Fig.17) into a smoothed opening, similar to that found on a spanner, however thgouth that id be best served keeping this piece as simple as possible. The viewer will barely be able to see this object, and so adding more polygons to my asset count for little benefit didn’t seem particularly wise to me.

Fig.18 
Fig.19 
Fig.20 
Fig.21
With the phone itself I started by making a sphere, to which I deleted half the faces (Fig.18) and gave the remaining shape a thickness of three (Fig.19). After this I used a poly plane, to which I added a thickness of one (Fig.20) and then positioned it to fill the gap in the previously made shape (Fig.21), combining the two pieces to make one shape.

Fig.22 
Fig.23 
Fig.24


For the handle of the phone I used the same method I used to make the back rest for the bar stool. I made a cube, and a curve. To which I extruded one of the faces of the cube along the curve line (Fig.22). Once I had this shape, I extruded the side of the curved shape outward to give me a gently curved phone handle shape (Fig.23). I did make this phone handle too long for my design, so I had to delete a large amount of the faces of the shape. I then filled in the hole this made in the faces of the shape. I left this shape at this stage, as I didn’t know what method I would use to forge the different parts into one, smooth phone shape.
YOUTUBE HUNGAMA (2019). Telephone 3D Modeling & Texturing Tutorial Maya 2018 | Props Modeling in Autodesk maya [Video.] [Accessed 23/11/2020]
I used the above video, however found that it didn’t work exactly how I needed it to so ended up adapting the method shown.
With the dial face I started with a basic cylinder which I shaped to what I want and bevelled the edge (Fig.25). Then I offset the faces and extruded outward until I had the final shape without the finger holes (Fig.26). I experimented with placing cylinders where I wanted the holes to appear and booleaning them (Fig.27), but I just could not get the new design to work without damaged topology. Ultimately, I used the circularise mesh tool instead and intruded them, thus not giving me holes that go all the way through but instead diverts which ultimately I don’t like as much (Fig.28) but I bevelled the edges to make the design look less like a compromise (Fig.29).

Fig.25 
Fig.26 
Fig.27 
Fig.28 
Fig.29


Fig.30 
Fig.31 
Fig.32


These are the steps I took to circularise the mesh and intrude the newly made faces, I could have used a better method to make complete wholes but didn’t know how when I made the model.
With my Rising Star models I found a method that perhaps would have helped here where instead of intruding the circularised faces you just circularise the faces on the other side of the model as well and delete them, then bridge the newly made gapes. This I think would have worked better but I didn’t know this at the time.

Fig.33 
Fig.34
Here you can see how I moved and shaped the vertex of the phone handle to make it seem like the speaker pieces and the handle are moulded from one piece.

Fig.35 
Fig.36


I spent a long time tyring to get a spiral to follow the curve I wanted. As most of the videos I found which showed this didn’t quite work right. Eventually the method in the video linked worked for me and gave me a shape that nearly lined up with where I needed it (Fig.35).
I than just had to manually extend the outside faces to make them intersect with the bottom of the phone and the side of the body of the design.
polySelectEdgesEveryN “edgeRing” 2
Maya Zest – 2016. [Online BlogPost]. Accessed [24/11/2020]. Availible Online: Maya Zest: Select every other edge loop on your model (maya)
The final obstacle I found was I had a spiral cord that was far too high a poly count to be used on the low poly. Thankfully, I searched for a method to select every other edge of an object and found the above quote on a blogpost I have linked. This allowed me to select every other edge loop and delete them in one go, rather than spend a lifetime manually selecting each other edge.

Fig.37 
Fig.38 
Fig.39 
Fig.40
Once I had the cable in place the model was finished and just needed to be UV’d and textured. The final model took a lot more work than I thought it would but I am very happy with the end result.

UV
This is the UV that baked, I don’t think there are any major issues with it, though in later models when I found a long enough face that it curled over itself like these I cut down the middle to make them one piece for one face.

Texturing
The main problems with this model once baked came with the dial face (Fig.3) which I suspect happened because the low poly bake was made from a very simple shape that should have had more subdivisions applied and the curled cable (Fig.2). Which again I think was just a case of me having to much of a gap at the edges between the smoothed high poly and the rough low poly. This would have been fixed with more subdivisions in the low poly.
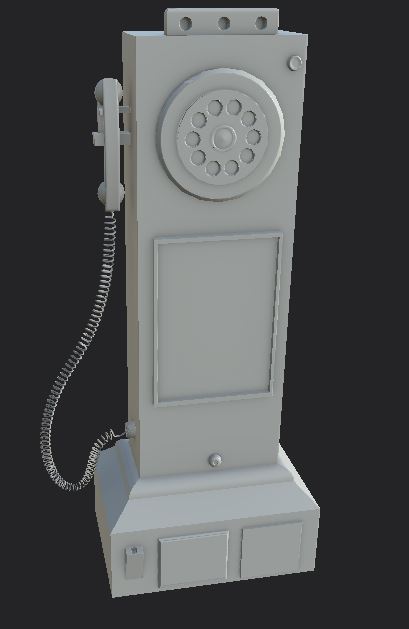
Fig.1 
Fig.2 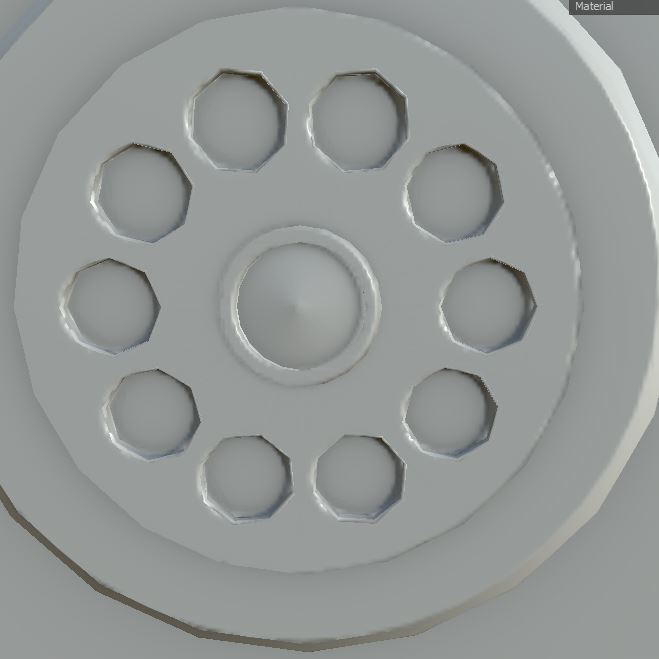
Fig.3 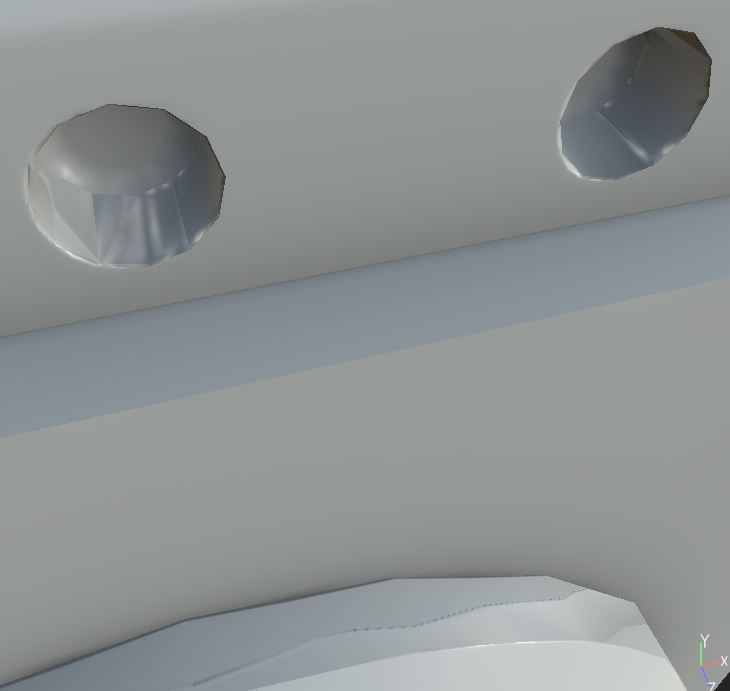
Fig.4
I began with a basic rough plastic layer; this gave me a nice worn effect to the corners of the body which I thought worked well (Fig.5). Then I used the brushed aluminium texture for the face of the dial and the plaques at the bottom of the phone (Fig.6). For the dial holes and the top holes, I used a worn copper texture, while this isn’t as realistic as It could have been, I feel it added a nice contrast to the steel texture. This is the same reason I used the red aluminium for the push button on the right hand side (Fig.7)
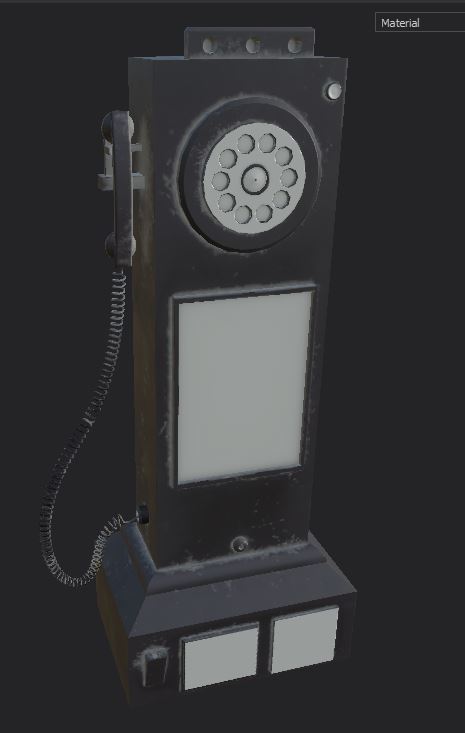
Fig.5 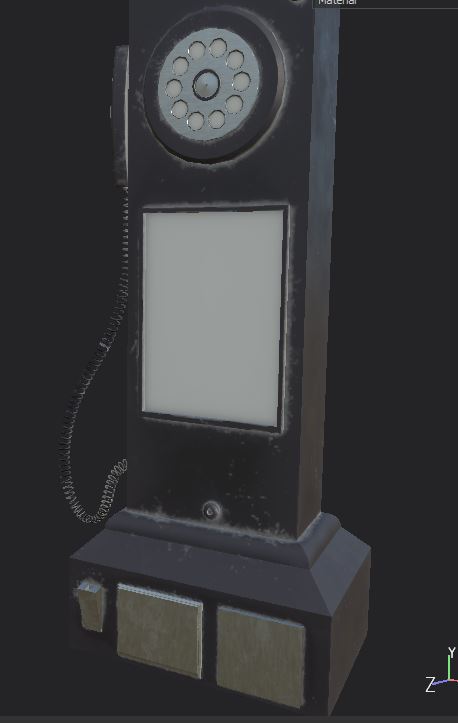
Fig.6 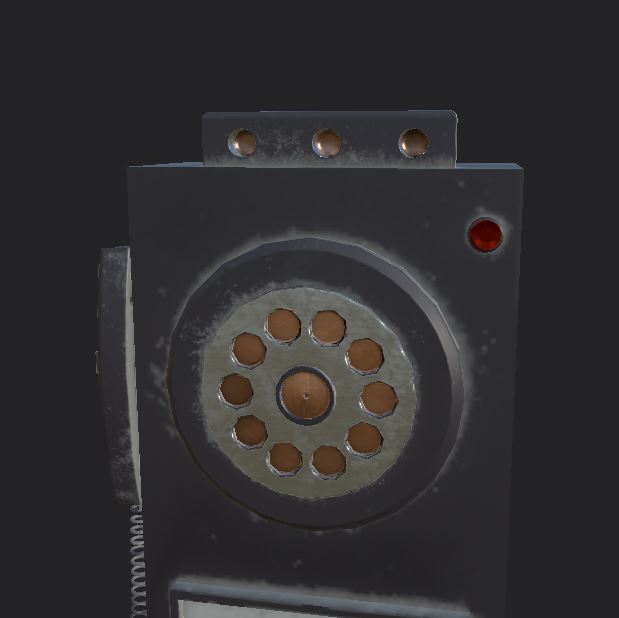
Fig.7 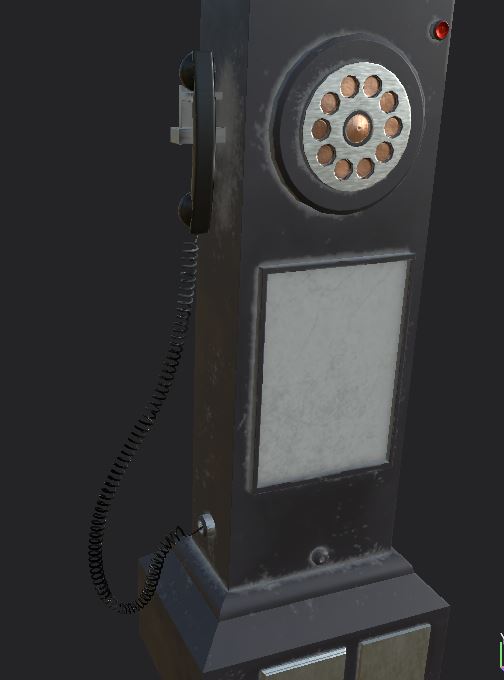
Fig.8 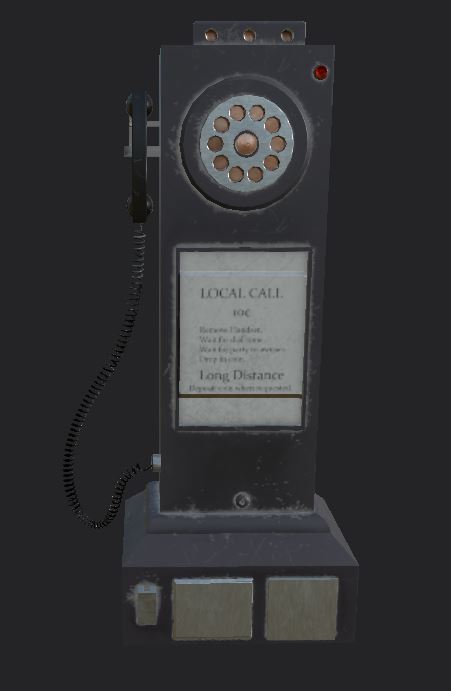
Fig.9
I used a worn plastic texture which I coloured a plain white for the sign place (Fig.8). Then made a square text face in photoshop and imported it as a stencil just like I did with the fuel pump (Fig.9). However, a problem here was because I had modelled my design as more of a rectangle than a square I ended up with dead space which I didn’t like. I think there is still a lot I need to learn about making and using stencils as I wasn’t shown this in any way before I attempted it. In the future I will likely redo this stencil in order to get the text to properly fit the rectangular space.
Final renders can be found here
Reference
Alexander Robert. NEW YORK, NY – SEPTEMBER 23, 2017: A vintage rotary dial telephone for sale at a flea market in the Chelsea district of New York City. (Photo by Robert Alexander/Getty Images) Taken from Time.com article. 2019. Available at: https://time.com/5503086/rotary-phone/ [Accessed 14/11/2020]
Avalita [Product]. Avalita Vintage Rotate Classic Look Dial Pay Phone, wall-mounted vintage phone Model Retro Booth Home Decoration Ornament (Black). Available at:https://www.amazon.co.uk/Avalita-Vintage-wall-mounted-Decoration-Ornament/dp/B07ZKL7B1N/ref=pd_sbs_86_3/261-4726601-7226766?_encoding=UTF8&pd_rd_i=B07ZKL7B1N&pd_rd_r=5070b564-eeca-451c-9b1d-1905e30f4b0b&pd_rd_w=kyCLU&pd_rd_wg=X2YdU&pf_rd_p=2304238d-df78-4b25-a9a0-b27dc7bd722e&pf_rd_r=PHN893PWG8916RBZ7YNM&psc=1&refRID=PHN893PWG8916RBZ7YNM [Accessed 14/11/2020]
Hermes, Mike (2020). Create a 3D animated curled hose in Maya 2020 [Video[. Available online: https://www.youtube.com/watch?v=ONgJxjJwRm4&t=196s&ab_channel=MikeHermes [Accessed 22.11.2020]
Maxim Kadashov (2012). Spiral along a curve in Maya [Video]. Available online: https://www.youtube.com/watch?v=hRXtYCwH5hk&ab_channel=MaximKadashov [Accessed 24/11/2020]
MayaZets (2016) [Blog Post] Available online: http://mayazest.blogspot.com/2017/07/select-every-other-edge-loop.html [Accessed 24/11/2020]
Shpock [Sales Listing]. Louise W. (Seller). Wild & Wolf Retro 1950’s Phone. Available at: https://www.shpock.com/en-gb/i/XkKnFawZFy8tHJg4/wild-wolf-retro-1950-s-phone [Accessed 14/11/2020]
YOUTUBE HUNGAMA (2019). Telephone 3D Modeling & Texturing Tutorial Maya 2018 | Props Modeling in Autodesk maya [Video. Available online: https://www.youtube.com/watch?v=mFfICzCF6uo&ab_channel=YOUTUBEHUNGAMA [Accessed 23/11/2020]
Pingback: 3D Art for Games – Wireframes – Post 2 – Fuel Pump & Phone – Fraser Ibbotson – 647603